Little Waves Crochet Stitch

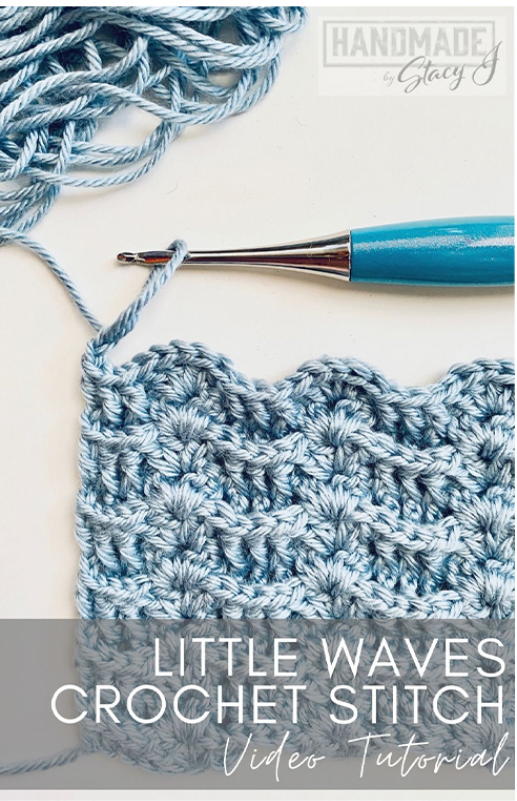
The Little Waves Crochet Stitch is a fun and simple stitch that incorporates Double Crochet  and Front Post Double Crochet stitches. It makes a beautiful, reversible pattern that is both airy and fairly dense. Below you will find the written directions and a video tutorial to walk you through creating this beautiful stitch. Also, I have a pin for you to save to your Pinterest Boards 🙂

Disclosure: This post contains affiliate links. As an affiliate, when you purchase through my links, you allow the company to pay me a small commission without costing you a penny more, which allows me to continue making free content. Thank you for your support!


About the hook!

The hook that I’m using is the Furl’s Odyssey hook in Turquoise and Silver (I absolutely LOVE this hook!). And, I just happen to be an affiliate for Furl’s. What that means is that if you click on this link and decide to purchase a hook, you will NOT be charged a penny more and I’ll receive a small commission (which helps me continue to make free content). Here is the link 🙂


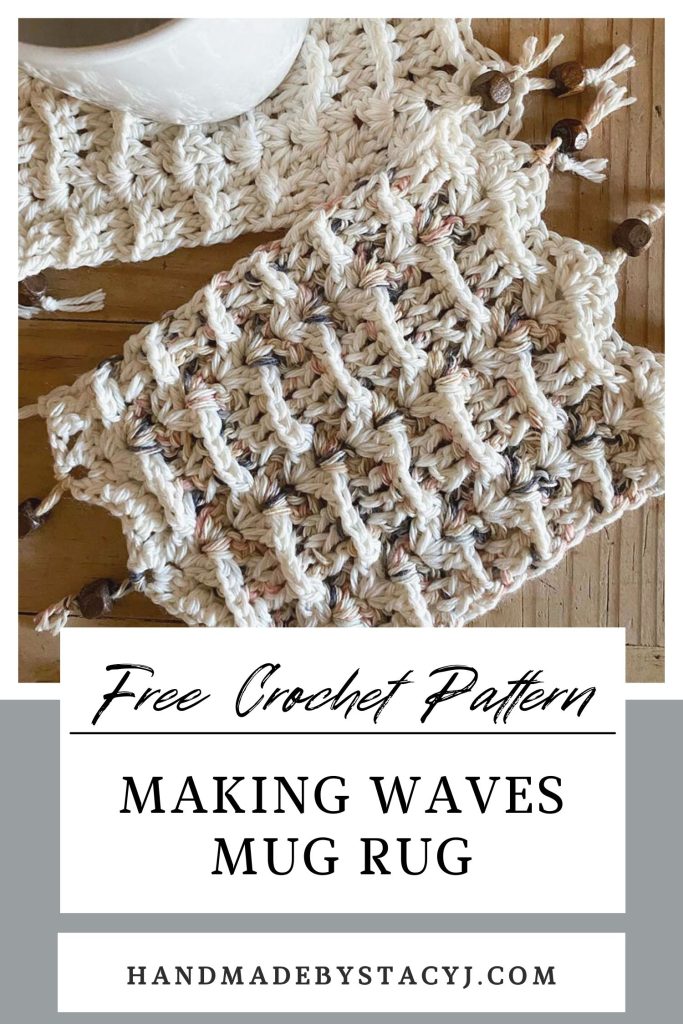
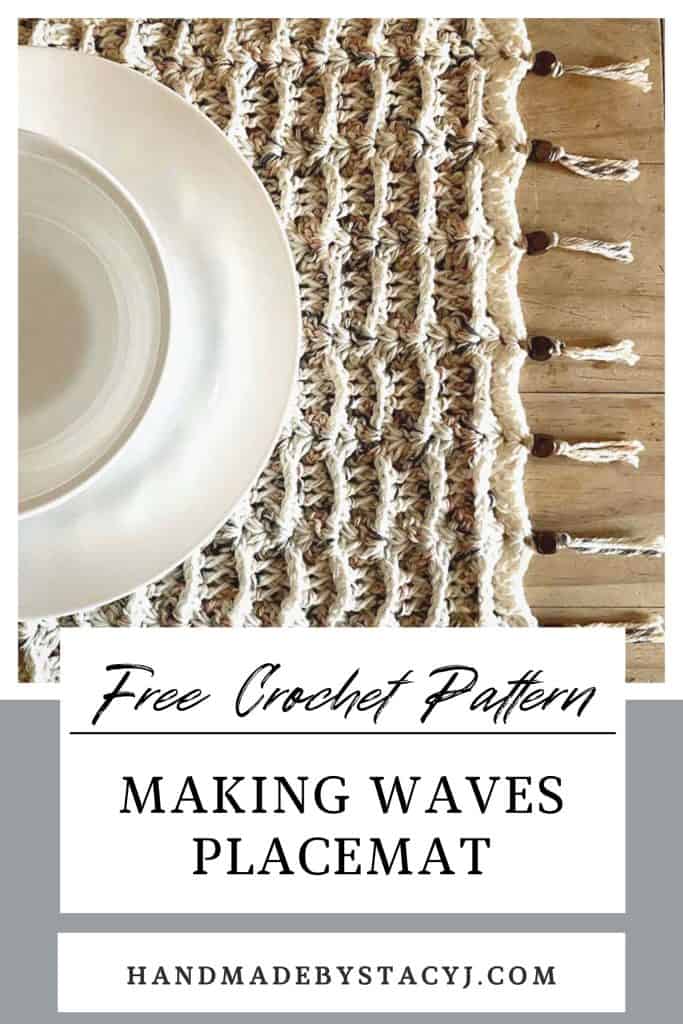
If you’d like to see the Making Waves Table Set that uses the Little Waves crochet stitch, all three patterns from this set are free to view on my website. Simply click on the image and you’ll be directed to the free crochet patterns.


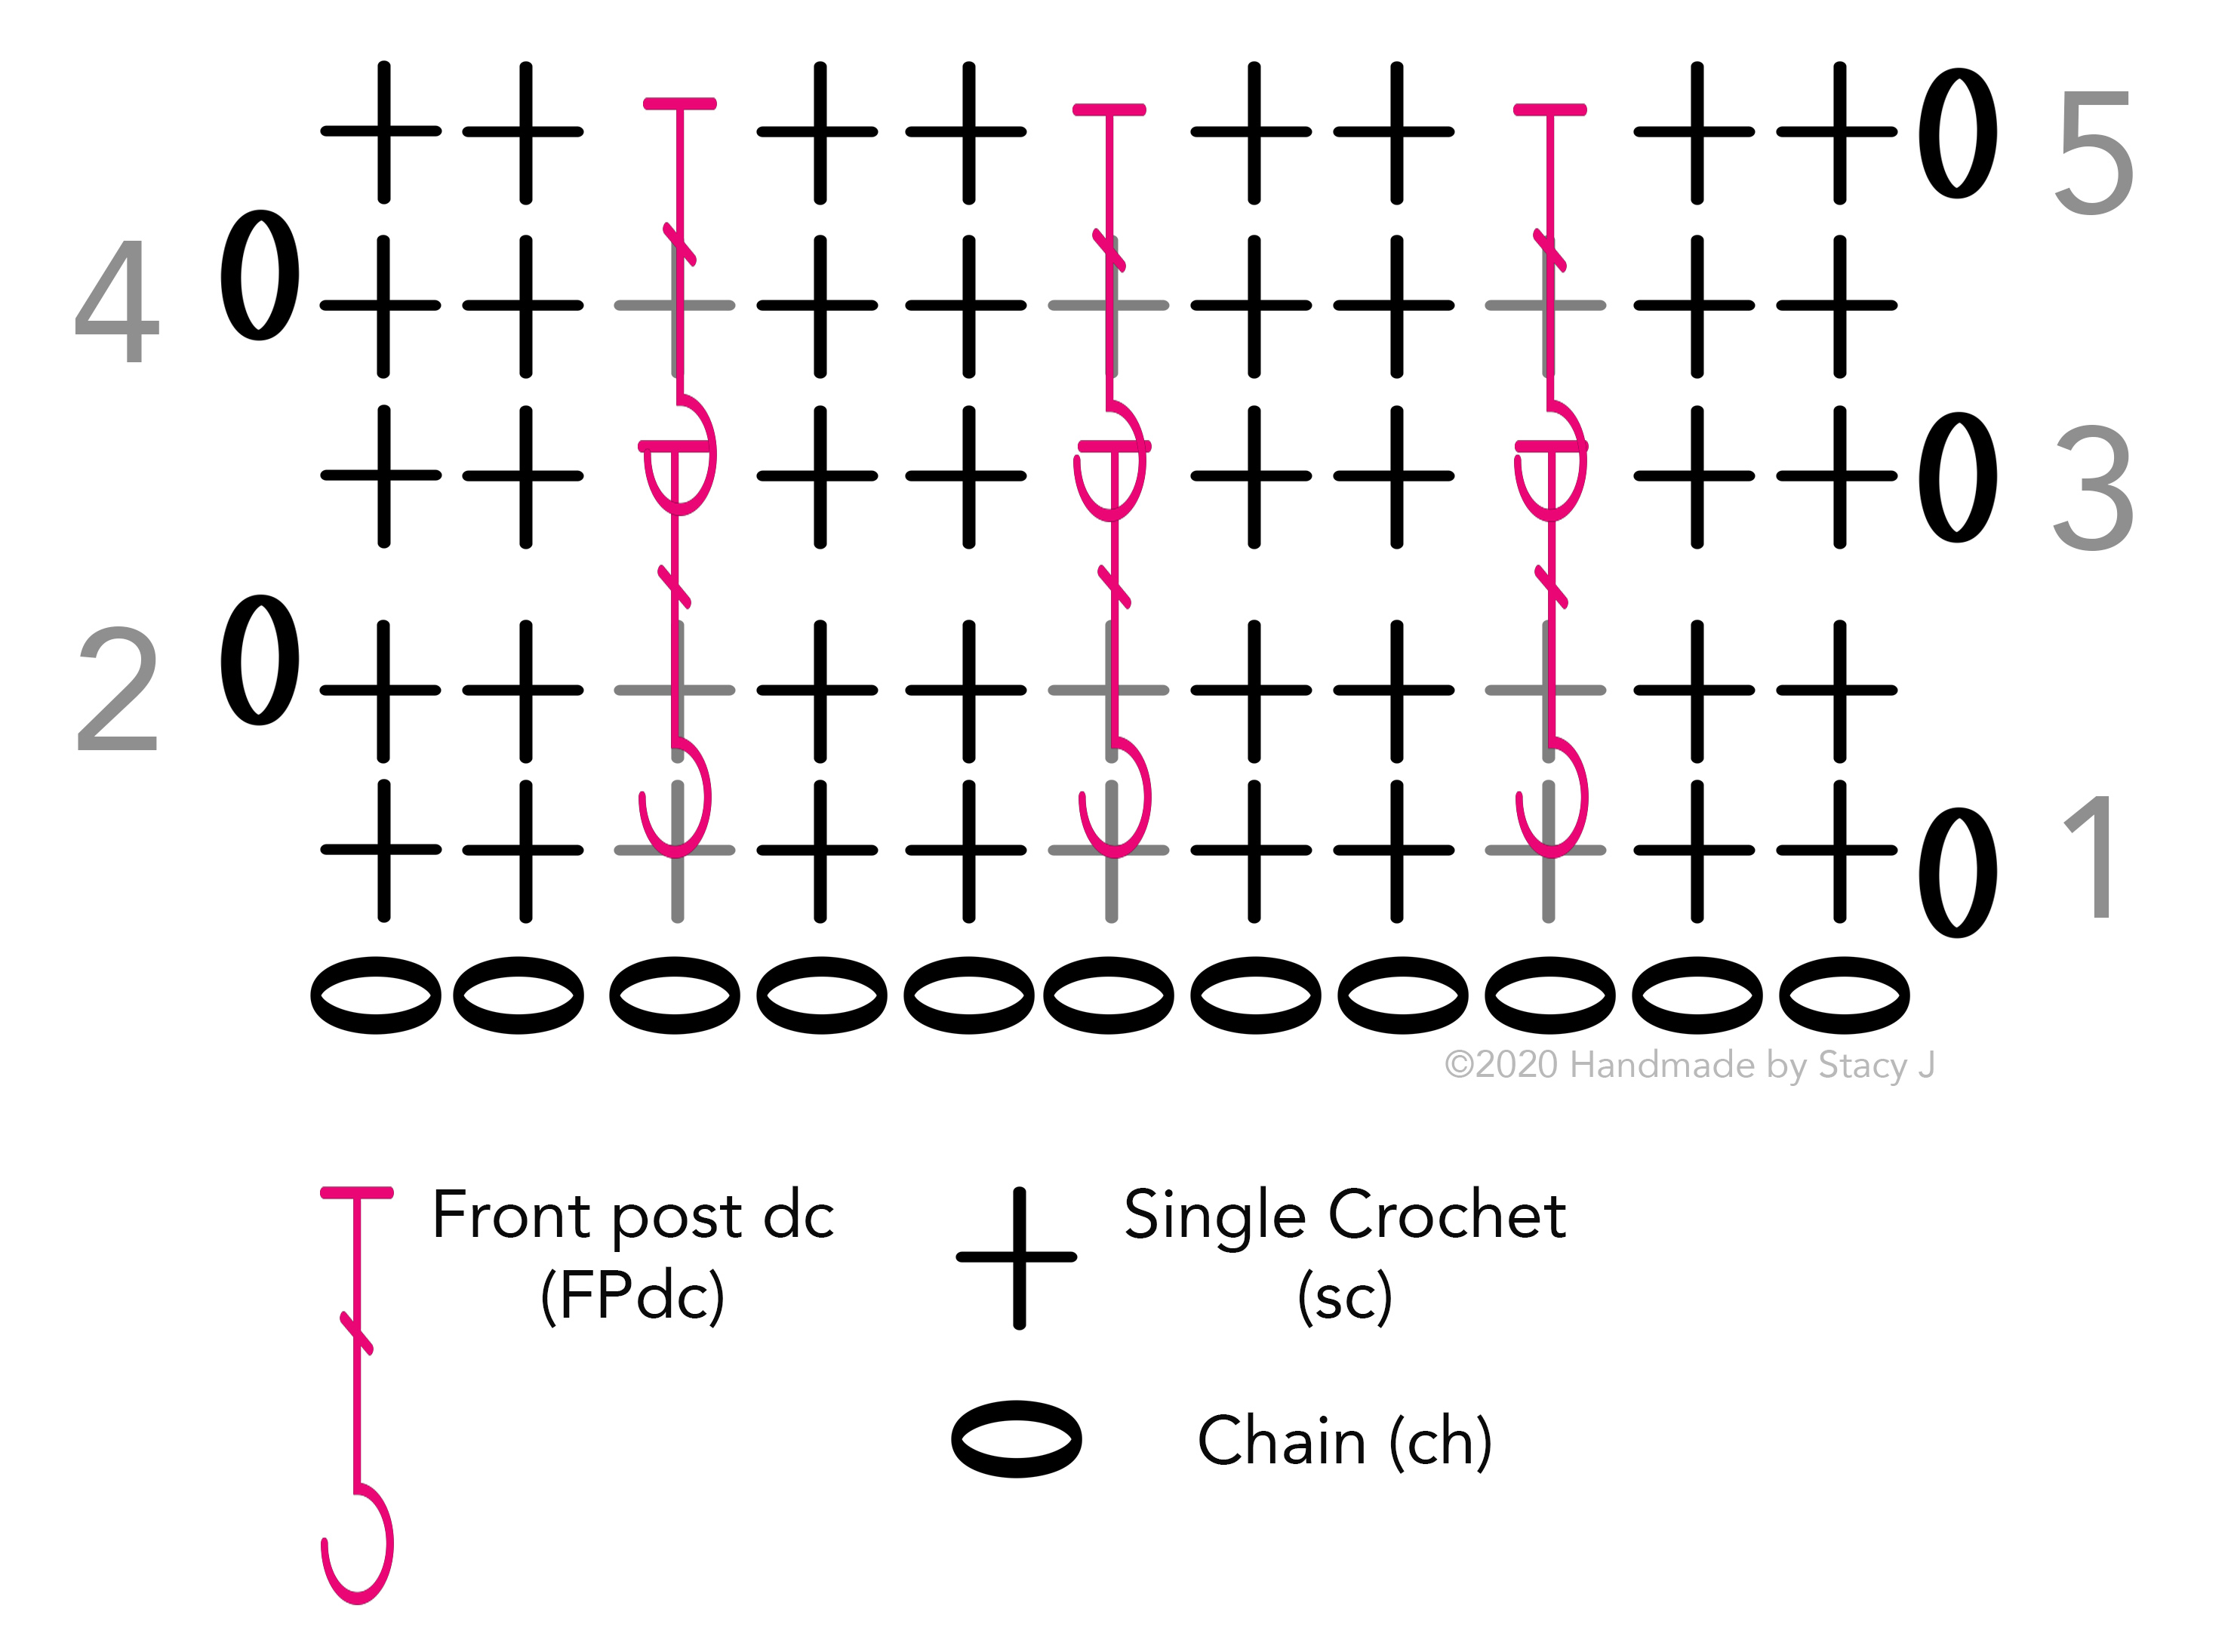
Directions for the Little Waves Crochet Stitch:

Chain in multiples of 8 +5

Row 1: Dc in 4th chain from hook (3 skipped chains count as dc) and in next ch, *sk next 2 chs (2dc, ch1, 2dc) in next ch, sk next 2 chs, 1 dc in ea of next 3 chs; rep * across. Turn

Row 2 (Pattern Repeat): Ch 2 (some folks ch3, but I prefer to ch2), work Fpdc around ea of the next 2 dc posts, (2dc, ch1, 2dc) in next ch-1 sp, *sk next 2 dc, work Fpdc around ea of next 3 dc, sk next 2 dc, work (2dc, ch1, 2dc) in next ch-1 sp; rep * to last 5 sts, sk next 2 dc, work Fpdc around next 2 dc, dc in top of turning ch.

Repeat row 2 until desired length is reached. Fasten off and weave in ends.


Pin of crocheted Little Waves Stitch from Handmade by Stacy J
Here’s a pin for your Pinterest board 🙂

Thank you so much for visiting and supporting our yarny adventures. Please tag me @handmadebystacyj so that I can see your makes – I love to see them!

Stacy J

Subscribe on YouTube • Join me on Facebook • Follow on Instagram

Patterns on Ravelry • Inspiration on Pinterest

Split Front Post Treble Crochet (Modified Prong Stitch)

Learn how to crochet the Split Front Post Treble Crochet Stitch (or the Modified Prong Stitch). Today you’ll learn how to add incredible texture and design to your crochet pieces without having the gap in the back that results from front post crochet. I’ll walk you through the steps and you’ll get to experience for yourself how fun this stitch really is.

Courtney, from Creations by Courtney, asked me to make this tutorial for her. She designs amazing garments that utilize this stitch and I know that she would just LOVE if you would visit her website. She’s constantly creating beautiful, new and innovative garment patterns made for all body types. Her website is: https://creationsbycourtney.com

Please consider subscribing to my YouTube channel, as I’m uploading fun stitches that are easy to follow on a weekly (or more!) basis! Thank you!!


Disclosure: This post contains affiliate links. As an affiliate, when you purchase through my links, you allow the company to pay me a small commission without costing you a penny more, which allows me to continue making free content. Thank you for your support!


Stitch Technique for Split Front Post Treble Crochet

1. YO twice, working in front of previous row, insert hook from front to back around post of dc indicated 2 rows below, YO, pull up a loop, [YO, pull through 2 loops on hook] twice

2. YO, insert hook in next st, YO, pull up a loop (4 loops on hook), YO, pull through 2 loops (3 loops on hook)

3. YO twice, sk next 3 sts 2 rows below, insert hook front to back around the post of next dc, YO, pull up a loop (6 loops on hook), [YO, pull through 2 loops] twice, YO, pull through 4 loops.

Note: There will always be 3 dc between the legs of each Split FpTr


Pin of Split Front Post Treble Crochet Stitch
Here’s a pin for you Pinterest board ??

Looking for a great hook? Check out Furls!


Directions for Split Front Post Treble Crochet stitch pattern

Stitch is worked in multiples of 8 + 9

1: (Right side): Dc in fourth ch from hook and in ea ch across. Mark this as your right side; turn

2: Ch 1, sc in ea st across, turn

3: Ch 2 (counts as dc), 1 dc in ea of next 2 sts, Split FpTr beg around second dc 2 rows below, *dc in next 7 sts, sk next 3 dc 2 rows below, Split FpTr beg around next dc; rep from * until 3 sts remain, dc in last 3 sts; turn

4: Ch 1, sc in ea st across, turn

5: Ch 2 (counts as dc), 1 dc in ea of next 6 sts, Split FpTr beg around sixth dc 2 rows below, *dc in next 7 sts, sk next 3 dc 2 rows below, Split FpTr beg around next dc; rep from * until 7 sts remain, dc in last 7 sts; turn

Repeat rows 2 – 5 until you reach desired length

Thank you for joining me on our yarny adventures!

Stacy J

Subscribe on YouTube • Join me on Facebook • Follow on Instagram

Patterns on Ravelry • Inspiration on Pinterest

Crosshatch Crochet Stitch

The Crosshatch Crochet Stitch is a super simple stitch that only uses the chain, single crochet and double crochet. Come join me as I show you how to do this using a G hook and Medium (4) weight yarn – step by step. Written directions are below, as well as the video tutorial and a pin to save to your boards.

Please subscribe to my YouTube channel, as I upload a new crochet tutorial every Tuesday.

https://youtu.be/HEm5MKo9sUs

Directions for Crosshatch Crochet Stitch

Crosshatch Crochet Stitch works in multiples of 7 sts + 4 (+3 for the base chain)

1: Sk 2 ch (counts as dc), 2 dc in 3rd ch from hook, *sk 3 ch, 1 sc in next ch, ch 3, 1 dc in ea of next 3 ch; rep * until 4 ch remain, sk 3 ch, 1 sc in last ch, turn.

2: Ch 3 (counts as dc), work 2 dc in first sc, *sk 3 dc, 1 sc in 1st ch of ch-3, ch 3, 1 dc in ea of next 2 ch and 1 dc in next sc; rep from * across, ending with sk 2 dc, 1 sc in top of turning ch, turn.

Repeat Row 2 until you reach the desired length.

Here is the video tutorial for you: https://youtu.be/HEm5MKo9sUs


Pin of Crosshatch Crochet Stitch from Handmade by Stacy J
Here’s a pin for your Pinterest board 🙂

I hope you found this tutorial helpful. Thank you for joining me on our yarny adventures! Happy Crocheting!

? Stacy J

Subscribe on YouTube • Join me on Facebook • Follow on Instagram

Patterns on Ravelry • Inspiration on Pinterest

Blackberry Salad Crochet Stitch

The Blackberry Salad Crochet Stitch is a fun and simple crochet stitch that offers lots of texture! It works in increments of 4+1 and over a 4 row repeat. If you can chain and double crochet, YOU CAN DO THIS! There are written directions below for the Blackberry Salad Crochet Stitch, as well as a pin to save to your boards. The video tutorial is directly below.


DIRECTIONS for the Blackberry Salad Crochet Stitch:

Increments of 4+1 (+2 for the base chain)

1: Skip 3 chains (counts as dc), dc in the 4th ch from hook and in each ch across, turn.

2: Ch 1 (does not count as st), 1 sc in ea of the next 2 sts, *5 dc bobble, ch 1, 1 sc in ea of next 3 sts; rep * across until 3 sts remain; 5 dc bobble, 1 sc in last st and 1 sc in top of turning ch, turn.

3: Ch 3 (counts as dc), 1 dc in ea st across (when you come to the bobble, only dc in either the bobble or the ch-1, but not both; be sure to stay consistent with this choice throughout your work), dc in top of turning ch, turn.

4: Ch 1 (does not count as st), 1 sc in ea of the next 4 sts, *5 dc bobble in next st, ch 1, 1 sc in ea of the next 3 sts; Rep * across, 1 sc in top of turning ch, turn

5: Repeat row 3

Repeat rows 2 – 5 until you reach your desired length.


Pin of the crocheted Blackberry Salad Stitch tutorial from Handmade by Stacy J
Here’s a pin for your Pinterest board 🙂

I do hope you found this tutorial helpful. This is such a fun stitch that I’m sure you’ll be using it for all kinds of crochet goodies. Thank you for joining me on our yarny adventures!

Stacy J

Subscribe on YouTube • Patterns on Ravelry • Follow on Instagram

Join on Facebook • Inspiration on Pinterest

The Bar Stitch – Crochet

The Bar Stitch is a very quick and easy crochet stitch to learn. It only uses a couple of stitches and creates a very beautiful pattern. This would work well for a baby blanket, wash cloth or variety of garments. Below you will find the written directions, a chart and an image to pin to your Pinterest board. Enjoy!

Difficulty level:

Easy

Terms and Abbreviations used:

Directions are written in US terminology

Ch: Chain

FPdc: Front Post double crochet – work 1 dc around stem of stitch 2 rows below, inserting hook from right to left to draw up loops. You will skip the st behind this one, as it was just worked 2 rows below.

Rep: Repeat

Sc: Single Crochet


Directions for the Bar Stitch

Multiple of 3 sts +3

Note: Ch 1 does not count as a stitch.

  1. Ch in increments of 3 to your desired length, then ch 3 more; work 1 sc in 2nd ch from hook and 1 sc in each ch across, turn.
  2. Ch 1, work 1 sc across, turn.
  3. Ch 1, work 1 sc in each of the first 2 sc, * work 1 FPdc around next sc 2 rows below, work 1 sc in each of next 2 sc (being sure to skip the st behind the FPdc). Rep from * to end, turn
  4. Ch 1, work 1 sc across
  5. Ch 1, work 1 sc in each of the next 2 sc, *1 FPdc around stem of FPdc in 2 rows below, 1 sc in each of the next 2 sts; rep from * across.
  6. Repeat rows 4 & 5 until desired length, ending with a row 4.
Pin of the Bar Stitch crochet tutorial from Handmade by Stacy J
Here’s a pin to add to your Pinterest board 🙂

If you would like a printable pdf, here is the file to download:

I do hope you enjoy this stitch and that it finds a nice little home in your stitch dictionary. Thank you for joining me on our yarny adventures!

Stacy J

YouTube • Facebook • Instagram • Ravelry • Pinterest

Cabbage Patch Crochet Stitch

The Cabbage Patch Stitch is one of my favorite stitches to crochet. That’s because it’s beautiful, dense and works up very quickly! Below are written directions, a chart, a pin to save to your boards and a pdf.

Disclosure: This post contains affiliate links. As an affiliate, when you purchase from my links you allow the companies to pay me a small commission. This is at no additional cost to you, which allows me to continue making free content. Thank you for your support!

Are you looking for an amazing hook? Check out Furls!


Note:

This stitch works in multiples of 4 + 7

Special abbreviations:

Cross2dc: Skip 3 dc, work 1 dc into next dc, ch 2, working behind last dc work 1 dc into the 1st of the skipped dc.


Instructions for the Cabbage Patch Stitch:


1. (RS): Work 4 dc into 5th ch from hook, *sk 3 ch, 4 dc into next ch; rep from * to last 2 ch, 1 dc into last ch, turn.

2. Ch 3 (counts as dc), sk 1st dc, *cross2dc; rep from * to end, 1 dc into top of ch-3 at beg of previous row, turn.

3. Ch 3, work 4 dc into each ch-2 sp to end, 1 dc into top of ch-3 at beg of previous row, turn.

4. Rep rows 2-3.


Here’s a pin for your Pinterest Board 🙂

If you’d like a printable pdf, here’s the stitch pattern of the Cabbage Patch stitch to download:

I hope you enjoy this stitch as much as I do. Thank you for joining me on our yarny adventures!

Stacy J

Subscribe on YouTube • Join me on Facebook • Follow on Instagram

Patterns on Ravelry • Inspiration on Pinterest