The Crossed Front Post Double Crochet Columns stitch pattern is a lovely (and easy) stitch to learn. The chain space between the columns offer a touch of lace, while the double crochet panels between the columns offer stability and a denser fabric. This stitch is worked in stitch multiples of 9 + 3 chains over a 2 row repeat.
Disclosure: This post contains affiliate links. That means that I may receive compensation when you purchase through my links at no additional cost to you. I am a King Cole Brand Ambassador and this post is part of our ongoing collaboration. Thank you for your support!
The Little Frills shawlette design came to me as I was watching a movie and I saw a ruffley-type scarf. When I saw that, I knew that I needed to create a free knitting pattern with ruffles! When King Cole Yarns reached out to me about their 2023 Make-Along, I knew that this was the perfect time to design this baby!
About the yarn
The King Cole “Finesse” yarn called to me to be worn against the skin. The yarn is a wonderful cotton and silk blend that’s a DK / #3 lightweight yarn. Each skein holds approximately 131 yards / 120 metres and is 77% cotton, 23% silk and 100% scrumptiousness!
As I worked with this particular yarn, I was in awe of the softness. It glided through my fingers and there weren’t any knots! It took the Russian Join very well as I added the next skein to the project and I love all the color options. This yarn is to be hand washed in cool water and laid flat to dry. I highly recommend this yarn, not only for this project, but for any project that calls for a dk / #3 lightweight yarn that will be worn next to your skin.
The Little Frills Shawlette uses size US 9 / 5.5 mm knitting needles and uses just under 3 skeins of the main color (Blush) and 2 skeins of the contrast color (Ice).
Disclosure: This post contains affiliate links. As an affiliate, when you purchase through my links, you allow the company to pay me a small commission without costing you a penny more, which allows me to continue making free content. The yarn for this pattern was provided to me from King Cole – I am a King Cole Brand Ambassador and this post is part of our ongoing collaboration. Thank you for your support!
To see the video tutorial, please click on the image above.
About the Little Frills Shawlette
This shawlette begins with casting on 81 stitches. Then, on each right side row for the first panel, you’ll work gradual increases. Then, as you progress, you’ll begin doing large increases that nearly double your stitch count. The rows work quickly, as they are only using knits, purls and yarn overs. The yarn over rows are also accented with a garter stitch border; so that’s 2 rows with each yarn over where you won’t be purling!
When having this pattern tested, I did an oops that included one extra repeat of the final increase rows. I corrected the pattern, but my testers loved it so much that they kept that extra increase (If you’d like to see their makes, please check out their Ravelry projects). That extra increase added so much ruffley goodness, but also added quite a bit of time needed to work the bind off. The bind off used is the “Picot” bind off and it requires casting on 2 stitches and then binding off 4. It takes some time, but is so worth it in the end. If you choose to add that extra increase section, you’ll need approximately 220 yards / 202 metres more of your contrast color.
If you prefer a printable pdf that includes a checklist to help keep track of your rows and printable gift tags for gifting your shawlette, you can purchase through Ravelry (or add to your favorites or que) or through my Etsy store.
Please note that due to this being a digital download, all sales are final and no refunds will be given. Thank you for your support!
Here’s a pin to add to your Pinterest board
Materials needed:
King Cole “Finesse” Cotton Silk DK (77% Cotton, 23% Silk; 131 yds / 120 m; 50g; #3 Light / DK weight) yarn in colors:
Blush (MC): 315 yds / 288 m
Ice (CC): 167 yds / 153 m (if you choose to do an extra repeat of the final panel, you’ll need approximately 387 yds / 354 m of your CC)
1 locking stitch marker or scrap piece of yarn (optional)
Tapestry needle
Scissors
Measures: 60” / 152.4 cm long at widest point x 10” / 25.4 cm deep
Gauge: 15 sts x 18 rows = 4” / 10 cm in Stockinette Stitch – Gauge isn’t critical in this project, but will affect yarn usage
Pattern Difficulty level: Easy
The terms are written using US terminology and I’ve created a video with time stamps to help you along.
If you prefer a printable pdf that includes a checklist to help keep track of your rows and printable gift tags for gifting your shawlette, you can purchase through Ravelry (or add to your favorites or que) or purchase directly through me and save 10% (Valid for US residents only)!
Please note that due to this being a digital download, all sales are final and no refunds will be given. Thank you for your support!
Stitches & Terms Used
(Pattern is written in US terms):
Cable cast on: Insert right needle between the first and second stitch on left needle, draw up a loop and place on left needle (1 stitch casted on)
CC: Contrast color
K: Knit
K2tog: Knit two stitches together
Kfb: Knit into the front and back of the same stitch
MC: Main color
P: Purl
Rep: Repeat
Rs: Right side
Sl: Slip
St(s): Stitch(es)
Ws: Wrong side
Wyib: With yarn in back
Wyif: With yarn in front
Notes:
To avoid weaving in multiple yarn tails, I recommend working the Russian join as you join a new skein of yarn. To see a video tutorial of this technique, please visit: https://youtu.be/iU9rszpZzoQ
Use a locking stitch marker or scrap piece of yarn to mark the right side of your work.
When slipping stitches while working on the RS, yarn is always held at the back of your work.
Row 1: Sl, k1, kfb, knit to last 3 sts, kfb, sl, p1 (83 sts)
Row 2: Sl wyib, p to last 2 sts, sl wyif, p1
Row 3: As row 1 (85 sts)
Row 4 (WS): Sl wyib,p1, k to last 2 sts, sl wyif, p1
Row 5: Sl, k1, kfb, *k2tog, yo; rep * to last 4 sts, k1, kfb, sl, p1 (87 sts)
Row 6: As row 4
Rows 7 – 10: Rep rows 1 – 2 (91 sts)
Row 11: As row 1 (93 sts)
Row 12: As row 4
Row 13: As row 5 (95 sts)
Row 14: As row 4
Row 15: As row 1 (97 sts)
Row 16: As row 2
Second Panel
Row 1: Sl, k1, kfb, k across to last 3 sts, kfb, sl, p1 (99 sts)
Row 2 (WS): Sl wyib, p last 2 sts, sl wyif, p1
Row 3: As row 1 (101 sts)
Row 4: Sl wyib, p1, k to last 2 sts, sl wyif, p1
Row 5: (In this row, we nearly double our st count) Sl, k1, *k1, yo; rep * to last 3 sts, k1, sl, p1 (198 sts)
Row 6: As row 4
Row 7: Sl, k across to last 2 sts, sl, p1
Row 8: Sl wyib, p to last 2 sts, sl wyif, p1
Row 9: As row 7
Row 10: As row 8
Row 11: As row 7
Row 12: As row 4
Row 13: Sl, k1, *k2tog, yo; rep * to last 3 sts, k1, sl, p1
Row 14: As row 4
Rows 15 – 18: Repeat rows 7 – 8
Row 19: As row 7
Rep rows 4-18 once more (392 sts)
Final Panel
Switch to CC
(If you’d like extra ruffly goodness, like my testers did, repeat this section one more time and plan on using approximately 220 more yards / 202 metres of your CC)
Row 1: Sl, k across to last 2 sts, sl, p1
Row 2 (WS): Sl wyib, k last 2 sts, sl wyif, p1
Row 3: (In this row, we nearly double our st count) Sl, k1, *k1, yo; rep * to last 3 sts, k1, sl, p1 (780 sts)
Row 4: As row 4 of Panel 2
Picot Bind off
Cast on 2 sts using cable cast on method (2 sts increased)
Bind off four stitches knit-wise (to get four bind-off sts, you will have to knit a total of 5 sts and pulled a total of 4 sts over on the right needle, the 5th st will be left on the right needle
Place that last st back on the left needle
Repeat until you are out of sts to bind off
If you’d like to check out some more knitting patterns, please click on the images below. You’ll be directed to the free knitting pattern on the website for each of them.
I do hope you’ve enjoyed this free knitting pattern for the Little Frills Shawlette! When you’re all done, please take pictures and tag me on social media. @handmadebystacyj or #handmadebystacyj so that I can see your beautiful shawlette 🙂
This Little Frills Shawlette free knitting pattern is copyright 2023 Handmade by Stacy J. Please do not duplicate or copy any portion of this pattern, as well as photographs. You are encouraged to share images of your final product and are allowed to sell final products; I just ask that if you sell your final product, please purchase the ad-free pdf, provide your own photographs and that you please credit Handmade by Stacy J as the designer. Thank you for your support!
The Cobblestone infinity scarf was inspired as I designed the crocheted “Birthday Sorbet” baby blanket for Mary Maxim. When they shipped me the yarn, they surprised me with a couple of skeins of the Mary Maxim “Purely Soft” yarn and it just screamed to me to be an infinity scarf…so, the Cobblestone Infinity Scarf was born!
When I shared the design with Mary Maxim, they liked it so much that they created a kit from it! If you’d like to check out the kit, please visit: https://shrsl.com/3zdp9and check out the “Related Kits” section.
About the yarn
The Mary Maxim “Purely Soft” yarn has a squishiness that is simply uncomparable to any other yarn I’ve ever worked with. Have you ever walked down the yarn aisle and just couldn’t stop squishing one particular yarn?? Yep…this is like that! It’s so soft and light!
Each skein has approximately 147 yards / 135 metres and is 70% Premium Acrylic & 30% Polyamide. The skein is 5.3 oz / 150 grams and is a #5 / Bulky weight yarn.
The Cobblestone Infinity Scarf uses size US 10.5 / 6.5 mm knitting needles and uses 2 skeins of the Purely Soft yarn.
Disclosure: This post contains affiliate links. As an affiliate, when you purchase through my links, you allow the company to pay me a small commission without costing you a penny more, which allows me to continue making free content. Thank you for your support!
About the Cobblestone Infinity Scarf
The Cobblestone Infinity Scarf is a quick and easy project to work up as a last-minute gift or as a little something to keep yourself warm that uses bulky yarn and large knitting needles, so that it comes together quickly. The Mary Maxim “Purely Soft” yarn used for this scarf is really unique and, I think, is what makes this scarf stand out. It’s very soft and has a gorgeous halo that really adds amazing texture. This pattern is easily adjusted to make larger or smaller, as the stitch pattern is worked in multiples of 2 with a 4 row repeat. To get the same striping effect, there is a color placement chart that shows the color and which row to repeat.
If you prefer a printable pdf that includes a checklist to help keep track of your rows and printable gift tags for gifting your infinity scarf, you can purchase through through my Etsy store or Ravelry (or add to your favorites).
If you’d like to purchase the kit from Mary Maxim that includes a printed pattern and the yarn, please visit: http://shrsl.com/42g6fand check out the “Related Kits”.
Please note that due to this being a digital download, all sales are final and no refunds will be given. Thank you for your support!
Here’s a pin to add to your Pinterest board
Materials needed:
Mary Maxim “Purely Soft” yarn (5.3 oz / 150 g; 147 yd / 135 m; Bulky / #5 weight; 70% Acrylic / 30% Polyamide) or any other #5 / Bulky weight yarn in colors:
1 locking stitch marker or scrap piece of yarn (optional)
Tapestry needle
Scissors
Measures: 8” x 62” / 20 cm x 157 cm circumference
Gauge: 15 sts x 18 rows = 13 st x 16 rows = 4” x 4” / 10 cm x 10 cm in stockinette stitch – Gauge isn’t critical in this project, but will affect yarn usage
Pattern Difficulty level: Easy
The terms are written using US terminology and I’ve created a video with time stamps to help you along.
If you prefer a printable pdf that includes a checklist to help keep track of your rows and printable gift tags for gifting your infinity scarf, you can purchase through my Etsy store or Ravelry (or add to your favorites or que).
If you’d like to purchase the kit from Mary Maxim that includes a printed pattern and the yarn, please visit: http://shrsl.com/42g6fand check out the “Related kits”
Please note that due to this being a digital download, all sales are final and no refunds will be given. Thank you for your support!
Stitches & Terms Used
(Pattern is written in US terms):
Bind off
BOR: Beginning of round
German twist cast on
K: Knit
Kfb: Knit front and back
P2tog: Purl 2 together
Rnd: Round
Notes:
This infinity scarf is easily adjustable to any size, as the stitch pattern works in multiples of 2 with a 4 row repeat; please beware that your yarn quantity will vary if you adapt the pattern to a larger or smaller size.
Use included color chart to determine color placement for stripes
When working the stripes, do not cut your yarn; instead, carry it up the side
Using color A and the German twist cast on method, cast on 194; join in the round being careful not to twist your stitches and use a stitch marker to indicate the BOR.
Set up Rnd: Knit
Round 1: Knit
Round 2: P2tog around (this will decrease the stitch count by half)
Round 3: Kfb in each stitch (this will increase the stitch count to the original cast on amount)
Round 4: Knit
Repeat rounds 1-4 using the chart to determine color placement for the stripes.
Bind off knit wise.
Weave in your ends and enjoy!
I do hope you’ve enjoyed this free knitting pattern! When you’re all done, please take pictures and tag me on social media. @handmadebystacyj or #handmadebystacyj so that I can see your beautiful infinity scarf 🙂
This Cobblestone Infinity Scarf free knitting pattern is copyright 2023 Handmade by Stacy J. Please do not duplicate or copy any portion of this pattern, as well as photographs. You are encouraged to share images of your final product and are allowed to sell final products; I just ask that if you sell your final product, please purchase the ad-free pdf, provide your own photographs and that you please credit Handmade by Stacy J as the designer. Thank you for your support!
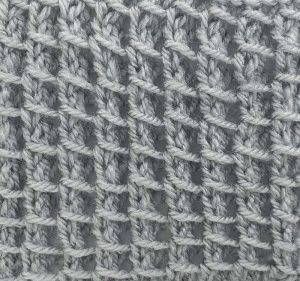
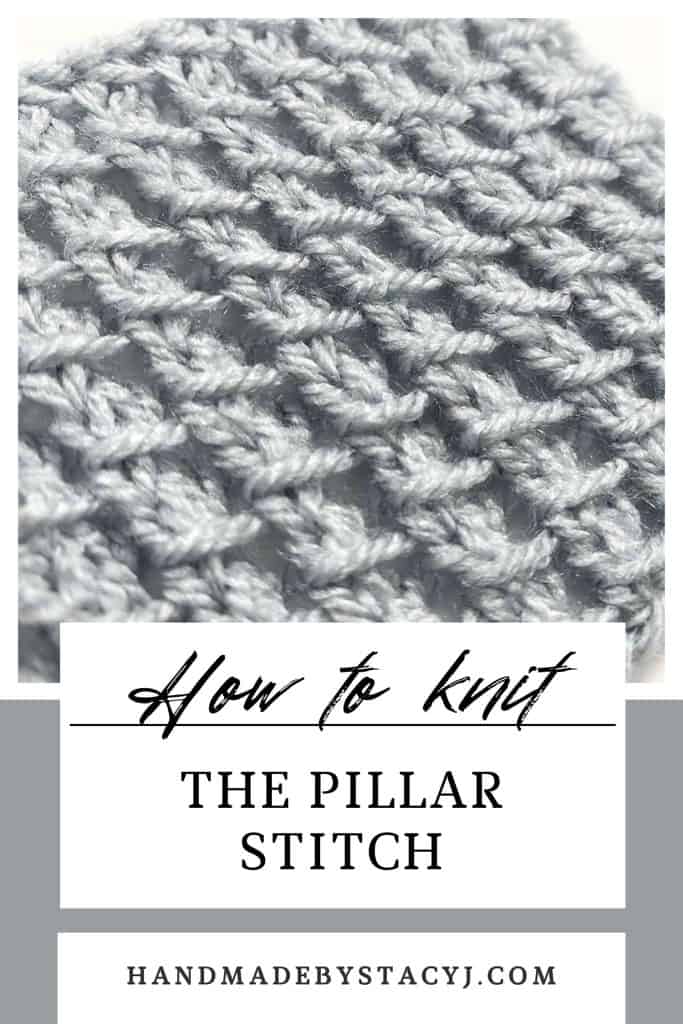
The Pillar Stitch is a beautiful ribbed knit stitch. The ribbing creates an interesting texture with very little stretch. This would be a great to use for a dishcloth, scarf or a blanket! This stitch is worked in stitch multiples of 2 over a 2 row repeat.
Disclosure: This post contains affiliate links. That means that I may receive compensation when you purchase through my links at no additional cost to you. I am a King Cole Brand Ambassador and this post is part of our ongoing collaboration. Thank you for your support!
Materials needed
(listed below is what I used to create the sample of the stitch pattern)
King Cole Baby DK yarn in color Silver (#1711), approximately 20 yds (To find your local store that stocks King Cole yarns, here is the stockist finder link; Or, if you need to shop online, here is LoveCrafts link)
To view the video tutorial of how to knit the Pillar Stitch, please click on the video above or visit: https://youtu.be/75OjI3-o_eIFront view of Pillar StitchBack view of Pillar stitch
Stitches and abbreviations used
K: Knit
P: Purl
RS: Right side
Rep: Repeat
St (s): Stitch (es)
WS: Wrong side
Yo: Yarn over
Here’s a pin for your Pinterest board 🙂
Notes:
Stitch is worked in multiples of 2
Directions for the Pillar Stitch:
Row 1 (WS): Purl
Row 2 (RS): K1, *yo, k2, pass yo over k2; rep * to last st, k1
Repeat rows 1-2 to desired length.
If you’d like to check out a couple other fun stitches, here are a few. Simply click on the image to be directed to the stitch tutorial page.
I hope you enjoyed learning this stitch as much as I did. Please tag me @handmadebystacyj when posting on social media – I’d love to see your makes!
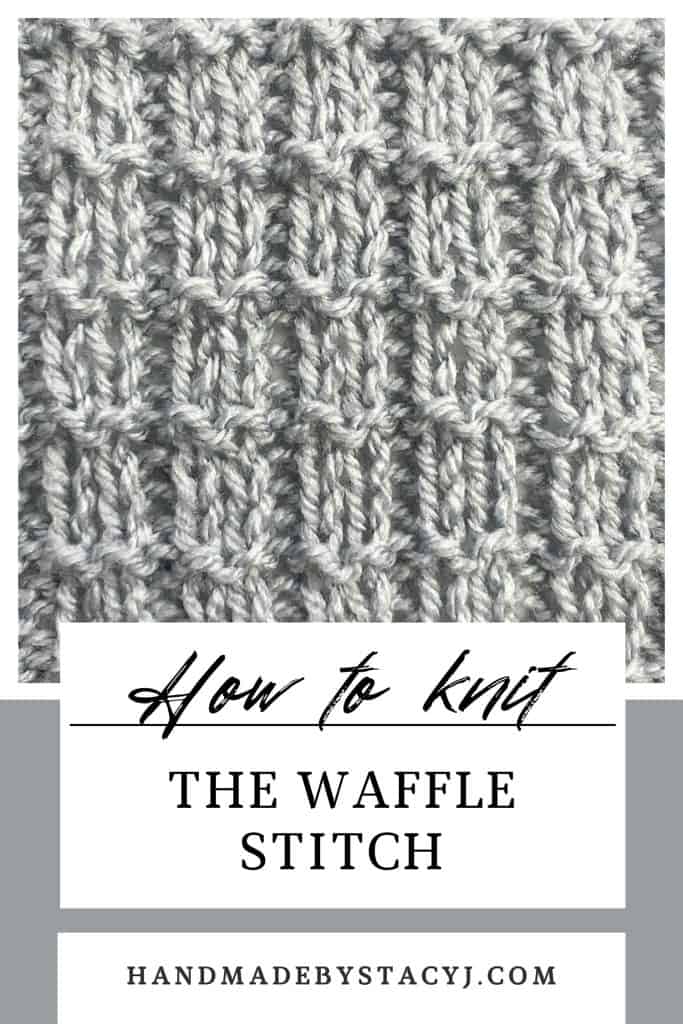
The Waffle Stitch is a beautiful ribbed knit stitch. The ribbing creates an interesting texture with wonderful stretch that would be a great to use for a dishcloth, scarf or a slouchy beanie. It would also look great as a cuff for a sleeve or the ribbing of a hat! This stitch is worked in stitch multiples of 3 + 1 over a 4 row repeat.
Disclosure: This post contains affiliate links. That means that I may receive compensation when you purchase through my links at no additional cost to you. I am a King Cole Brand Ambassador and this post is part of our ongoing collaboration. Thank you for your support!
Materials needed
(listed below is what I used to create the sample of the stitch pattern)
King Cole Baby DK yarn in color Silver (#1711), approximately 20 yds (To find your local store that stocks King Cole yarns, here is the stockist finder link; Or, if you need to shop online, here is LoveCrafts link)
To view the video tutorial of how to knit the Waffle Stitch, please click on the video above or visit: https://youtu.be/tz8AHmZWNrEFront view of the Waffle StitchBack side of the Waffle stitch
Stitches and abbreviations used
K: Knit
P: Purl
RS: Right side
Rep: Repeat
WS: Wrong side
Here’s a pin for your Pinterest board 🙂
Notes:
Stitch is worked in multiples of 3 + 1
Directions for the Waffle Stitch:
Row 1 (RS): P1, *k2,p1; rep * to end
Row 2 (WS): K1, *p2, k1; rep * to end
Row 3: As row 1
Row 4: Knit
Repeat rows 1-4 to desired length.
If you’d like to check out a couple other fun stitches, here are a few. Simply click on the image to be directed to the stitch tutorial page.
The Shell Medley crochet stitch pattern is a lovely (and easy) stitch to learn. The stitch pattern offers a bit of lace, yet with stability of the fabric with the arched fan pattern. This stitch is worked in stitch multiples of 13 + 1 chain over a 2 row repeat.
Disclosure: This post contains affiliate links. What that means is that when you purchase through my affiliate links, I may receive compensation at no additional cost to you. I am a King Cole Brand Ambassador and this post is part of our ongoing collaboration. Thank you for your support!
Materials needed
(listed below is what I used to create the sample of the stitch pattern)
King Cole Baby DK yarn in color Silver (#1711), approximately 25 yds (To find your local store that stocks King Cole yarns, here is the stockist finder link; Or, if you need to shop online, here is LoveCrafts link)
To view the video tutorial of how to crochet the Crossed Front Post Double Crochet Columns stitch, please click on the video above or visit: https://youtu.be/V8dtay2DGW4
Stitches and abbreviations used
(Instructions are written in US terms)
Ch (s): Chain (s)
Dc: Double crochet
Ea: Each
Fpdc: Front post double crochet – Yarn over, insert hook from front to back around post indicated, yarn over and draw up a loop, (yarn over and draw through 2 loops) two times
RS: Right side
Sk: Skip
Sp (s): Space (s)
St (s): Stitch (es)
Tch: Turning chain
WS: Wrong side
Here’s a pin for your Pinterest board
Notes:
Stitch is worked in multiples of 13 + 1 ch; for the YouTube video I chained 27
Directions for how to crochet the Shell Medley Stitch:
Row 1 (WS): 1 sc in second ch from hook, ch 1, sk next ch, 1 sc in next ch, ch 1, sk 3 chs, in next ch work (1 dc, ch 1) 3 times, sk next 3 chs, sc in next ch, *ch 4, sk 4 ch, sc in next ch, ch 1, sk 3 chs, in next ch work (1 dc, ch 1) 3 times, sk 3 chs, sc in next ch; rep * to last 2 chs, ch 1, sk next ch, sc in last ch
2 (RS): Ch 3 (counts as first dc), turn; 3 dc in next ch-1 sp, sk next sc and ch, work Fpdc around next dc, ch 3, sk next (ch-sp, dc, ch-sp), work Fpdc around next dc, *sk next ch-1 sp and sc, in ch-4 sp work 9 dc, sk next sc and next ch, work Fpdc around next dc, ch 3, sk next (ch-sp, dc, ch-sp), work Fpdc around next dc; rep * to last 2 ch-1 sps, sk next ch-1 sp, work 3 dc in next ch-1 sp, 1 dc in top of last sc
3: Ch 1, turn; 1 sc in first dc, ch 1, sk next dc, sc in next dc, ch 1, in next ch-3 sp work (1 dc, ch 1) 3 times, sk next 2 dc, 1 sc in next dc, *ch 4, sk next 5 dc, sc in next dc, ch 1, in next ch-3 sp work (1 dc, ch 1) 3 times, sk next 2 dc, 1 sc in next dc; rep * to last 2 dc, ch 1, sk next dc, 1 sc in top of tch
Repeat rows 2-3 to desired length
I hope you enjoyed learning this stitch as much as I did. Please tag me @handmadebystacyj when posting on social media – I’d love to see your makes!
Today I am so excited to share with you the FREE crochet pattern for the Birthday Sorbet Baby Blanket!
Disclosure: This post contains affiliate links. As an affiliate, when you purchase through my links, you allow the company to pay me a small commission without costing you a penny more, which allows me to continue making free content.
About the Birthday Sorbet Baby Blanket
The Birthday Sorbet Baby Blanket was inspired by a friend of mine that requested a fun, happy blanket for a new baby. He gave me complete creative freedom to create whatever called to me. The idea of a colorful C2C blanket with some added texture was all I could think about. So, the Birthday Sorbet Baby Blanket was born!
My testers rated this pattern as “Easy”, making it the perfect project to make as you watch your favorite program or listen to your favorite podcast.
On a side note, I want to extend a big “Thank You!” to all of my testers that helped with this design!
Here’s a pin for you Pinterest board
About the yarn
The yarn used was provided to me from Mary Maxim. It’s the Mary Maxim “Mellowspun DK”. This is a DK / #3 light weight yarn that is 100% acrylic. It works up beautifully, is machine washable and there are LOTS of colors to choose from.
If you prefer a printable pdf that includes higher resolution charts, 16 point font for easier reading and printable gift tags for gifting, you can purchase through Ravelry (or add to your favorites or que) or you can purchase through my Etsy store.
Due to this being a digital download, no refunds will be given. Thank you!
Locking stitch marker or scrap piece of yarn for marking stitches (optional)
Tapestry needle
Scissors
Measures:
Body (C2C portion): 34” x 34” / 86 cm x 86 cm
Final Size: 40” x 40” / 102 cm x 102 cm
Difficulty Level:
Easy-ish
Gauge:
C2C pattern 6 blocks x 6 blocks: 4.25” / 10.8 cm (Gauge isn’t critical in this project, but will affect yarn usage)
Stitches & Abbreviations Used
(Pattern is written in US terms):
3dc Cluster: Yo, insert hook in indicated st, yo, draw through 2 loops, yo, insert hook in same st, yo, draw through 2 loops, yo, insert hook in same st, yo, draw through 2 loops, yo, draw through all 4 loops left on hook; leaving st behind cluster unworked
Bpdc: Back post double crochet – Yo and insert hook from back to front around post of indicated stitch, yo and draw yarn around post of st, yo and draw through two loops, yo and draw through remaining 2 loops
C2C: Corner to corner
Ch(s): Chain(s)
Dc: Double crochet
Fpdc: Front post double crochet – Yo and insert hook from front to back around post of indicated stitch, yo and draw yarn around post of st, yo and draw through two loops, yo and draw through remaining 2 loops; leaving the st behind unworked
Hdc: Half double crochet
Pop: Popcorn – 5 dc in same st, pull out hook and insert from front to back under top 2 loops of first dc, insert hook in dropped loop and pull through stitch, ch 1 to close stitch
Rep: Repeat
RS: Right Side
Sc: Single crochet
Sl st: Slip Stitch
Sp: Space
St(s): Stitch(es)
Standing hdc: Standing half double crochet – With slip knot on hook, yo, insert hook in sp indicated, yo, draw through all 3 loops on hook
Standing sc: Standing single crochet – With slip knot on hook, insert hook in sp indicated, yo, draw through 2 loops on hook
WS: Wrong side
Yo: Yarn over
If you prefer a printable pdf that includes higher resolution charts, 16 point font for easier reading and printable gift tags for gifting, you can purchase through Ravelry (or add to your favorites or que) or you can purchase through my Etsy store.
Due to this being a digital download, no refunds will be given. Thank you!
Directions for Body of Birthday Sorbet Baby Blanket:
Notes:
Before beginning your blanket, please print a chart at the end of the pattern to help with color placement – there is a color chart available, as well as a greyscale chart that you can use to customize your own color choices.
Total amount of C2C blocks on each side is 45; You can easily adjust the size by adding or subtracting more rows. However, yarn quantities will vary, as will the placement of some border stitches.
An easy way to help remember placement is that the CC rows always contain popcorns and the MC rows are only C2C
To view the tutorial on how to crochet the body of the Birthday Sorbet blanket Free Crochet Pattern, please click on the video link directly above or visit my YouTube channel at: https://youtu.be/NZsr_Eb9bAs
C2C Increase
Row 1: With MC, ch 6, in 4th ch from hook work 1 dc, 1 dc in ea of remaining 2 chs
Ch 6, work 1 dc in 4th ch from hook and remaining 2 chs, sl st in ch-3 sp from previous block, ch 3, work 3 dc in ch-3 sp
Rows 3 & 4: Repeat row 2 two more times
Row 5: Popcorn Row: Changing to designated CC, Ch 6, work 1 dc in 4th ch from hook and remaining 2 chs, *sl st in ch-3 sp from previous block, ch 3, work 1 dc, 1 pop, 1 dc in ch-3 sp; rep * to the last block; in the last block, do not work popcorn, instead work 3 dc in ch-sp.
Continue repeating rows 2-5 in the sequence of repeating rows 2-4 in MC, 1 row repeat of row 5 in CC.
When you complete your 45th row (a popcorn row) you’ll begin decreasing (this is the middle of the blanket).
To see step by step photos of how to work a C2C increase, please check out the images below.
C2C Decrease
Turn, then begin with sl st in each of the next 3 dc, sl st in ch-3 sp, ch 3, work 3 dc in ch-3 sp, sl st in next blocks ch-3 sp; proceed to end of row by working C2C pattern (sl st in ch-3 sp from previous block, ch 3, work 3 dc in ch-3 sp), ending with sl st in last ch-3 sp (When changing colors, do so after completing 3 sl sts over the beg 3 dc)
Repeat row 1 of C2C Decrease until you have one block left working in the sequence of 3 rows in MC, 1 pop row in CC; your final 4 rows will all be using MC and not incorporating the pop st (as in the beg rows of blanket pattern)
To see step by step photos of how to work the C2C decrease, please view the images below.
Border
Notes:
Do not turn; RS will always be facing
There will always be a total of four ch-2 sps and those are not included in the stitch count.
Directions for Birthday Sorbet Border
With RS facing and MC, join with standing sc in any corner and work 2 more sc in the same c2c block. Working around Blanket, work 3 sc in each block, (ch2 , then 3 more sc in each corner); end with ch 2 and sl st in top of first standing sc, fasten off. Each side: 135 sc
With CC2, join with standing hdc in any corner. Work 1 hdc in each st around, working (1 hdc, ch 2, 1 hdc) in each corner ch sp; end with (1hdc, ch 2) in final ch sp and join with sl st to first standing hdc, fasten off. Each side: 137 hdc
With MC, join in any corner ch sp a standing hdc, work 1 bpdc around each post from row 2, working (1 hdc, ch 2, 1 hdc) in each corner; end with (1 hdc, ch 2) in last corner and join with sl st to top of beginning hdc; fasten off. Each side: 137 bpdc, 2 hdc
(Note: make sure that your slip stitches are not too tight, otherwise they may pull your work and be difficult to work into on the next row). With CC1, join in any corner ch sp with standing sc, [work 1 sl st in ea of next 3 sts, *work 1 3-dc cluster st in top of next st 2 rows below, 1 sl st in ea of next 5 sts; rep * until 4 sts rem to corner sp , work 1 3-dc cluster, 1 sl st in ea of next 3 sts, (1 sc, ch2, 1 sc) in corner ch sp]; Rep [ ] 3 more times ending in last corner ch sp with (sc, ch2, join with sl st to top of standing sc). fasten off. Each side: 23 clusters, 2 sc, 116 sl st
With RS facing and MC, join with standing hdc in any corner ch sp, *work 1 hdc in each sl st and 1 fpdc around each 3dc cluster; work (hdc, ch 2, hdc) in each corner ; rep * around ending with ( hdc, ch 2) join with sl st in top of first standing hdc in last corner ch sp, fasten off. Each side: 120 hdc, 23 fpdc
With CC10, join with standing hdc in any corner ch sp, *work I hdc in each st and (hdc, ch 2, hdc) in each corner sp; rep * around. End with (hdc, ch 2) in last ch sp, join with sl st to top of first standing hdc, fasten off. Each side: 145 hdc
With MC, rep row 3. Each side:145 bpdc, 2 hdc
This is essentially a repeat of row 4; your 3dc clusters will be centered above the two 3dc clusters made in row 4. With CC7, join with standing sc in any corner space. [Work 1 sl st in ea of the next 4 sts, *work a 3dc cluster in the stitch 2 rows below (where the color ridge is formed), 1 sl st in ea of the next 5 st; rep * across until 5 sts rem to corner, work 1 3dc cluster, 4 sl st, then work (sc, ch 2, sc) in corner]; rep [ ] 3 more times ending with sc, ch2, join to top of standing sc with sl st, fasten off. Each side: 25 clusters, 2 sc, 122 sl st
With MC, rep row 5. Each side: 126 hdc, 25 fpdc
With CC5, rep row 6. Each side: 153 hdc
With CC8, rep row 6. Each side: 155 hdc
Weave in your ends, block and enjoy!
Here are the free charts to help with your color placement
This free crochet pattern is copyright 2023 Handmade by Stacy J. Please do not duplicate or copy any portion of this pattern, as well as photographs. You are encouraged to share images of your final product and are allowed to sell final products; If you sell your final product, I just ask that you please purchase the ad-free pdf and credit Handmade by Stacy J as the designer. Thank you!
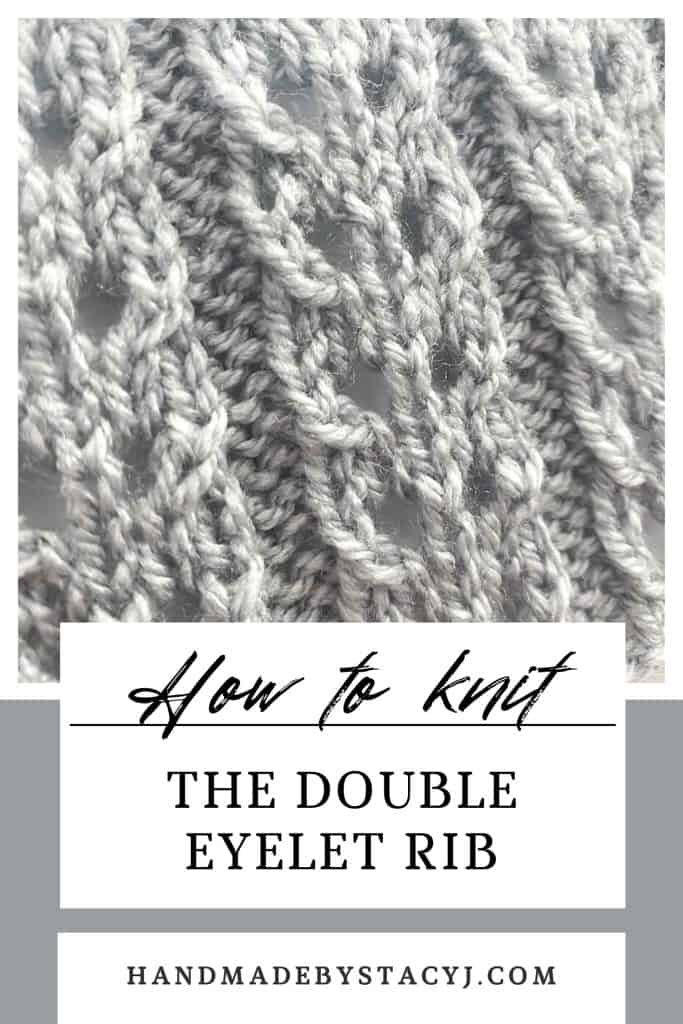
The Double Eyelet Rib is a beautiful, lacy ribbing knit stitch. The lace ribbing creates a light fabric with wonderful stretch that would be a great to use for a dishcloth, scarf or a slouchy beanie. This stitch is worked in stitch multiples of 7 + 2 over a 4 row repeat.
Disclosure: This post contains affiliate links. That means that I may receive compensation when you purchase through my links at no additional cost to you. I am a King Cole Brand Ambassador and this post is part of our ongoing collaboration. Thank you for your support!
Materials needed
(listed below is what I used to create the sample of the stitch pattern)
King Cole Baby DK yarn in color Silver (#1711), approximately 25 yds (To find your local store that stocks King Cole yarns, here is the stockist finder link; Or, if you need to shop online, here is LoveCrafts link)
To view the video tutorial of how to knit the Double Eyelet Rib, please click on the video above or visit: https://youtu.be/1q5ob8Iti_Y
Front view of Double Eyelet Rib
Back View of Double Eyelet Rib
Stitches and abbreviations used
K: Knit
K2tog: Knit 2 stitches together
P: Purl
RS: Right side
Skpo: Slip, knit, pass slipped stitch over – Slip next stitch purlwise to right hand needle, knit the next stitch, slip the slipped stitch from right hand needle over the knit stitch just worked.
St(s): Stitch (es)
Rep: Repeat
WS: Wrong side
Yo: Yarn over
Here’s a pin for your Pinterest board 🙂
Notes:
Stitch is worked in multiples of 7 + 2; for the YouTube video I cast on 30
Directions for the Double Eyelet Rib:
Row 1 (RS): P2, *k5, p2; rep * to end
Row 2 (WS): K2, *p5, k2; rep * to end
Row 3: P2, *k2tog, yo, k1, yo, skpo, p2; rep * to end
Row 4: As row 2
Repeat rows 1-4 to desired length.
If you’d like to check out a couple other fun rib stitches, here are a few. Simply click on the image to be directed to the stitch tutorial page.
I hope you enjoyed learning this stitch as much as I did. Please tag me @handmadebystacyj when posting on social media – I’d love to see your makes!
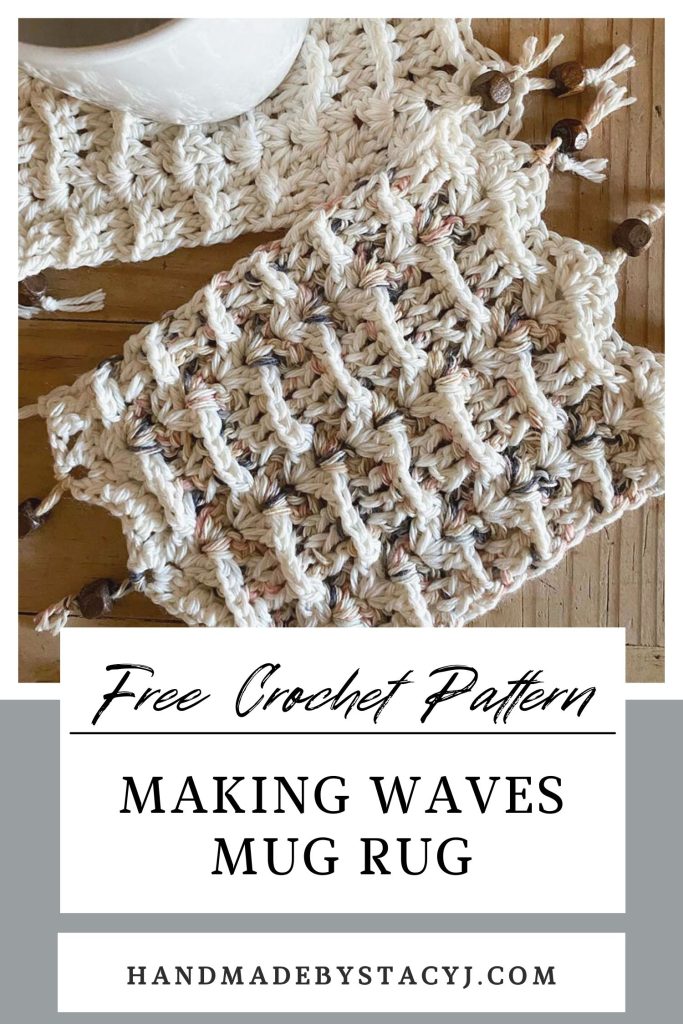
Today I am so excited to share with you the FREE crochet pattern for the Making Waves Mug Rug!
Disclosure: This post contains affiliate links. As an affiliate, when you purchase through my links, you allow the company to pay me a small commission without costing you a penny more, which allows me to continue making free content.
About the Making Waves Mug Rug
The Making Waves Mug Rug was designed for the 2023 “Cozy at Home” Crochet along with CAL Central as an accompanying pattern to the Table Runner. This crochet along’s theme was to make something cozy and comfy for your home, but also included home decor and utilitarian projects.
Each week from January 9, 2023 – March 13, 2023 a different designer released a new, never before released free crochet pattern. Well, this is my contribution! When I placed the entire set on my table to photograph, my hubby even came up to me and said, “Wow! The table looks fantastic!” So, it looks like I’ll be completing the set of placemats and adding some more mug rugs for our table now 🙂
If you’d like to see the free patterns for the table runner and the placemat, please click an image below
About the yarn
The yarn used is the Comfy Cotton Blend from Lion Brand. This is a DK / #3 light weight yarn. It offers lots of drape, is soft to use and offers lots of yardage in one skein.
This pattern is an EASY project. Therefore, a beginner could try this out, too. This free crochet pattern has been tested – thank you to all my lovely testers!
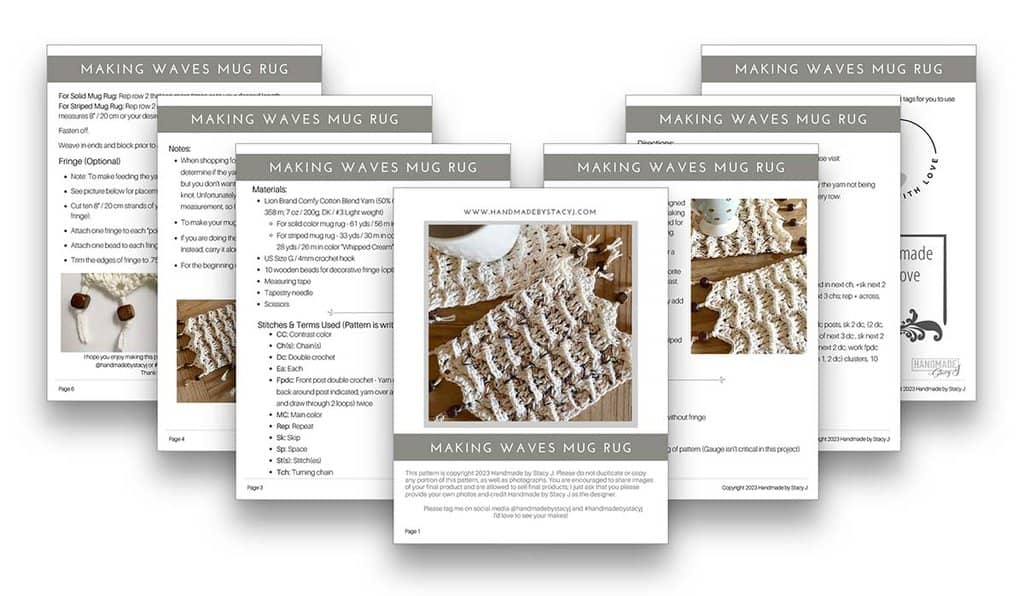
If you prefer a printable pdf that includes printable gift tags for gifting you can purchase through Ravelry (or add to your favorites or que) or you can purchase directly through my Etsy store.
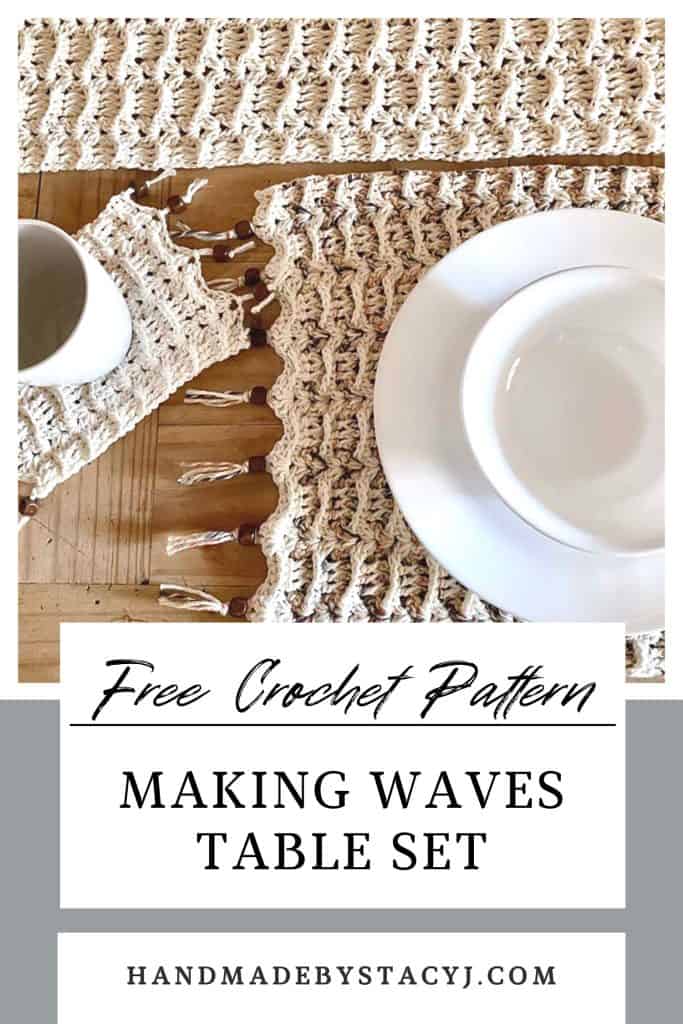
Or, purchase the COMPLETE Making Waves Table Set
The complete set includes the individual table runner, placemat and mug rug pdf patterns at a discounted price in comparison to if they were purchased individually. If you prefer to shop with Ravelry, simply add all three patterns to your cart and a discount will automatically apply or you can purchase directly from my Etsy store.
Please note that due to this being a digital download, all sales are final and no refunds will be given. Thank you for your support!
Pattern for gauge is included below, right before the pattern directions (Gauge isn’t critical with this project, but will affect yarn usage)
Stitches & Abbreviations Used
(Pattern is written in US terms):
CC: Contrast color
Ch(s): Chain(s)
Dc: Double crochet
Ea: Each
Fpdc: Front post double crochet – Yarn over, insert hook from front to back around post indicated, yarn over and draw up a loop, (yarn over and draw through 2 loops) twice
MC: Main color
Rep: Repeat
Sk: Skip
Sp: Space
St(s): Stitch(es)
Tch: Turning chain
Notes:
When shopping for beads, take 2 pieces of yarn with you to the store to determine if the yarn will fit through the bead. You want it to fit through with ease, but you don’t want the hole of the bead to be too large, as it might slide over the knot. Unfortunately, when I purchased my beads, they didn’t have a specific measurement, so I used my best judgment.
To make your mug rug wider or thinner, add or subtract in increments of 8.
If you are making the striped mug rug, do not cut the yarn at the end of each row. Instead, carry it along with your work.
For the beginning chain, chain loosely or go up a hook size.
To view the tutorial on how to crochet the Making Waves Mug Rug (this also is helpful with the placemat), please click on the video link directly above or visit my YouTube channel at: https://youtu.be/QAYYqIkyct8
Gauge Pattern:
(Gauge is not critical in this project, but will affect yarn usage)
With US G / 4mm crochet hook, loosely ch 21
Work row 1 of pattern
Work row 2 of pattern four times
Gauge swatch should measure 4” / 10 cm wide x 2 7/8” / 7.3 cm tall from the top of a shell to the bottom of the piece.
Directions for Making Waves Mug Rug:
Notes: For the striped mug rug, use the following sequence and carry the yarn (do not cut the yarn) not being currently used with your work, as you’ll be changing colors every row.
Rows 1 – 2: CC
Rows 3, 5, 7, 9, 11 and 13: MC
Rows 4, 6, 8, 10, 12: CC
Rows 14 and 15: CC
With US G / 4mm crochet hook and CC, loosely chain 29
Row 1: Dc in 4th ch from hook (3 skipped chs count as dc) and in next ch, *sk next 2 chs, (2 dc, ch 1, 2 dc) in next ch, sk next 2 chs, 1 dc in ea of next 3 chs; rep * across, turn. Stitch count: 3 (2 dc, ch 1, 2 dc) clusters, 12 dc
Row 2 (Pattern repeat): Ch 2, work fpdc around ea of next 2 dc posts, sk 2 dc, (2 dc, ch 1, 2 dc) in next ch-1 sp, *sk next 2 dc, work fpdc around ea of next 3 dc , sk next 2 dc, work (2 dc, ch 1, 2 dc) in next ch-1 sp; rep * to last 5 sts, sk next 2 dc, work fpdc around next 2 dc, dc in top of tch, turn. Stitch count: 3 (2 dc, ch 1, 2 dc) clusters, 10 fpdc, 1 dc, 1 ch-2
For Solid Mug Rug: Rep row 2 thirteen more times or to your desired length.
For Striped Mug Rug: Rep row 2 alternating colors (do not cut yarn) for each row until the piece measures 8” / 20 cm or your desired length, ending with two final rows of CC.
Fasten off.
Weave in ends and block prior to adding fringe and the beads.
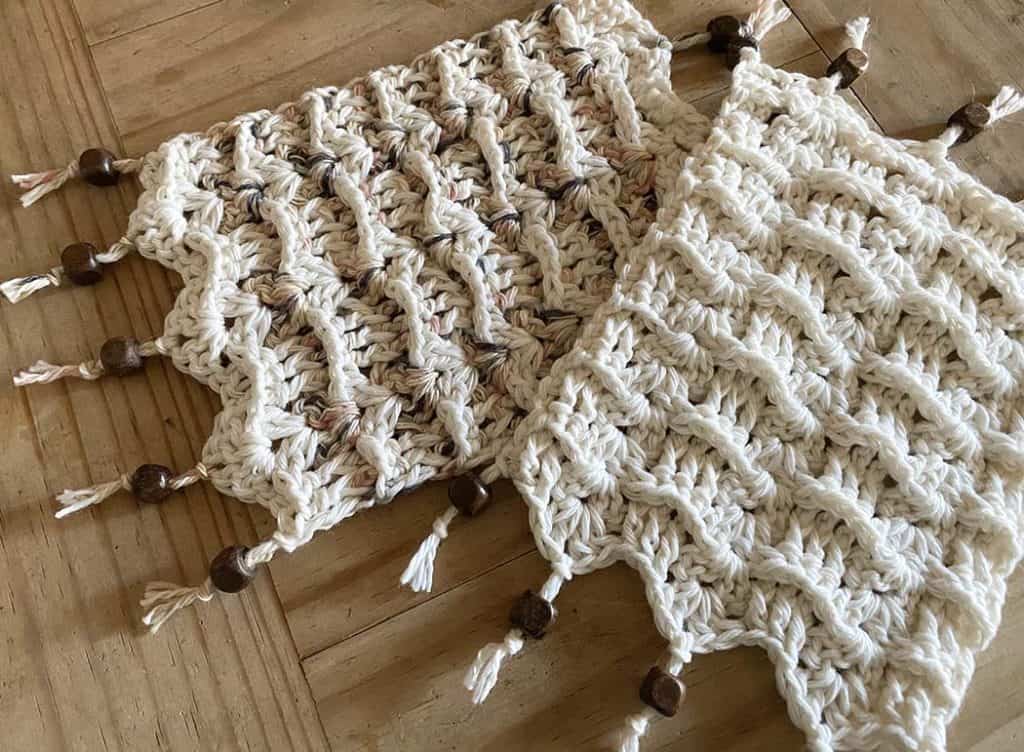
Fringe (Optional)
Note: To make feeding the yarn through the bead easier, use a tapestry needle
Cut ten 8” / 20 cm strands of yarn (If you did the striped version, use MC for fringe)
Attach one fringe to each “point” and one on each of the outer edges
Attach one bead to each fringe and then secure it with a knot.
Trim the edges of fringe to .75” / 1.9 cm or length desired
Please take pictures and tag me at #handmadebystacyj and @handmadebystacyj
This free crochet pattern is copyright 2023 Handmade by Stacy J. Please do not duplicate or copy any portion of this pattern, as well as photographs. You are encouraged to share images of your final product and are allowed to sell final products; If you sell your final product, I just ask that you please purchase the ad-free pdf and credit Handmade by Stacy J as the designer. Thank you!
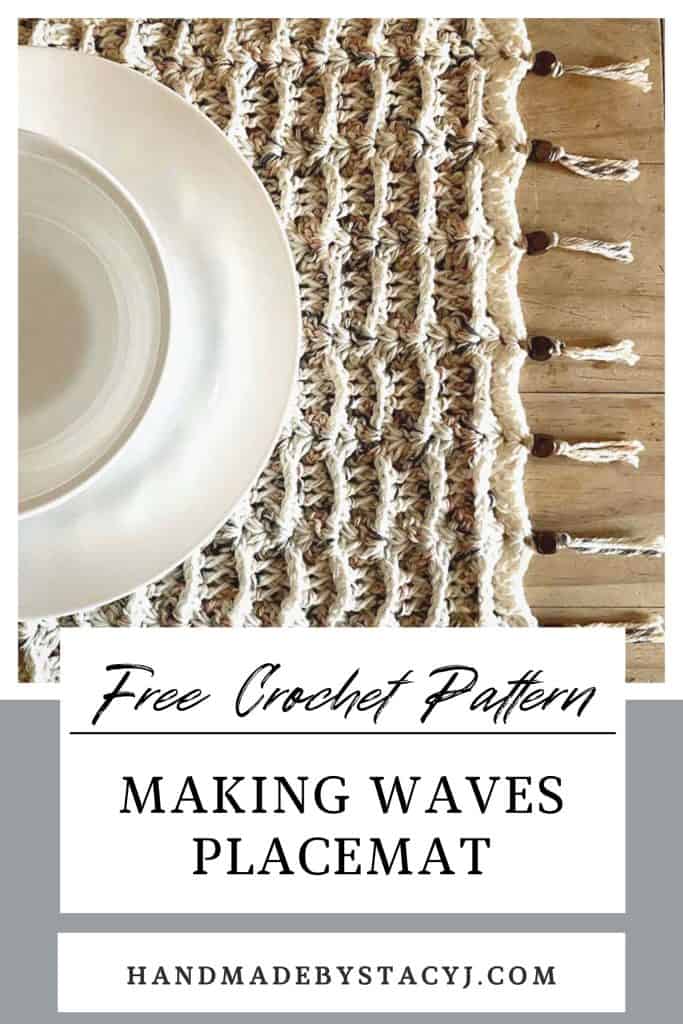
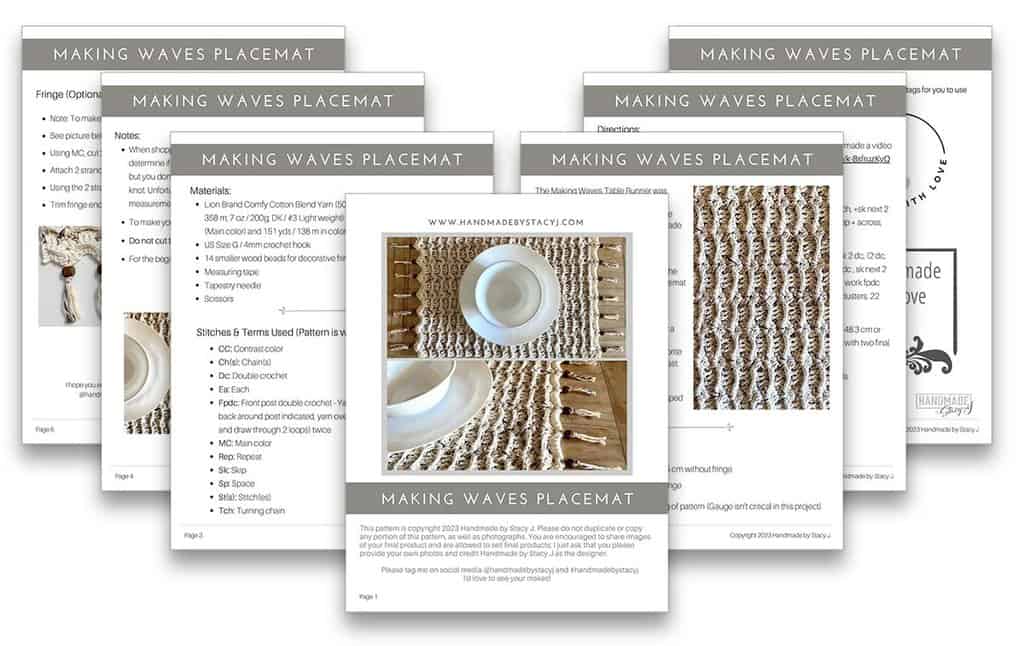
Today I am so excited to share with you the FREE crochet pattern for the Making Waves Placemat!
Disclosure: This post contains affiliate links. As an affiliate, when you purchase through my links, you allow the company to pay me a small commission without costing you a penny more, which allows me to continue making free content.
About the Making Waves Placemat
The Making Waves Placemat was designed for the 2023 “Cozy at Home” Crochet along with CAL Central as an accompanying pattern to the Table Runner. This crochet along’s theme was to make something cozy and comfy for your home, but also included home decor and utilitarian projects.
Each week from January 9, 2023 – March 13, 2023 a different designer released a new, never before released free crochet pattern. Well, this is my contribution! When I placed the entire set on my table to photograph, my hubby even came up to me and said, “Wow! The table looks fantastic!” So, it looks like I’ll be completing this set of placemats and some more mug rugs for our table now 🙂
If you’d like to see the free patterns for the table runner and the mug rug, please click on the image below.
About the yarn
The yarn used is the Comfy Cotton Blend from Lion Brand. This is a DK / #3 light weight yarn. It offers lots of drape, is soft to use and offers lots of yardage in one skein.
This free crochet pattern is an EASY project. Therefore, a beginner could try this out, too. This pattern has been tested – thank you to all my lovely testers!
If you prefer a printable pdf that includes printable gift tags for gifting you can purchase through Ravelry (or add to your favorites or que) or you can purchase directly through my Etsy store.
Or, purchase the COMPLETE Making Waves Table Set
The complete set includes the table runner, placemat and mug rug pdf patterns at a discounted price in comparison to if they were purchased individually. If you prefer to shop with Ravelry, simply add all three patterns to your cart and a discount will automatically apply or you can purchase directly from my Etsy store.
Please note that due to this being a digital download, all sales are final and no refunds will be given. Thank you for your support!
Materials:
Lion Brand Comfy Cotton Blend Yarn (50% Cotton / 50% Polyester; 392 yds / 358 m; 7 oz / 200g; DK / #3 Light weight) – 160 yds / 146 m in color “Chai Latte” (Main color) and 151 yds / 138 m in color “Whipped Cream” (Contrast color)(If you need to shop online, here is LoveCrafts link and here is my affiliate link to Lion Brand)
14 smaller wood beads for decorative fringe (optional)
Tapestry needle
Scissors
Measuring tape
Here’s a pin for you Pinterest board 🙂
Measures:
19.5” x 12.5” / 48 cm x 31.75 cm without fringe
23.5” x 12.5” / 60 cm x 31.75 cm with fringe
Difficulty Level:
Easy
Gauge:
Pattern for gauge is included below, right before the pattern directions (Gauge isn’t critical with this project, but will affect yarn usage)
Stitches & Abbreviations Used
(Pattern is written in US terms):
CC: Contrast color
Ch(s): Chain(s)
Dc: Double crochet
Ea: Each
Fpdc: Front post double crochet – Yarn over, insert hook from front to back around post indicated, yarn over and draw up a loop, (yarn over and draw through 2 loops) twice
MC: Main color
Rep: Repeat
Sk: Skip
Sp: Space
St(s): Stitch(es)
Tch: Turning chain
Notes:
When shopping for beads, take 2 pieces of yarn with you to the store to determine if the yarn will fit through the bead. You want it to fit through with ease, but you don’t want the hole of the bead to be too large, as it might slide over the knot. Unfortunately, when I purchased my beads, they didn’t have a specific measurement, so I used my best judgment.
To make your placemat wider or thinner, add or subtract in increments of 8.
Do not cut the yarn at the end of each row. Instead, carry it along with your work.
For the beginning chain, chain loosely or go up a hook size.
To view the tutorial on how to carry the yarn, I’ve created a video of the Making Waves Mug Rug that will demonstrate that and will also walk you through how to do the stitches for the placemat (see link above).
Gauge Pattern:
(Gauge is not critical in this project, but will affect yarn usage)
With US G / 4mm crochet hook, loosely ch 21
Work row 1 of pattern
Work row 2 of pattern four times
Gauge swatch should measure 4” / 10 cm wide x 2 7/8” / 7.3 cm tall from the top of a shell to the bottom of the piece.
Directions for Making Waves Placemat:
Using US G / 4mm crochet hook and CC, loosely chain 61
Row 1: Dc in 4th ch from hook (3 skipped chs count as dc) and in next ch, *sk next 2 chs, (2 dc, ch 1, 2 dc) in next ch, sk next 2 chs, 1 dc in ea of next 3 chs; rep * across, turn. Stitch count: 7 (2 dc, ch 1, 2 dc) clusters, 24 dc
Row 2 (Pattern repeat): Ch 2, work fpdc around ea of next 2 dc posts, sk 2 dc, (2 dc, ch 1, 2 dc) in next ch-1 sp, *sk next 2 dc, work fpdc around ea of next 3 dc , sk next 2 dc, work (2 dc, ch 1, 2 dc) in next ch-1 sp; rep * to last 5 sts, sk next 2 dc, work fpdc around next 2 dc, dc in top of tch, turn. Stitch count: 7 (2 dc, ch 1, 2 dc) clusters, 22 fpdc, 1 dc, 1 ch-2
Rep row 2 alternating colors (do not cut yarn) for each row until the piece measures 19” / 48.3 cm or your desired length, ending with two final rows of CC.
Fasten off. Weave in ends and block prior to adding fringe and the beads.
Weave in ends and block prior to adding the beads.
Fringe (Optional)
Note: To make feeding the yarn through the bead easier, use a tapestry needle
Using MC, cut 28 strands of 10” / 25.4 cm length for fringe
Attach 2 strands to each “point” on the short ends of the placemat
Using the 2 strands at each “point”, strand one bead and secure with a knot
This free crochet pattern is copyright 2023 Handmade by Stacy J. Please do not duplicate or copy any portion of this pattern, as well as photographs. You are encouraged to share images of your final product and are allowed to sell final products; If you sell your final product, I just ask that you please purchase the ad-free pdf and credit Handmade by Stacy J as the designer. Thank you!