Birthday Sorbet Baby Blanket

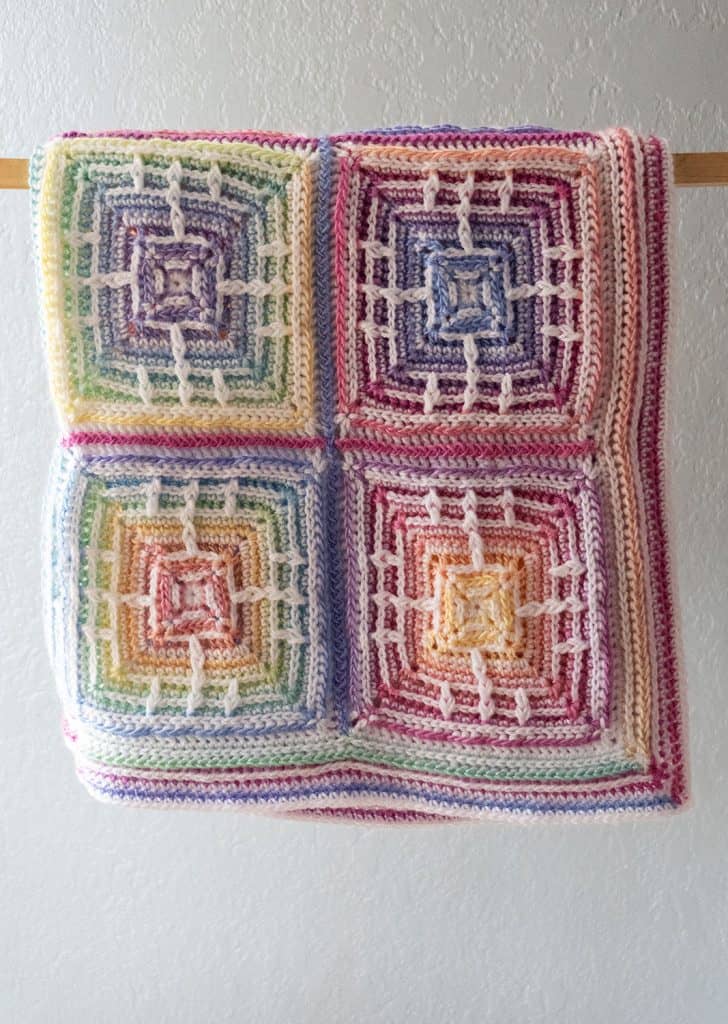
Today I am so excited to share with you the FREE crochet pattern for the Birthday Sorbet Baby Blanket!

Disclosure: This post contains affiliate links. As an affiliate, when you purchase through my links, you allow the company to pay me a small commission without costing you a penny more, which allows me to continue making free content.

About the Birthday Sorbet Baby Blanket

The Birthday Sorbet Baby Blanket was inspired by a friend of mine that requested a fun, happy blanket for a new baby. He gave me complete creative freedom to create whatever called to me. The idea of a colorful C2C blanket with some added texture was all I could think about. So, the Birthday Sorbet Baby Blanket was born!

My testers rated this pattern as “Easy”, making it the perfect project to make as you watch your favorite program or listen to your favorite podcast.

On a side note, I want to extend a big “Thank You!” to all of my testers that helped with this design!


Here’s a pin for you Pinterest board

About the yarn

The yarn used was provided to me from Mary Maxim. It’s the Mary Maxim “Mellowspun DK”. This is a DK / #3 light weight yarn that is 100% acrylic. It works up beautifully, is machine washable and there are LOTS of colors to choose from.


If you prefer a printable pdf that includes higher resolution charts, 16 point font for easier reading and printable gift tags for gifting, you can purchase through Ravelry (or add to your favorites or que) or you can purchase directly through me and save 10% (Valid for US residents only).

Due to this being a digital download, no refunds will be given. Thank you!

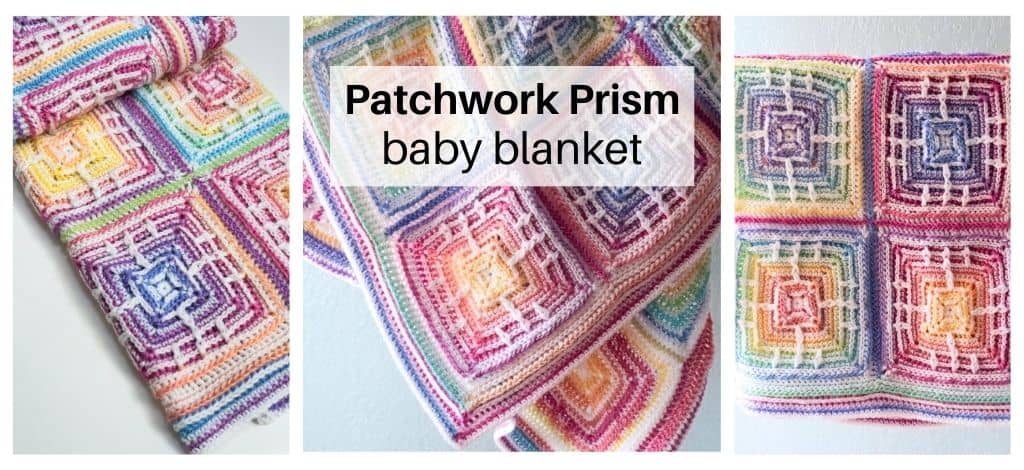
Birthday Sorbet Crochet Pattern collage from Handmade by Stacy J

Materials:

Measures: 

  • Body (C2C portion): 34” x 34”  / 86 cm x 86 cm
  • Final Size: 40” x 40”  / 102 cm x 102 cm

Difficulty Level: 

Easy-ish

Gauge: 

C2C pattern 6 blocks x 6 blocks: 4.25” / 10.8 cm (Gauge isn’t critical in this project, but will affect yarn usage)

Horizontal gauge for Birthday Sorbet free crochet pattern from Handmade by Stacy J
Vertical gauge for Birthday Sorbet free crochet pattern from Handmade by Stacy J

Stitches & Abbreviations Used 

(Pattern is written in US terms):

  • 3dc Cluster: Yo, insert hook in indicated st, yo, draw through 2 loops, yo, insert hook in same st, yo, draw through 2 loops, yo, insert hook in same st, yo, draw through 2 loops, yo, draw through all 4 loops left on hook; leaving st behind cluster unworked
  • Bpdc: Back post double crochet – Yo and insert hook from back to front around post of indicated stitch, yo and draw yarn around post of st, yo and draw through two loops, yo and draw through remaining 2 loops
  • C2C: Corner to corner
  • Ch(s): Chain(s)
  • Dc:  Double crochet
  • Fpdc: Front post double crochet – Yo and insert hook from front to back around post of indicated stitch, yo and draw yarn around post of st, yo and draw through two loops, yo and draw through remaining 2 loops; leaving the st behind unworked
  • Hdc: Half double crochet
  • Pop: Popcorn – 5 dc in same st, pull out hook and insert from front to back under top 2 loops of first dc, insert hook in dropped loop and pull through stitch, ch 1 to close stitch
  • Rep: Repeat
  • RS: Right Side
  • Sc: Single crochet
  • Sl st: Slip Stitch
  • Sp: Space
  • St(s): Stitch(es)
  • Standing hdc: Standing half double crochet – With slip knot on hook, yo, insert hook in sp indicated, yo, draw through all 3 loops on hook
  • Standing sc: Standing single crochet – With slip knot on hook, insert hook in sp indicated, yo, draw through 2 loops on hook
  • WS: Wrong side
  • Yo: Yarn over

If you prefer a printable pdf that includes higher resolution charts, 16 point font for easier reading and printable gift tags for gifting, you can purchase through Ravelry (or add to your favorites or que) or you can purchase directly through me and save 10% (Valid for US residents only).

Due to this being a digital download, no refunds will be given. Thank you!

Directions for Body of Birthday Sorbet Baby Blanket:

Notes:

  • Before beginning your blanket, please print a chart at the end of the pattern to help with color placement – there is a color chart available, as well as a greyscale chart that you can use to customize your own color choices.
  • Total amount of C2C blocks on each side is 45; You can easily adjust the size by adding or subtracting more rows. However, yarn quantities will vary, as will the placement of some border stitches.
  • An easy way to help remember placement is that the CC rows always contain popcorns and the MC rows are only C2C

To view the tutorial on how to crochet the body of the Birthday Sorbet blanket Free Crochet Pattern, please click on the video link directly above or visit my YouTube channel at: https://youtu.be/NZsr_Eb9bAs

C2C Increase

Row 1: With MC, ch 6, in 4th ch from hook work 1 dc, 1 dc in ea of remaining 2 chs

Ch 6, work 1 dc in 4th ch from hook and remaining 2 chs, sl st in ch-3 sp from previous block, ch 3, work 3 dc in ch-3 sp

Rows 3 & 4: Repeat row 2 two more times

Row 5: Popcorn Row: Changing to designated CC, Ch 6, work 1 dc in 4th ch from hook and remaining 2 chs, *sl st in ch-3 sp from previous block, ch 3, work 1 dc, 1 pop, 1 dc in ch-3 sp; rep * to the last block; in the last block, do not work popcorn, instead work 3 dc in ch-sp.

Continue repeating rows 2-5 in the sequence of repeating rows 2-4 in MC, 1 row repeat of row 5 in CC.

When you complete your 45th row (a popcorn row) you’ll begin decreasing (this is the middle of the blanket).

To see step by step photos of how to work a C2C increase, please check out the images below.


C2C Decrease

  • Turn, then begin with sl st in each of the next 3 dc, sl st in ch-3 sp, ch 3, work 3 dc in ch-3 sp, sl st in next blocks ch-3 sp; proceed to end of row by working C2C pattern (sl st in ch-3 sp from previous block, ch 3, work 3 dc in ch-3 sp), ending with sl st in last ch-3 sp (When changing colors, do so after completing 3 sl sts over the beg 3 dc)
  • Repeat row 1 of C2C Decrease until you have one block left working in the sequence of 3 rows in MC, 1 pop row in CC; your final 4 rows will all be using MC and not incorporating the pop st (as in the beg rows of blanket pattern)

To see step by step photos of how to work the C2C decrease, please view the images below.


Border

Notes:

  • Do not turn; RS will always be facing
  • There will always be a total of four ch-2 sps and those are not included in the stitch count.

Directions for Birthday Sorbet Border

  1. With RS facing and MC, join with standing sc in any corner and work 2 more sc in the same c2c block. Working around Blanket, work 3 sc in each block, (ch2 , then 3 more sc in each corner); end with ch 2 and sl st in top of first standing sc, fasten off. Each side: 135 sc
  2. With CC2, join with standing hdc in any corner. Work 1 hdc in each st around, working (1 hdc, ch 2, 1 hdc) in each corner ch sp; end with (1hdc, ch 2) in final ch sp and join with sl st to first standing hdc, fasten off. Each side: 137 hdc
  3. With MC, join in any corner ch sp a standing hdc, work 1 bpdc around each post from row 2, working (1 hdc, ch 2, 1 hdc) in each corner; end with (1 hdc, ch 2) in last corner and join with sl st to top of beginning hdc; fasten off. Each side: 137 bpdc, 2 hdc
  4. (Note: make sure that your slip stitches are not too tight, otherwise they may pull your work and be difficult to work into on the next row). With CC1, join in any corner ch sp with standing sc, [work 1 sl st in ea of next 3 sts, *work 1 3-dc cluster st in top of next st 2 rows below, 1 sl st in ea of next 5 sts; rep * until 4 sts rem to corner sp , work 1 3-dc cluster, 1 sl st in ea of next 3 sts, (1 sc, ch2, 1 sc) in corner ch sp]; Rep [ ] 3 more times ending in last corner ch sp with (sc, ch2, join with sl st to top of standing sc). fasten off.  Each side: 23 clusters, 2 sc, 116 sl st
  5. With RS facing and MC, join with standing hdc in any corner ch sp, *work 1 hdc in each sl st and 1 fpdc around each 3dc cluster; work (hdc, ch 2, hdc) in each corner ; rep * around ending with ( hdc, ch 2) join with sl st in top of first standing hdc in last corner ch sp, fasten off. Each side: 120 hdc, 23 fpdc
  6. With CC10, join with standing hdc in any corner ch sp, *work I hdc in each st and (hdc, ch 2, hdc) in each corner sp; rep * around. End with  (hdc, ch 2) in last ch sp, join with sl st to top of first standing hdc, fasten off.  Each side: 145 hdc
  7. With MC, rep row 3. Each side:145 bpdc, 2 hdc
  8. This is essentially a repeat of row 4; your 3dc clusters will be centered above the two 3dc clusters made in row 4.  With CC7, join with standing sc in any corner space. [Work 1 sl st in ea of the next 4 sts, *work a 3dc cluster in the stitch 2 rows below (where the color ridge is formed), 1 sl st in ea of the next 5 st; rep * across until 5 sts rem to corner, work 1 3dc cluster, 4 sl st, then work (sc, ch 2, sc) in corner]; rep [ ] 3 more times ending with sc, ch2, join to top of standing sc with sl st, fasten off. Each side: 25 clusters, 2 sc, 122 sl st
  9. With MC, rep row 5. Each side: 126 hdc, 25 fpdc
  10. With CC5, rep row 6. Each side: 153 hdc
  11. With CC8, rep row 6. Each side: 155 hdc
  12. Weave in your ends, block and enjoy!

Here are the free charts to help with your color placement

Color Chart

Greyscale Chart

Please take pictures and tag me at #handmadebystacyj and @handmadebystacyj

Subscribe on YouTubeJoin me on FacebookFollow on Instagram

Patterns on RavelryInspiration on Pinterest

This free crochet pattern is copyright 2023 Handmade by Stacy J. Please do not duplicate or copy any portion of this pattern, as well as photographs. You are encouraged to share images of your final product and are allowed to sell final products; If you sell your final product, I just ask that you please purchase the ad-free pdf and credit Handmade by Stacy J as the designer. Thank you!

Tiny Gems Baby Blanket

The inspiration of the blanket

The Tiny Gems Baby Blanket is a free knitting pattern that was inspired by a dishcloth that I designed in 2020. It uses the Seersucker or Padded Diamonds stitch that adds a beautiful texture. It’s framed on the inside with a stockinette panel and the outside is worked with garter stitch. It’s all worked in one piece, so the borders are worked at the same time as the body of the blanket.

If you’d like to check out the free knitting pattern for the dishcloth that inspired this blanket, here’s the link.

About the yarn

As I was picking out the colors, the King Cole “Little Treasures Double Knitting” yarn in the color “Jem” really called out to me. It has hints of greens, yellows, cream and a touch of pinks / purples. It’s a fairly neutral color for babies and is oh-so-soft. It works up like a dream and there were very few knots. I used just under 4 skeins for this project.

The blanket uses size US 8 / 5 mm knitting needles and works over an 8 row repeat.


Disclosure: The Tiny Gems Blanket post contains affiliate links. As an affiliate, when you purchase through my links, you allow the company to pay me a small commission without costing you a penny more, which allows me to continue making free content. The yarn for this pattern was provided to me from King Cole – I am a King Cole Brand Ambassador and this post is part of our ongoing collaboration. Thank you for your support!

About the blanket

The Tiny Gems Baby Blanket works over an 8 row repeat and the stitches are worked in increments of 4. Therefore, you can adjust the size as you like. One of my testers even turned the blanket into a doll blanket for one of her granddaughters! The framing is worked as you work the blanket, so there’s no picking up stitches or adding to the blanket once the body is completed.

The blanket is sized for a 42″ x 42″ and the terms are written using US terminology. I’ve created a video to help with your blanket


If you prefer and ad free pdf that includes a chart, checklist, larger font and gift tags for gifting your blanket, you can click here to purchase off of Ravelry (or add it to your favorites or que), or you can click here to purchase directly from me and save 10%. (The 10% discount from me is only valid for US residents.)

Here’s a pin to add to your Pinterest board 🙂

Materials needed:

Measures: 42″ x 42″ / 107 cm x 107 cm

Gauge: 16 sts x 24 rows = 4” x 4” / 10 cm x 10 cm in stockinette stitch

Pattern Difficulty level: Easy

If you prefer and ad free pdf that includes a chart, checklist, larger font and gift tags for gifting your blanket, you can click here to purchase off of Ravelry (or add it to your favorites or que), or you can click here to purchase directly from me and save 10% (The 10% discount from me is valid only for US residents).

Tiny Gems Baby Blanket Pattern example from Handmade by Stacy J

Stitches & Terms Used

(Pattern is written in US terms):

Bind off

Garter Stitch: Knit each row

K: Knit

Long Tail cast on

P: Purl

Pm: Place marker

Rep: Repeat

Rm: Remove marker

Rs: Right side

Sm: Stitch marker

St (s): Stitch (es)

WS: Wrong side

Notes:

  • To make blanket larger or smaller, add or subtract in increments of 4
  • Some of my testers needed to do 3 more repeats of the body to meet the measurement
Tiny Gems Baby Blanket free knitting pattern from Handmade by Stacy J

Directions for Tiny Gems Baby Blanket

Click here to view the video tutorial

Using Long tail cast on method, cast on 154

Bottom Panel:

Work 26 rows in Garter stitch

Bottom Framing:

Row 1 (RS): K17, pm, p2, pm, k116, pm, p2, pm, k17

2 (WS): K19, p116, k19

3 – 8: Rep rows 1-2 three more times, slipping markers as you come to them

9: As row 1

10 (WS): K19, p8, pm, k2, pm, k96, pm, k2, pm, p8, k19

Tiny Gems Baby Blanket free knitting pattern from Handmade by Stacy J

Pattern:

Row 1 (RS): K17, p2, k8, p2, *k1, p1; rep * to next sm, p2, k8, p2, k17

2 (WS): K19, p8, k2, *k1, p1; rep * to next sm, k2, p8, k19

3: K17, p2, k8, p2, *p1, k3; rep * to next sm, p2, k8, p2, k17

4: K19, p8, k2, *p3, k1; rep * to next sm, k2, p8, k19

5: As row 1

6: As row 2

7: K17, p2, k8, p2, *k2, p1, k1; rep * to next sm, p2, k8, p2, k17

8: K19, p8, k2, *p1, k1, p2; rep * to next sm, k2, p8, k19

Repeat rows 1-8  sixteen more times or until entire piece measures 34” / 86.4 cm

Next row (RS): Repeat Pattern row 1 once more

Tiny Gems Baby Blanket free knitting pattern from Handmade by Stacy J

Top Framing:

Row 1 (WS): K19, p8, Rm, k2, Rm, k96, Rm, k2, Rm, p8, k19

2 (RS): K17, p2, k116, p2, k17

3: K19, p116, k19

4 – 9: Repeat rows 2-3 three more times

10: Repeat row 2 once more

Top Panel:

Work garter st for 26 rows and remove markers as you come to them.

Bind off loosely, knit wise

Weave in any ends, then block and enjoy.

When you’re all done, please take pictures and tag me on social media @handmadebystacyj or #handmadebystacyj so that I can see your beautiful blanket 🙂

Subscribe on YouTubeJoin me on FacebookFollow on Instagram

Patterns on RavelryInspiration on Pinterest

This free knitting pattern is copyright 2022 Handmade by Stacy J. Please do not duplicate or copy any portion of this pattern, as well as photographs. You are encouraged to share images of your final product and are allowed to sell final products; I just ask that if you sell your final product, please purchase the ad-free pdf, provide your own photographs and that you please credit Handmade by Stacy J as the designer. Thank you for your support!

Paislee Baby Blanket

This written pattern for the Paislee Baby Blanket can be used with the video tutorial on the “Handmade by Stacy J” YouTube channel. It‘s a beginner friendly crochet pattern that makes a beautiful baby blanket. There is also a checklist attached to the pattern to help keep track of rows; And, you can access that by scrolling to the bottom of this page. Enjoy!


Difficulty level:

Easy

Stitches & Abbreviations Used:

Pattern is written in US Terms

Beg: Beginning

Bphdc: Back post half double crochet

Ch: Chain

Dc: Double Crochet 

Hdc: Half Double Crochet

MC: Main Color

Rep: Repeat

Sc: Single Crochet

Sk: Skip

Sl St: Slip Stitch

St (s): Stitch (es)


Here’s a pin for your Pinterest board

Disclosure: If you choose to purchase your yarn through my affiliate links, please know that you will be allowing the companies to pay me a small commission without costing you a penny more. This allows me to continue creating free content. Thank you for your support!!

Materials:

Size G+ (4.5 mm) Crochet Hook

Size H (5 mm) Crochet Hook

Main Color: Baby Bee Sweet Delight Prints (60% Acrylic / 40% Polyamide; 4 oz skein; Size 3 Lightweight) “Gageboy / #304” – 3.5 skeins (1319 yards)

#1 Accent Color: Baby Bee Soft & Sleek Baby Low-Pill Fiber (100% Low Pill Acrylic; 4 oz skein; Size 4 Medium weight) “Flannel / #030” –  (104 yards)

#2 Accent Color: Baby Bee Soft Stork Struck (50% Acrylic / 50% Tencil; 3.5 oz skein; Size 4 Medium weight) “Mint Charm / #05” – .5 skeins (104 yards)

#3 Accent Color: Baby Bee Soft Stork Struck (50% Acrylic / 50% Tencil; 3.5 oz skein; Size 4 Medium weight) “Baby’s Blue / #06” – .5 skeins (104 yards)

Tapestry needle

One stitch marker

Scissors


Measures:

35” x 28” before border and 40” x 34” with border

Gauge:

4”: 7 clusters x 15 rows / 25 rows: 7” / 50 rows: 14”

Gauge isn’t very important, however your yarn quantity will vary depending on your gauge.

Directions for Paislee Baby Blanket:

A video tutorial is available at: https://youtu.be/u9vtPzPaAUo and at the top of this pattern.

Body of blanket:

To adjust size, work in multiples of 3 + 2 and add 1 for the base chain

Ch 189 with Main Color and G+ (4.5 mm) hook

1. (RS) Skip 2 ch (counts as 1 sc), *work [1 sc, ch 1, 1 dc] into next ch, skip 2 ch; rep from * ending 1 sc into last ch, turn. 62 clusters


2. (WS) Ch 2, skip 1st sc and next dc, *work [1 sc, ch 1, 1 dc] into next ch sp, skip sc and dc; rep from * ending with [1 sc, ch 1, 1 dc] into last ch sp, skip next sc, 1 hdc into top of last sc in row 1, turn. 62 clusters


3. (RS) Ch 2, skip 1st hdc and next dc, *work [1 sc, ch 1, 1 dc] into next ch sp, skip sc and dc; rep from * ending with [1 sc, ch 1, 1 dc] into last ch sp, skip next sc, 1 hdc into top of last hdc in previous row, turn. 62 clusters


4. Rep row three 97 more times or until work measures 28”; Do not fasten off, turn.

Paislee Baby Blanket border from Handmade by Stacy J

Border:

Use H (5.00 mm) hook / Right side is always facing (Do not turn)

1. With right side facing and Main color yarn, ch 1 (does not count as sc), make [1 sc, ch 2, 1 sc] in same corner, *work 1 sc in each st across, in corner [1 sc, ch 2, 1 sc], rep * around omitting [1 sc, ch 2, 1 sc] in first corner that has already been worked; then join with sl st to top of first sc; Do not turn.

2. Sl st in corner sp, ch 3 (counts as hdc and ch 1), 1 hdc in same corner sp, *work 1 hdc in each st across, in corner work [1 hdc, ch 1, 1 hdc], rep * around and then join with sl st to 2nd ch, fasten off and weave in ends. Do not turn.

3. With Accent Yarn #3 (Blue), join with standing sc in any corner, ch 2, 1 sc in same corner, *work 1 bphdc around each post across, in corner work [1 sc, ch 2, 1 sc], rep * around and then join with sl st to top of first sc, do NOT fasten off;  Do not turn.

4. Continuing with Blue yarn, Sl st in corner sp, ch 3 (counts as hdc and ch 1), 1 hdc in same corner sp, *work 1 hdc in each st across, in corner work [1 hdc, ch 1, 1 hdc], rep * around and then join with sl st to 2nd ch, fasten off and weave in ends. Do not turn.

5. With Accent Yarn #1 (Flannel Gray), join with standing sc in any corner, ch 2, 1 sc in same corner, *work 1 bphdc around each post across, in corner work [1 sc, ch 2, 1 sc], rep * around and then join with sl st to top of first sc, do NOT fasten off;  Do not turn.

6. Continuing with Gray yarn, Sl st in corner sp, ch 3 (counts as hdc and ch 1), 1 hdc in same corner sp, *work 1 hdc in each st across, in corner work [1 hdc, ch 1, 1 hdc], rep * around and then join with sl st to 2nd ch, fasten off and weave in ends. Do not turn.

7. With Accent Yarn #2 (Mint Charm Green), join with standing sc in any corner, ch 2, 1 sc in same corner, *work 1 bphdc around each post across, in corner work [1 sc, ch 2, 1 sc], rep * around and then join with sl st to top of first sc, do NOT fasten off;  Do not turn.

8. Continuing with Green yarn, Sl st in corner sp, ch 3 (counts as hdc and ch 1), 1 hdc in same corner sp, *work 1 hdc in each st across, in corner work [1 hdc, ch 1, 1 hdc], rep * around and then join with sl st to 2nd ch, fasten off and weave in ends. Do not turn.

9. With Main Color yarn, join with standing sc in any corner, ch 2, 1 sc in same corner, *work 1 bphdc around each post across, in corner work [1 sc, ch 2, 1 sc], rep * around and then join with sl st to top of first sc, do NOT fasten off;  Do not turn.

10. Continuing with Main Color yarn, Sl st in corner ch sp, ch 3 (counts as dc and ch 1), 1 sc in same corner sp, sk 1 st, *work [1sc, ch 1, 1 dc] in next st, sk 1 st; Rep * around, working [1 sc, ch 1, 2 dc, ch 1, 1 sc] in corner ch spaces; in last corner sp, end with [1 sc, ch 1, 1 dc] and join with sl st to 2nd ch; fasten off and weave in ends. 


If you prefer a pdf with a checklist, please feel free to download and print the link below.

Paislee-Blanket-Pattern

Please tag me on your finished blanket @handmadebystacyj and #handmadebystacyj – I’d love to see it!

This pattern is ©2020 Handmade by Stacy J.  You are welcome and encouraged to gift or sell your projects made from this pattern. However, you may not sell or distribute this pattern, it’s images or content in any way; please direct your followers to the pattern link instead.

Subscribe on YouTubeJoin me on FacebookFollow on Instagram

Patterns on RavelryInspiration on Pinterest

Ridges & Lace Baby Blanket

The Ridges & Lace Baby Blanket is free knitting pattern that is a simple and quick knit to make for the little one in your life. It has lots of drape, not very heavy, works up in just a few days and uses very simple stitches – this would be a great first blanket for a newer knitter to try or a palette cleanser for an advanced knitter looking for simple project.

With less than 3 skeins of yarn used, it could also be a great stash buster or an inexpensive gift to create for someone special.

Ridges & Lace Baby Blanket - free knitting pattern from Handmade by Stacy J
Here’s a pin for your Pinterest board 🙂

About the blanket

The Ridges & Lace Baby Blanket is a rectangular shaped blanket, but can easily be made more square by doing more repeats of sections A-D. It can also be made wider, as the body is worked in stitch increments of 2. Please note that your yarn quantity will vary if you choose to change the size.

This pattern has been tested. Some testers chose to do another repeat of sections A-D and they did not require another ball of yarn. Instead, they used up what yarn they had remaining.

This pattern was inspired by the Eyelet Lace Dishcloth that I designed during my “Learn to Knit” series. Click here to check out that pattern.

Disclosure: This post contains affiliate links – by purchasing through my links, you allow the companies to pay me a small commission without costing you any more. This allows me to continue making free content. Thank you for your support!

If you prefer a printable pdf of the Ridges & Lace Baby Blanket that includes a chart, a checklist to help keep track of your rows and printable gift tags for gifting your blanket, you can purchase through Ravelry (or add to your favorites or que) or you can purchase directly through me and save 10%! The 10% discount is valid for US residents only. Due to this pattern being a digital download, no refunds will be given. Thank you for your support!


Ridges and Lace Baby Blanket pattern collage

Measures:

40″ x 29″ / 101 cm x 73 cm


Difficulty Level: 

Easy


Gauge in Stockinette Stitch:

20 sts x 24 rows in Stockinette Stitch = 4″ or 10 cm.


Materials Needed:


Ridges & Lace Baby Blanket free knitting pattern from Handmade by Stacy J

Stitches & Terms Used

(Pattern is written in US terms):

K: Knit

P: Purl

SM: Stitch Marker

K2tog: Knit 2 together

Yo: Yarn over

PM: Place Marker

RS: Right Side

WS: Wrong Side

Garter Stitch: Knitting each stitch on each side

If you prefer a printable pdf of the Ridges & Lace Baby Blanket that includes a chart, a checklist to help keep track of your rows and printable gift tags for gifting your blanket, you can purchase through Ravelry (or add to your favorites or que) or you can purchase directly through me and save 10%! The 10% discount is valid for US residents only. Due to this pattern being a digital download, no refunds will be given. Thank you for your support!


Directions for Ridges & Lace Baby Blanket:

Cast on 160 using German Twist or preferred stretchy Cast on Method
 

Bottom Panel:

Work 20 rows in Garter stitch
 

Bottom Framing:

1 (RS): k12, pm, k136, pm, k12
2 (WS): k12, p to m, k12
3: K across
4 – 5: Rep rows 2-3 once more
6: As row 2

Garter Ridge:

1 (RS): K across
2 (WS): K12, p5, pm, k2, pm, k122, pm, k2, pm, p5, k12

A: Stockinette Panel

1 (RS): K across
2 (WS): K12, p5, k2, p122, k2, p5, k12
3-8: Rep rows 1-2 three times

B: Garter Ridge

1 (RS): K across
2 (WS): K12, p5, k2, k122, k2, p5, k12

C: Lace Panel

1 (RS): K across
2 (WS): K12, p5, k2, p122, k2, p5, k12
3: K20, (yo, k2tog) to last st before m, k20
4: As row 2
5: K across
6: As row 2
7: K21, (yo, k2tog) to 2nd st before m, k21
8: As row 2
9: K across
10: As row 2
11: As row 3
12: As row 2

D: Garter Ridge

1 (RS): K across
2 (WS): K12, p5, k2, k122, k2, p5, k12


Repeat sections A-D four more times or until desired length.
Repeat sections A – B once more

Ridges and Lace Baby Blanket free knitting pattern from Handmade by Stacy J

Top Framing:

1 (RS): K17, remove m, k2, remove m, k122, remove m, k2, remove m, k17
2 (WS): K12, p to m, k12
3: K across
4-5: Rep rows 2 & 3
6: As row 2
 

Top Panel:

Work garter st for 20 rows, removing markers as you come to them.
 

Bind off loosely, knit wise

Weave in your ends, block, enjoy and tag me on your makes @handmadebystacyj or #handmadebystacyj – I’d love to see them!

If you’d like to view some more blankets that I’ve designed, please click on any of the images below. You’ll then be directed to that specific free knitting pattern


This free knitting pattern is copyright 2022 Handmade by Stacy J. Please do not duplicate or copy any portion of this pattern, as well as photographs. You are encouraged to share images of your final product and are allowed to sell final products; I just ask that if you sell your final product, please purchase the ad-free pdf, provide your own photographs and that you please credit Handmade by Stacy J as the designer. Thank you for your support!

Subscribe on YouTubeJoin me on FacebookFollow on Instagram

Patterns on RavelryInspiration on Pinterest

Spring Ripples Baby Blanket

The Spring Ripples Baby Blanket is a super quick and easy blanket to crochet! It uses two strands of DK weight yarn held together and worked up for me in a weekend. It also has a pattern that is very easy to remember.

The yarn is extremely affordable through LoveCrafts and would be a great stash buster, as the contrasting colors only use about half a skein each. Just grab a main color and some fun contrasting colors and you can have a blanket in less time that it takes to decide on the colors! 

This is an easy pattern that only uses a variation of double crochet, so a beginner could tackle this pretty easily. The hook size used makes this a dense and squishy blanket; if you would like yours a little more drapey, try using a larger hook; Some of my testers used worsted weight yarn with a K hook. Just keep in mind that your yarn usage will vary.


Difficulty level:

Easy

Stitches & Abbreviations Used:

Written in US Terms

Beg: Beginning

CC: Contrasting Color

Ch: Chain

Dc: Double Crochet 

Dc3tog: Double Crochet 3 Together – Worked over 3 sts [Yarn over, insert hook in next stitch, yarn over and pull up loop, yarn over, draw through 2 loops] 3 times (4 loops on hook), yarn over, draw through all loops on hook —2 stitches decreased

MC: Main Color

Pc: Popcorn (When working Pc, do NOT ch 1 to close the st) Work 5 double crochet (dc) stitches in the same stitch, drop the loop from your hook, insert your hook from front to back under the top 2 loops of the first double crochet of the group, grab the dropped loop with your hook, as well as the dropped CC and pull it through the stitch, do NOT ch 1.

Rep: Repeat

Sk: Skip

Sl St: Slip Stitch

St (s): Stitch (es)

Tch: Turning Chain


Pin of Spring Ripples Baby Blanket crocheted by Handmade by Stacy J
Here’s a pin for your Pinterest board

Disclosure: If you choose to purchase your yarn through my affiliate links, please know that you will be allowing the companies to pay me a small commission without costing you a penny more. This allows me to continue creating free content. Thank you for your support!!

Materials:

Size I (5.5mm) Crochet Hook

Hayfield Bonus DK Yarn 100g / 3.5 oz; 100% Acrylic; 280 m / 306 yds  in colors:

    (MC) Color #993 – Aran:  4.5 skeins / 450g; 1377 yds / 1260 m

    (CC-A) Color #957 Primrose: 0.5 skein / 50g; 153 yds / 140 m

    (CC-B) Color #585 Petal Pink: 0.5 skein / 50g; 153 yds / 140 m

    (CC-C) Color #959 Lilac Purple: 0.5 skein / 50g; 153 yds / 140 m

    (CC-D) Color #730 Ice Blue: 0.5 skein / 50g; 153 yds / 140 m

    (CC-E) Color #956 Mint Green: 0.5 skein / 50g; 153 yds / 140 m

Tapestry Needle and Scissors


Measures:

29” x 35” (73.7 cm x 88.9 cm) without fringe

Gauge:

Working Dc with two strands of yarn held together, 12 sts x 7 rows = 4”

Gauge isn’t very important, however your yarn quantity will vary depending on your gauge.

Notes: 

  • Two strands are held together at all times, with MC being one strand throughout, except for when making the Popcorn stitch.
  • Pattern may be made wider by adding stitches in multiples of 14 (+2 for base chain)
  • Stitch count of 98 sts will be the same on every row

To purchase an ad-free pdf that includes a chart, row checklist, gift tag and care instruction tag (if you used the recommended yarn) of this pattern, please visit my Ravelry or Etsy Shop.

Spring_Ripples_Baby_Blanket_Pattern collage from Handmade by Stacy J

Directions:

A video tutorial is available at: https://youtu.be/4rGyjrTB-78 and at the top of this pattern.

With two strands of MC, ch 100

1 (RS): Sk 2 ch (counts as dc), 2 dc in next ch, *1 dc in ea of next 3 ch, [over next 3 ch, work dc3tog] twice, 1 dc in each of next 3 ch, [3 dc in next ch] twice; rep * across ending with 3 dc in last ch, turn.

2 (WS): Ch 3 (counts as dc), 2 dc in same st, *1 dc in ea of next 3 sts, [over next 3 sts, work dc3tog] twice, 1 dc in each of next 3 sts, [3 dc in next st] twice; rep * across ending with 3 dc in tch; cut one strand of MC and join Color A; turn.

3 (RS): [On this row, you will use only the CC for the Popcorn stitch and then the 2 strands throughout the rest of the row]  Ch 3 (counts as dc), 2 dc in same st, *1 dc in next st, using only CC work 1 pc in next st, using both strands work 1 dc in next st, [work dc3tog] twice, 1 dc in next st, using only CC work 1 pc in next st, using both strands work 1 dc in next st, [3 dc in next st] twice; rep * across ending with 3 dc in tch; turn.

4 (WS): Ch 3 (counts as dc), 2 dc in same st, *1 dc in ea of next 3 sts, [work dc3tog] twice, 1 dc in each of next 3 sts, [3 dc in next st] twice; rep * across ending with 3 dc in tch; turn.

Continue repeating rows 3 and 4 in the following sequence:
  • With MC and CC-A: Rep rows 3 and 4 twice more
  • With MC: Rep rows 3 and 4 once
  • With MC and CC-B: Rep rows 3 and 4 three times 
  • With MC: Rep rows 3 and 4 once
  • With MC and CC-C: Rep rows 3 and 4 three times
  • With MC: Rep rows 3 and 4 once
  • With MC and CC-D: Rep rows 3 and 4 three times
  • With MC: Rep rows 3 and 4 once
  • With MC and CC-E: Rep rows 3 and 4 three times

Final two rows will be using MC strands held together & will not involve Popcorn sts

Repeat row 4 twice; do not fasten off, turn


Close Up.jpg

Border (RS facing):

  1. Working along the top edge, repeat row 4; do not turn, instead rotate the blanket so that you’re working down the long edge.
  2. Work 1 more dc where the last 3 dc were just made, work dc in next st and evenly down the side; do not turn, rotate blanket so that you’re working along the lower edge.
  3. (When working this section, it’s helpful to put a stitch marker where the first “point” of the blanket is, that way if you’re off count at all, you can adjust by adding or decreasing a dc as needed) Over the next 3 sts, work dc3tog, 1 dc in ea of the next 3 sts (you should be at the point of the pattern), *[work 3 dc in next st] twice, 1 dc in ea of the next 3 sts, [work dc3tog] twice, 1 dc in ea of the next 3 sts; rep * to the last “point” of the bottom edge. Work [3 dc in next st] twice, 1 dc in each of the next 3 sts, dc3tog over next 3 sts.
  4. Work dc in first st (where the last of the dc3tog is) and evenly down the side ending with a sl st in the top of beg ch-3.

Fasten off and weave in all ends. This is when I wash and block the blanket, prior to adding the fringe.


Fringe:

Cut 4 strands that are 18” long for each point of the blanket on the shorter edges. I used 2 strands of the MC and 2 strands of a contrasting color, but feel free to get creative. Attach 4 strands to each point; then measure the fringe to 6” and trim.

A huge thank you to my wonderful testers! 

Please show them some love on Instagram @radarandmomma, @gypsyinrhapsody, @designsbydali and @restless_philomath

Please tag me on your finished blanket @handmadebystacyj and #handmadebystacyj – I’d love to see it!

This pattern is ©2021 Handmade by Stacy J.  You are welcome and encouraged to gift or sell your projects made from this pattern. However, you may not sell or distribute this pattern, it’s images or content in any way; please direct your followers to the pattern link instead.

Subscribe on YouTubeJoin me on FacebookFollow on Instagram

Patterns on RavelryInspiration on Pinterest