The Baby Steps Baby Blanket is quick, easy and fun to knit. The border frame is worked with the blanket as you make it. The frame around the body consists of a larger garter edge, then a smaller stockinette frame, then a small 2 stitch reverse stockinette frame that frames the body.
The stitches used are a combination of knit, purl, purl 3 together and yarn overs that create an interesting fabric. The needles are a little larger than the yarn band recommends, therefore giving the blanket a lovely drape. This blanket uses just under 4 skeins of yarn and works up fairly quickly, making it the perfect gift for the little one in your life.
It’s easy to adjust the size of the blanket, as the body is worked in stitch multiples of 14 over an 8 row repeat.
Disclosure: This post contains affiliate links. That means that I may receive compensation when you purchase through my links at no additional cost to you. Thank you for your support!
When Iearned this specific cable stitch, not only did I fall in love with it, it spoke to me to the be the Low Tide Throw. The texture, the simplicity, all of it called to me to be a large throw that you could cuddle up in on a chilly evening. With the help of King Cole Yarns, that vision became a reality for this blanket and is now a free knitting pattern.
The name “Low Tide” came to me as I looked at the texture. It reminded me of a time when I was walking barefoot at Bunbeg Beach in County Donegal, Ireland during our 2019 family vacation. My oldest son and I had taken the day to leave our shoes in the car, do some fishing, explore the ship wreck, do some walking and barefoot hiking. Before we knew it, we had walked miles barefoot on the beach. The tide was low and the sand glimmered with the shallow water with the sunlight highlighting the textures that this stitch offers. It’s one of my favorite memories of that trip. Whenever I think of my “Happy place,” this memory is always what comes to the forefront of my mind.
About the yarn
The King Cole Big Value Super Chunky “Stormy” yarn called to me to be a big, cuddly, cabled blanket. It’s 100% Premium Acrylic with a beautiful marling effect. It’s nice & soft, and comes in an 88 yds / 81 m skein – I used just under 18 skeins for this project.
The Low Tide Throw uses size US 15 / 10 mm knitting needles and works over an 8 row repeat.
Disclosure: This post contains affiliate links. As an affiliate, when you purchase through my links, you allow the company to pay me a small commission without costing you a penny more, which allows me to continue making free content. The yarn for this pattern was provided to me from King Cole – I am a King Cole Brand Ambassador and this post is part of our ongoing collaboration. Thank you for your support!
About the blanket
The Low Tide Throw works over an 8 row repeat and the stitches are worked in increments of 12. The framing is worked as you work the blanket. That means that there isn’t any stitches to pick up or adding to the blanket once the body is completed.
The blanket is sized for a 50″ x 60″ and the terms are written using US terminology. I’ve created a video to help with your blanket.
If you prefer a printable pdf that includes a chart, a checklist to help keep track of your rows and printable gift tags for gifting your blanket, you can purchase through Ravelry (or add to your favorites or que) or you can purchase directly through my Etsy store.
Please note that due to this being a digital download, all sales are final and no refunds will be given. Thank you for your support!
Here’s a pin to add to your Pinterest board
Materials needed:
King Cole Big Value Super Chunky “Stormy” (100% Premium Acrylic; 3.5 oz / 100g; 88 yd / 81 m) – 1600 yds / 1463 m in color #4106 / Thunder (To find your local King Cole stockist click HERE or visit LoveCrafts to purchase online) or any other Super Chunky / #6 Acrylic yarn
Gauge: 9 sts x 12 rows = 4” x 4” / 10 cm x 10 cm in stockinette stitch – Gauge isn’t critical in this project, but will affect yarn usage
Pattern Difficulty level: Easy-ish
If you prefer a printable pdf that includes a chart, a checklist to help keep track of your rows and printable gift tags for gifting your blanket, you can purchase through Ravelry (or add to your favorites or que) or you can purchase directly through my Etsy store!
Please note that due to this being a digital download, all sales are final and no refunds will be given. Thank you for your support!
Stitches & Terms Used
(Pattern is written in US terms):
Bind off in pattern
K: Knit
K2tog: Knit two stitches together
Kfb: Knit into the front and back of the same stitch
Long Tail cast on
P: Purl
Pm: Place marker
Rep: Repeat
Rs: Right side
Sm: Stitch marker
St(s): Stitch(es)
Ws: Wrong side
X: Times (3x = 3 times)
Special Stitches Used:
C6B: Cable 6 Back – Slip next 3 sts onto cable needle and hold at back, knit next 3 stitches from left needle, then knit 3 stitches from cable needle
C6F: Cable 6 Front – Slip next 3 sts onto cable needle and hold at front, knit next 3 stitches from left needle, then knit 3 stitches from cable needle
Notes:
To avoid weaving in multiple yarn tails, I recommend working the Russian join as you join a new skein of yarn. To see a video tutorial of this technique, please visit: https://youtu.be/iU9rszpZzoQ
This stitch pattern is worked in multiples of 12. If you’d like to adjust the size of your blanket, be sure to adjust the “set up” row to increase evenly to 12 stitches. Then be sure to adjust the “decrease” row, as well.
WS): (P2, k2) across, ending with p2 and removing markers as you come to them
Work rows 1 – 2 of the beginning Ribbing section five times
Bind off in pattern, weave in the ends and enjoy!
When you’re all done, please take pictures and tag me on social media. @handmadebystacyj or #handmadebystacyj so that I can see your beautiful blanket 🙂
This Low Tide Throw free knitting pattern is copyright 2023 Handmade by Stacy J. Please do not duplicate or copy any portion of this pattern, as well as photographs. You are encouraged to share images of your final product and are allowed to sell final products; I just ask that if you sell your final product, please purchase the ad-free pdf, provide your own photographs and that you please credit Handmade by Stacy J as the designer. Thank you for your support!
The Tiny Gems Baby Blanket is a free knitting pattern that was inspired by a dishcloth that I designed in 2020. It uses the Seersucker or Padded Diamonds stitch that adds a beautiful texture. It’s framed on the inside with a stockinette panel and the outside is worked with garter stitch. It’s all worked in one piece, so the borders are worked at the same time as the body of the blanket.
If you’d like to check out the free knitting pattern for the dishcloth that inspired this blanket, here’s the link.
About the yarn
As I was picking out the colors, the King Cole “Little Treasures Double Knitting” yarn in the color “Jem” really called out to me. It has hints of greens, yellows, cream and a touch of pinks / purples. It’s a fairly neutral color for babies and is oh-so-soft. It works up like a dream and there were very few knots. I used just under 4 skeins for this project.
The blanket uses size US 8 / 5 mm knitting needles and works over an 8 row repeat.
Disclosure: The Tiny Gems Blanket post contains affiliate links. As an affiliate, when you purchase through my links, you allow the company to pay me a small commission without costing you a penny more, which allows me to continue making free content. The yarn for this pattern was provided to me from King Cole – I am a King Cole Brand Ambassador and this post is part of our ongoing collaboration. Thank you for your support!
About the blanket
The Tiny Gems Baby Blanket works over an 8 row repeat and the stitches are worked in increments of 4. Therefore, you can adjust the size as you like. One of my testers even turned the blanket into a doll blanket for one of her granddaughters! The framing is worked as you work the blanket, so there’s no picking up stitches or adding to the blanket once the body is completed.
The blanket is sized for a 42″ x 42″ and the terms are written using US terminology. I’ve created a video to help with your blanket
If you prefer and ad free pdf that includes a chart, checklist, larger font and gift tags for gifting your blanket, you can click here to purchase off of Ravelry (or add it to your favorites or que), or you can purchase through my Etsy store.
Here’s a pin to add to your Pinterest board 🙂
Materials needed:
King Cole Little Treasures Double Knitting (60% Anti-Pilling Acrylic, 40% Polyamide; 3.5 oz / 100g; 349 yd / 320 m) – 1200 yds / 1097 m in color #4780 / Jem (To find your local King Cole stockist click HERE or visit LoveCrafts to purchase online)
Gauge: 16 sts x 24 rows = 4” x 4” / 10 cm x 10 cm in stockinette stitch
Pattern Difficulty level: Easy
If you prefer and ad free pdf that includes a chart, checklist, larger font and gift tags for gifting your blanket, you can click here to purchase off of Ravelry (or add it to your favorites or que), or you can purchase through my Etsy store.
Stitches & Terms Used
(Pattern is written in US terms):
Bind off
Garter Stitch: Knit each row
K: Knit
Long Tail cast on
P: Purl
Pm: Place marker
Rep: Repeat
Rm: Remove marker
Rs: Right side
Sm: Stitch marker
St (s): Stitch (es)
WS: Wrong side
Notes:
To make blanket larger or smaller, add or subtract in increments of 4
Some of my testers needed to do 3 more repeats of the body to meet the measurement
Work garter st for 26 rows and remove markers as you come to them.
Bind off loosely, knit wise
Weave in any ends, then block and enjoy.
When you’re all done, please take pictures and tag me on social media @handmadebystacyj or #handmadebystacyj so that I can see your beautiful blanket 🙂
This free knitting pattern is copyright 2022 Handmade by Stacy J. Please do not duplicate or copy any portion of this pattern, as well as photographs. You are encouraged to share images of your final product and are allowed to sell final products; I just ask that if you sell your final product, please purchase the ad-free pdf, provide your own photographs and that you please credit Handmade by Stacy J as the designer. Thank you for your support!
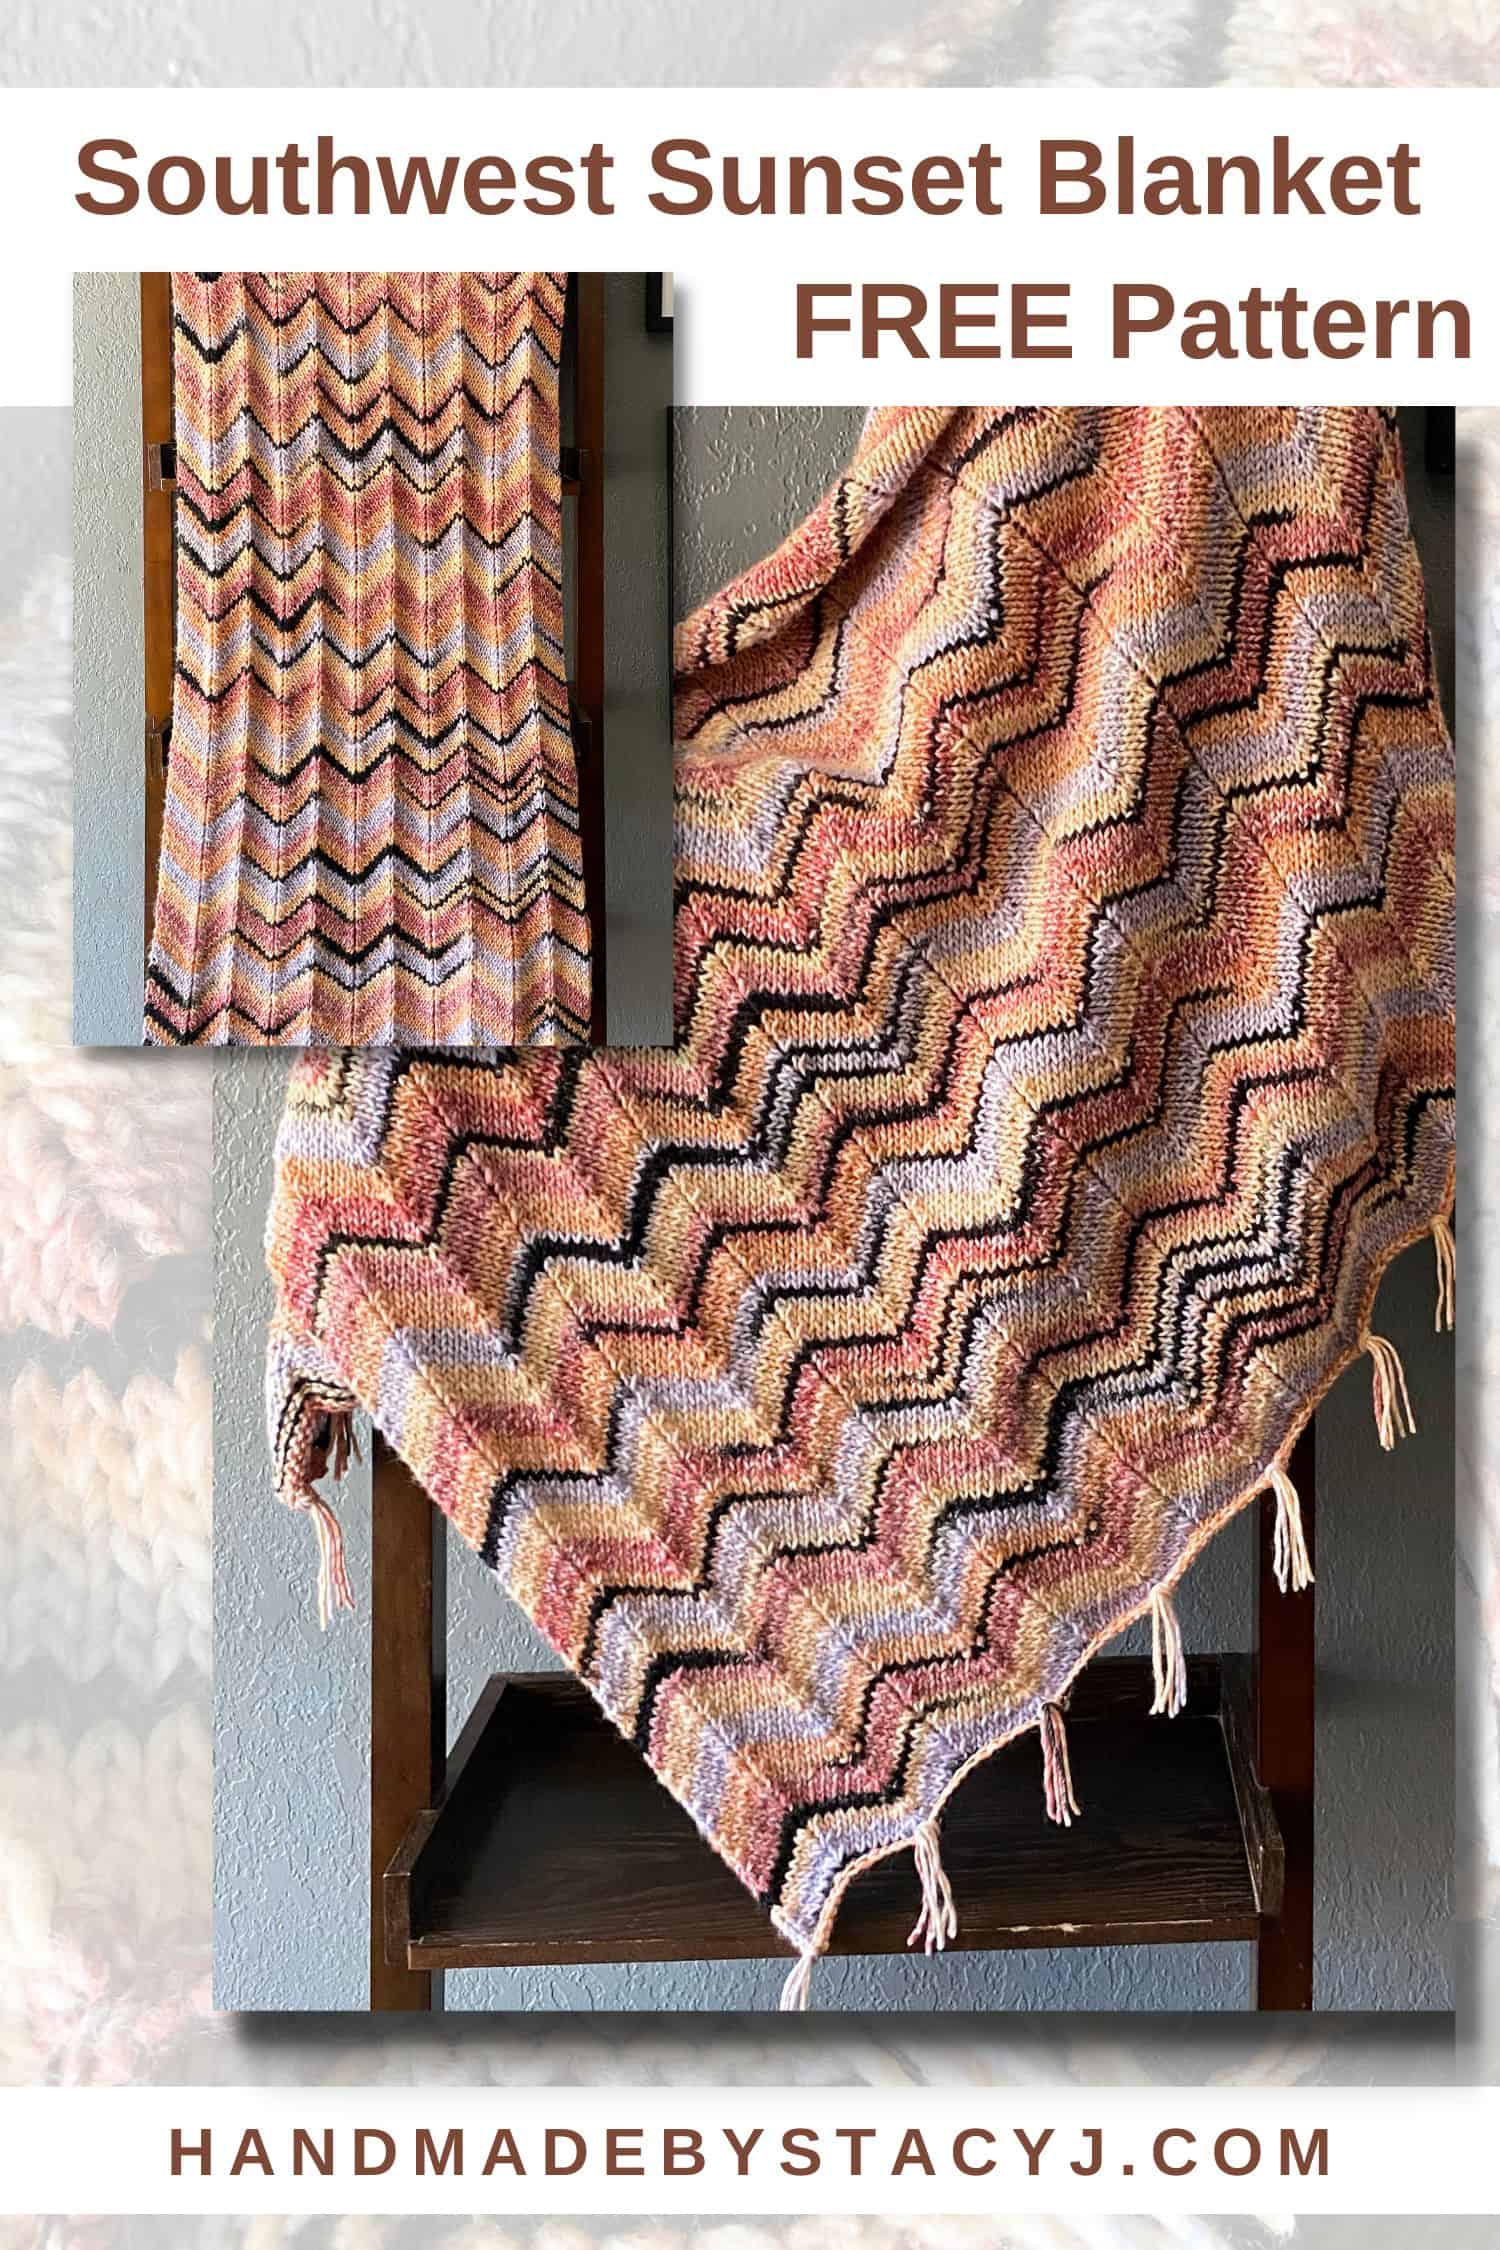
The Southwest Sunset Blanket was inspired by the yarn that I used to make it. As an ambassador for King Cole Yarns, they sent me a sample cake of the Safari Chunky yarn. When I was playing with it, it screamed out to me “I want to be a big, squishy, rippley blanket!”
About the yarn
As I was picking out the colors, the color “Sunset” was really catching my eye. So, I ordered some and started right away. The colors are so beautiful! They have a fairly slow changing stripe with intermittent black sections that remind me of the sunsets here in Arizona. I typically refuse to work with the color black; However the sections are short enough that the black was easy to work with. Plus, it’s such a rich, beautiful black that I found myself looking forward to those sections.
If you’d like to read my review of the King Cole Safari Chunky Yarn, please click HERE.
The blanket uses Safari Chunky yarn and size US 10.5 knitting needles. As a result of using larger yarn and needles, it is very quick and simple knit!
About the blanket
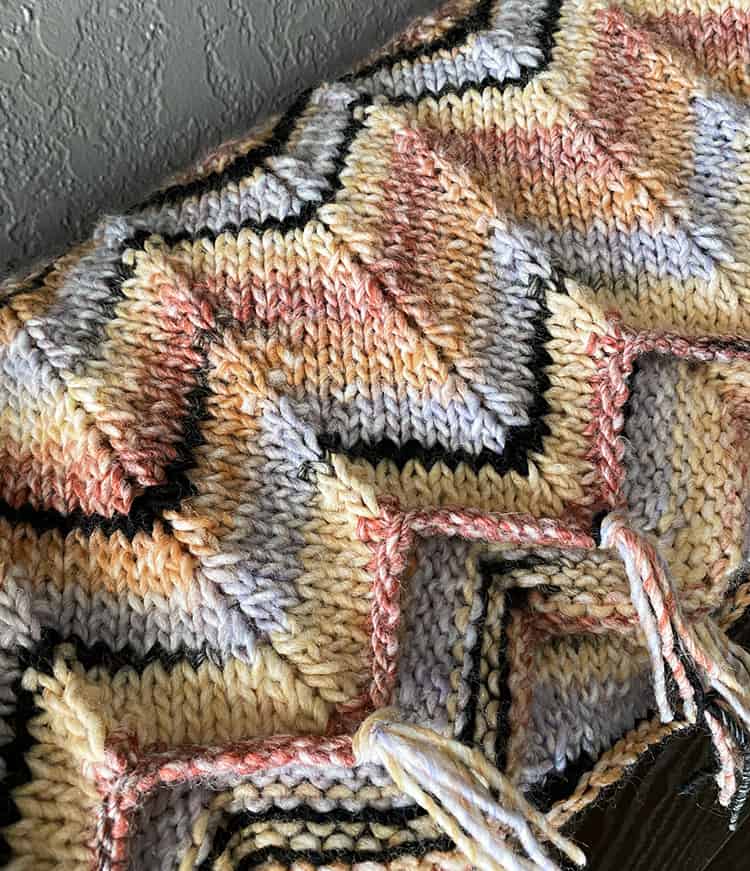
The 16 stitch knitted panel is simple to memorize and works over a 2 row repeat. The points at the end are highlighted with small fringes of only 3 strands of yarn used for each fringe. It does work up fairly quickly because of the chunky yarn. The 2 row repeat is good for when you want to knit while binging your favorite tv show (or podcast, in my case!)
The blanket is sized for a 50″ x 60″ throw and the terms are written using US terminology. The stitch pattern works in multiples of 16+2, so you can customize the size to your liking. I’ve created a video to help with starting your blanket, placing the stitch markers, the bind off (this part is super important) and working with the fringe.
Disclosure: The Southwest Sunset Blanket post contains affiliate links. As an affiliate, when you purchase through my links, you allow the company to pay me a small commission without costing you a penny more, which allows me to continue making free content. The yarn for this pattern was provided to me from King Cole – I am a King Cole Brand Ambassador and this post is part of our ongoing collaboration. Thank you for your support!
If you prefer and ad free pdf that includes a chart, larger font and gift tags for gifting your blanket, you can click here to purchase off of Ravelry (or add it to your favorites or que), or you can purchase from my Etsy store.
Here’s a pin to save to your Pinterest board 🙂
Materials needed:
King Cole Safari Chunky yarn (5.25 oz / 150 g; 311 yds / 285 m; 100% Premium Acrylic; #5 Chunky weight) In color “Sunset” – approximately 5 skeins or 1550 yards / 1418 meters (To find your local King Cole stockist click HERE or visit LoveCrafts to purchase online)
Gauge: 13 stitches x 18 rows = 4” x 4” / 10 cm x 10 cm In stockinette stitch pattern
Pattern Difficulty level: Easy
If you prefer and ad free pdf that includes a chart, larger font and gift tags for gifting your blanket, you can click here to purchase off of Ravelry (or add it to your favorites or que), or you can purchase from my Etsy store.
Stitches & Terms Used
(Pattern is written in US terms):
Bind off
K: Knit
K2tog: Knit 2 together
Kfb: Knit Into the front and back of the same stitch
Long tail cast on
P: Purl
Ssk: Slip 2 stitches one at a time knit wise; then place those 2 stitches back on left needle and knit those 2 stitches together through the back loop
Notes:
Stitch Pattern is worked using multiples of 16 + 2; please note that if you change the size of your blanket or knit using a gauge different than mine, your yarn quantities will vary.
For your first time knitting Row 2, insert a stitch marker between each * repeat. This will make keeping track of your stitches much easier.
Row 2 (RS): K1, *kfb, k5, ssk, k2tog, k5, kfb; repeat * across to last stitch, k1
Repeat rows 1-2 until blanket measures 60″ / 152.4 cm or your desired length. Then bind off in pattern (if you need to view how to do this specific bind off, click here).
I recommend blocking your blanket prior to attaching the fringe so that your points are more prominent for attaching fringe.
Fringe
Cut three 10″ / 25.4 cm pieces of yarn for each “point” on the ends of the blanket. If you cast on 178, you’ll end up with 66 pieces.
Use 3 strands of the cut yarn with a crochet hook or tool of your choice and attach the fringe at each point.
After all points have fringe, trim to an even length throughout.
If you enjoyed this blanket, here are a few more knit patterns that are available for free to view on the website 🙂
Wrap up In your blanket, enjoy a nap using it, then please take pictures! Please tag me on social media @handmadebystacyj or #handmadebystacyj so that I can see your beautiful blanket 🙂
This free knitting pattern is copyright 2022 Handmade by Stacy J. Please do not duplicate or copy any portion of this pattern, as well as photographs. You are encouraged to share images of your final product and are allowed to sell final products; I just ask that if you sell your final product, please purchase the ad-free pdf, provide your own photographs and that you please credit Handmade by Stacy J as the designer. Thank you for your support!