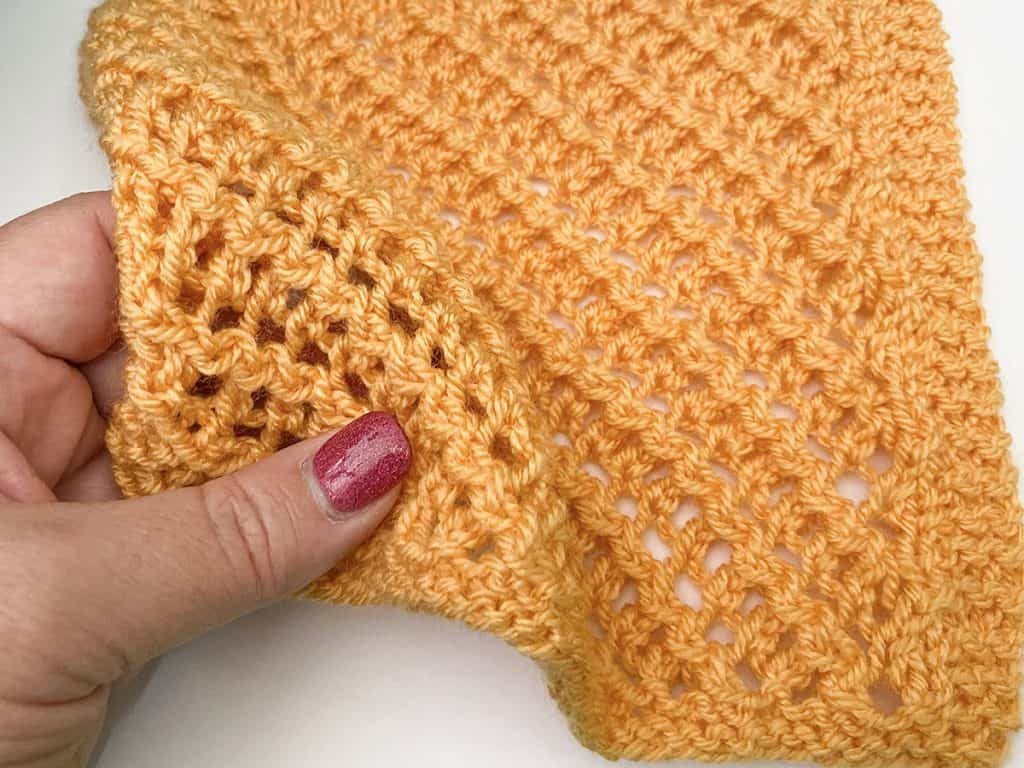
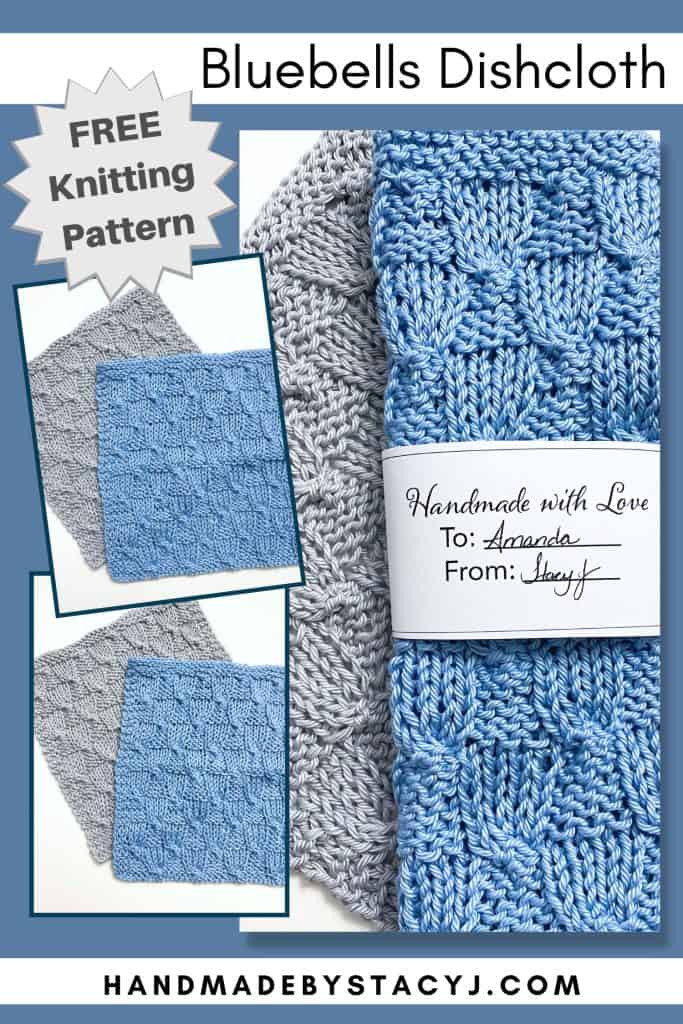
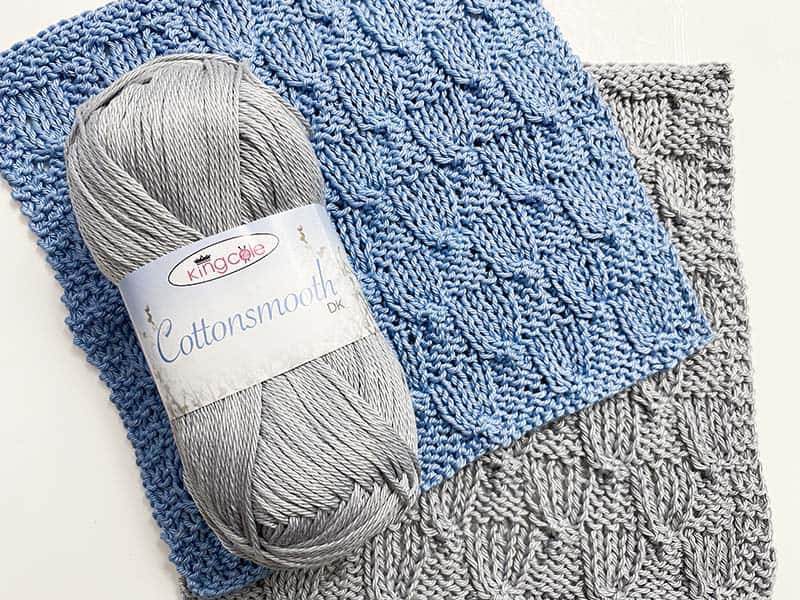
The Bluebells Dishcloth is a very quick and easy knit that has a wonderful stitch detail. If you haven’t knit cables before, this is a great way to get introduced to them. It uses only one cable stitch and the rest of the stitches are simple knit and purl. The yarn used in this project is the King Cole Cottonsmooth DK. It’s 100% Mercerized Cotton and is oh-so-amazing to work with! It’s a dk weight, so it doesn’t make a bulky dishcloth, making it easy to get into those delicate dishes.
Disclosure: This post contains affiliate links. That means that I may receive compensation when you purchase through my links at no additional cost to you. I am a King Cole Brand Ambassador and this post is part of our ongoing collaboration.
I named this pattern the Bluebells Dishcloth because the stitch reminds me of Bluebell flowers. The stitch pattern was found in a Japanese knitting book and it didn’t have a name to it, so that’s what I came up with. I do hope you enjoy working on this dishcloth as much as I enjoyed designing it.
Measures:
8.5” x 8.5” / 21.6 cm x 21.6 cm
Gauge:
12 rows of pattern = 2” / 5 cm
Materials needed:
- King Cole Cottonsmooth DK (100% mercerised cotton; 218 yds / 200 m; 100g; dk / #3 weight) yarn in color “Pale Blue” or “Silver” – 65 yds / 59.5 m (To find your local stockist, click HERE; or you can purchase online through this affiliate link)
- US size 3 / 3.25 mm knitting needles
- Cable needle
- Tapestry needle
- Scissors
- Lockable stitch marker (optional)
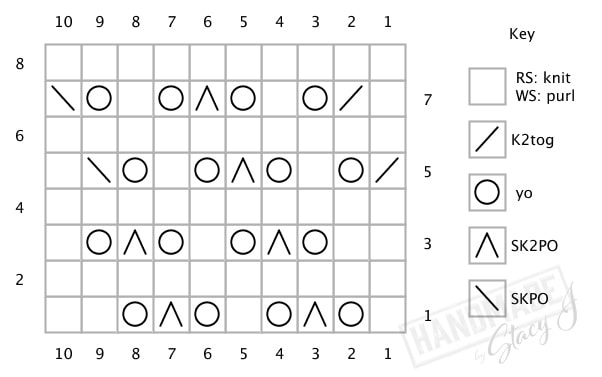
Stitches and abbreviations used:
Pattern is written in US terms
- Bind off
- Cast on
- C4F: Cable 4 front – Slip 2 stitches purlwise from left needle to cable needle, hold at front of work, knit next 2 stitches on left needle, then knit 2 stitches from cable needle
- K: Knit
- P: Purl
- Rep: Repeat
- RS: Right side
- St (s): Stitch (es)
- WS: Wrong side
Directions for Bluebells Dishcloth
Using long tail cast on method or preferred method, cast on 46
Rows 1 – 4: Knit
Row 5 (RS): K3, *c4f, p4; rep * to last 3 sts, k3
Row 6: K3, *k4, p4; rep * to last 3 sts, k3
Rows 7 – 10: As row 6
Row 11: K3, *p4, c4f; rep * to last 3 sts, k3
Row 12: K3, *p4, k4; rep * to last 3 sts, k3
Rows 13 – 16: As row 12
Repeat rows 5-16 three more times (or to desired length)
Repeat row 5 once more
Knit 3 rows
Bind off knitwise
If you enjoyed this dishcloth, here a few more that are available for free to view on the website 🙂


If you’d like to grab yourself the dishcloth wrappers printable, simply click on this link and you can download it for FREE.

Subscribe on YouTube • Join me on Facebook • Follow on Instagram
Patterns on Ravelry • Inspiration on Pinterest
This pattern is copyright 2023 Handmade by Stacy J. Please do not duplicate or copy any portion of this pattern, as well as photographs. You are encouraged to share images of your final product and are allowed to sell final products; I just ask that if you sell your final product, please purchase the ad-free pdf, provide your own photographs and that you please credit Handmade by Stacy J as the designer. Thank you for your support!