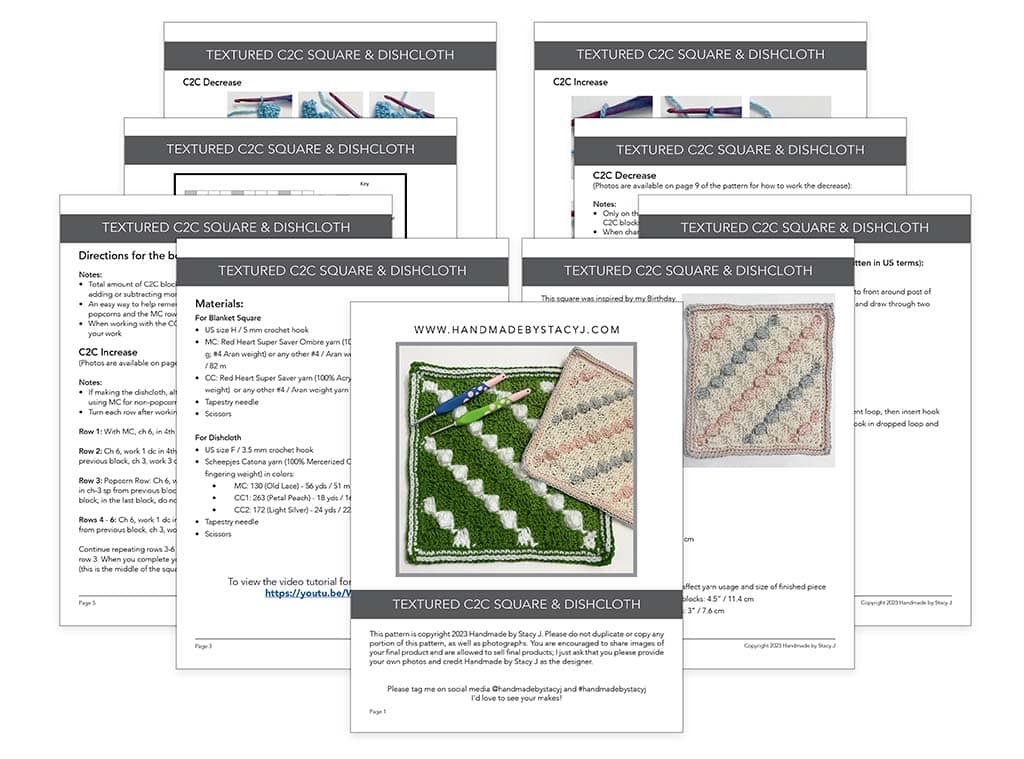
The Textured C2C Square & Dishcloth was inspired by my Birthday Sorbet Baby Blanket design. It’s such a fun and easy pattern to work with that I thought a smaller version would be perfect for the Unraveled Mitten 2023 Blanket CAL. It offers a lot of texture and works up quickly. If you’d like to make the dishcloth, simply follow the pattern, but use the smaller hook and lighter, cotton yarn. My testers rated this pattern as “Easy”, making it the perfect project to make as you watch your favorite program or listen to your favorite podcast. On a side note, I want to extend a big “Thank You!” to all of my testers that helped with this design!
The 2023 Stash-busting Afghan Mystery Crochet Along with Unraveled Mitten is a year-long crochet along that involves 20 different squares. Each square is 12″ x 12″ and is designed by a different participating designer. The squares are released every other week throughout 2023, with the last square being released in October (giving you plenty of time to finish your blanket to gift it!). To see the other blocks that have been released (there are some amazing blocks – you will want to check them out!), please visit: https://theunraveledmitten.com/2023/01/05/2023-stash-busting-crochet-along/
If you prefer a printable pdf that includes printable gift tags for gifting you can purchase directly through the Ravelry button below.
Please note that due to this being a digital download, all sales are final and no refunds will be given. Thank you for your support!
The Cables & Lace Dishcloth came to be when I was learning some Japanese knitting stitches. This particular stitch really called out to me. This wonderful stitch requires some concentration, but is not nearly as difficult as it looks.
The yarn used is Cottonsoft DK from King Cole. It’s a lovely 100% cotton yarn that is a light #3 / DK weight yarn. It is wonderful to work with & you can make a couple dishcloths with only one skein!
I’d like to extend a huge “Thank you” to my wonderful testers that helped me to finalize this pattern. To see their beautiful dishcloths, check out their projects linked in Ravelry.
Disclosure: This post contains affiliate links. That means that I may receive compensation when you purchase through my links at no additional cost to you. I am a King Cole Brand Ambassador and this post is part of our ongoing collaboration.
Here’s a pin for your Pinterest board 🙂
Measures:
9” x 9” / 22.9 cm x 22.9 cm
Gauge:
20 sts x 24 rows of stockinette stitch = 4” / 10 cm (Gauge isn’t critical in this project but will affect yarn usage)
Difficulty Level: Intermediate
To see a video tutorial on how to knit the Cables & Lace Dishcloth, please click on the video link below.
If you prefer a printable pdf that includes a chart, a checklist to help keep track of your rows, printable gift tags and printable dishcloth wrappers for gifting your dishcloth, you can purchase through Ravelry (or add to your favorites or que) or you can purchase directly through my Etsy store.
Please note that due to this being a digital download, all sales are final and no refunds will be given. Thank you for your support!
Materials needed:
King Cole Cottonsoft DK (100% Cotton; 229 yds / 210 m; 100g; #3 / DK weight) – 64 yds in color “Pale Blue” (To find your local stockist, click HERE; or you can purchase online through LoveCrafts at this affiliate link)
Next row (In this row the cables will be worked in a different order):
K3, (P2, C4B, C4F, p2, C4F, C4B,) x 2, p2, k3
Finishing rows:
Knit for 3 rows
Bind off knit-wise
If you prefer a printable pdf that includes a chart, a checklist to help keep track of your rows, printable gift tags and printable dishcloth wrappers for gifting your dishcloth, you can purchase through Ravelry (or add to your favorites or que) or you can purchase directly through my Etsy store.
Please note that due to this being a digital download, all sales are final and no refunds will be given. Thank you for your support!
This pattern is copyright 2023 Handmade by Stacy J. Please do not duplicate or copy any portion of this pattern, as well as photographs. You are encouraged to share images of your final product and are allowed to sell final products; I just ask that if you sell your final product, please purchase the ad-free pdf, provide your own photographs and that you please credit Handmade by Stacy J as the designer. Thank you for your support!
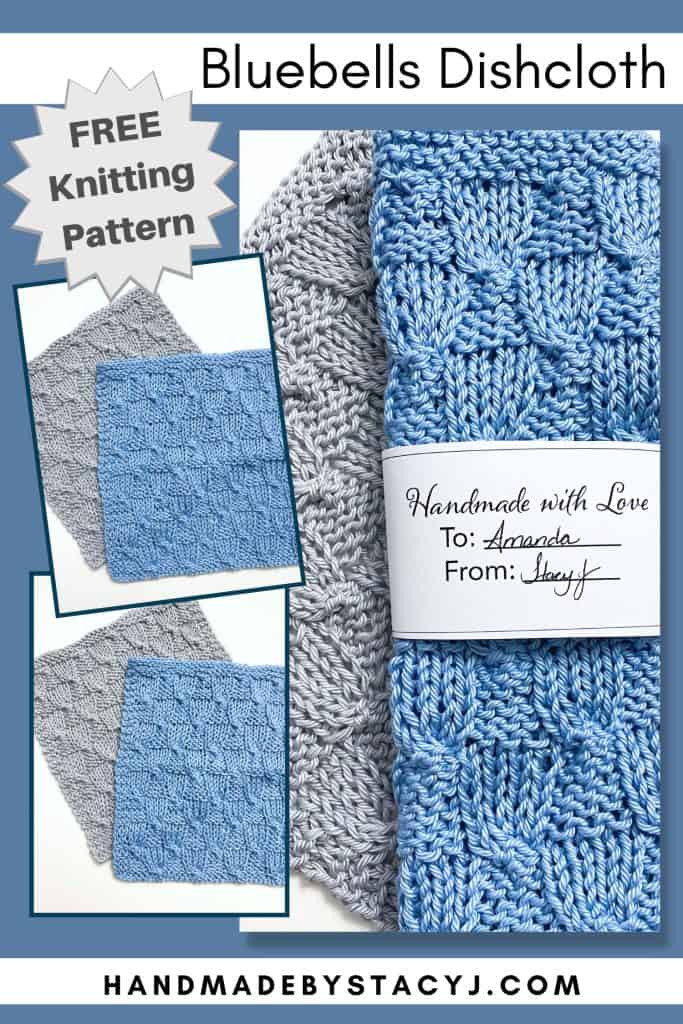
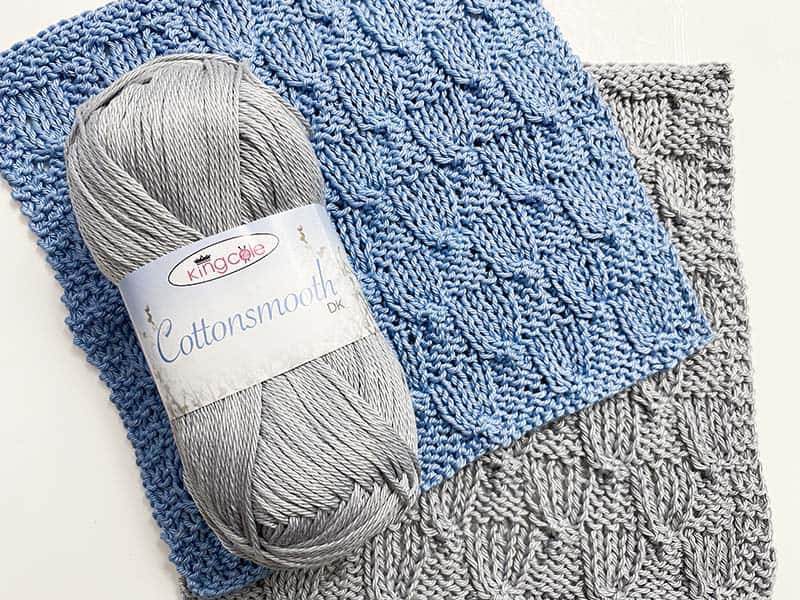
The Bluebells Dishcloth is a very quick and easy knit that has a wonderful stitch detail. If you haven’t knit cables before, this is a great way to get introduced to them. It uses only one cable stitch and the rest of the stitches are simple knit and purl. The yarn used in this project is the King Cole Cottonsmooth DK. It’s 100% Mercerized Cotton and is oh-so-amazing to work with! It’s a dk weight, so it doesn’t make a bulky dishcloth, making it easy to get into those delicate dishes.
Disclosure: This post contains affiliate links. That means that I may receive compensation when you purchase through my links at no additional cost to you. I am a King Cole Brand Ambassador and this post is part of our ongoing collaboration.
I named this pattern the Bluebells Dishcloth because the stitch reminds me of Bluebell flowers. The stitch pattern was found in a Japanese knitting book and it didn’t have a name to it, so that’s what I came up with. I do hope you enjoy working on this dishcloth as much as I enjoyed designing it.
Here’s a pin for your Pinterest board 🙂
Measures:
8.5” x 8.5” / 21.6 cm x 21.6 cm
Gauge:
12 rows of pattern = 2” / 5 cm
Materials needed:
King Cole Cottonsmooth DK (100% mercerised cotton; 218 yds / 200 m; 100g; dk / #3 weight) yarn in color “Pale Blue” or “Silver” – 65 yds / 59.5 m (To find your local stockist, click HERE; or you can purchase online through this affiliate link)
US size 3 / 3.25 mm knitting needles
Cable needle
Tapestry needle
Scissors
Lockable stitch marker (optional)
Stitches and abbreviations used:
Pattern is written in US terms
Bind off
Cast on
C4F: Cable 4 front – Slip 2 stitches purlwise from left needle to cable needle, hold at front of work, knit next 2 stitches on left needle, then knit 2 stitches from cable needle
K: Knit
P: Purl
Rep: Repeat
RS: Right side
St (s): Stitch (es)
WS: Wrong side
Directions for Bluebells Dishcloth
Using long tail cast on method or preferred method, cast on 46
Rows 1 – 4: Knit
Row 5 (RS): K3, *c4f, p4; rep * to last 3 sts, k3
Row 6: K3, *k4, p4; rep * to last 3 sts, k3
Rows 7 – 10: As row 6
Row 11: K3, *p4, c4f; rep * to last 3 sts, k3
Row 12: K3, *p4, k4; rep * to last 3 sts, k3
Rows 13 – 16: As row 12
Repeat rows 5-16 three more times (or to desired length)
Repeat row 5 once more
Knit 3 rows
Bind off knitwise
If you enjoyed this dishcloth, here a few more that are available for free to view on the website 🙂
This pattern is copyright 2023 Handmade by Stacy J. Please do not duplicate or copy any portion of this pattern, as well as photographs. You are encouraged to share images of your final product and are allowed to sell final products; I just ask that if you sell your final product, please purchase the ad-free pdf, provide your own photographs and that you please credit Handmade by Stacy J as the designer. Thank you for your support!
The written pattern for the Eyelet Lace Washcloth can be used with the video tutorial on the “Handmade by Stacy J” YouTube channel. It‘s a beginner friendly knit pattern that only uses Knit, Purl and simple increases and decreases. There is also a checklist & chart attached to this pattern to help keep track of rows. Enjoy!
Disclosure: This post contains affiliate links. As an affiliate, when you purchase through my links, you allow the company to pay me a small commission without costing you a penny more, which allows me to continue making free content. Thank you for your support!
Tutorial available on YouTube at: https://youtu.be/c1ojVmZZEHM At the bottom of this post, you will find a chart and a checklist, as well.
Here’s a pin for your Pinterest board 🙂
Difficulty level:
Easy
Measures:
9” x 9” / Gauge not important
Stitches used:
Knit (k)
Purl (p)
Yarn Over (yo)
Slip Slip Knit (ssk)
Materials Needed:
Solid Color yarn (100% Cotton, Medium 4 weight) 60 yards in Color “Sky” Size 6 (4.00 mm) Knitting Needles 2 stitch markers (optional), Tapestry needle and scissors
Note:
Pattern length can be adjusted by continuing to do more repeats. End with either row 5 or 13 in Pattern Repeat, then finish with “Final Row” section when you come to desired length. To adjust width, calculate the number of stitches in increments of 2.
Directions for Eyelet Lace Washcloth:
Set up Rows
Cast on 40 K across for 4 rows
Pattern
Knit across
(All all WS Rows) K3, p34, k3
K3, *yo, ssk; rep from * until 3 sts remain, k3
As row2
Knit across
As row2
Knit across
As row2
Knit across
As row 2
K4, *yo, ssk; rep from * until 4 sts remain, k4 12. As row 2
Knit across
As row 2
Knit across
As row 2 Rep rows 1-16 once more, then rep rows 1-13 once more
Final Rows
K across for 4 rows Bind off knit wise and weave in ends.
Below is the chart and a pdf with a checklist to help you along with your Eyelet Lace washcloth. 🙂
When you choose to make your Eyelet Lace dishcloth, please tag me on your makes @handmadebystacyj and #handmadebystacyj – I’d love to see them!
If you prefer a printable pdf with the checklist, please feel free to download this pattern.
This pattern is not to be sold or copied in any way. The images, pattern and charts are copyrighted by Handmade by Stacy J and may not be duplicated. You are welcome to sell your makes, however I ask that you credit me as the designer. You are also responsible for providing your own photographs. Thank you!
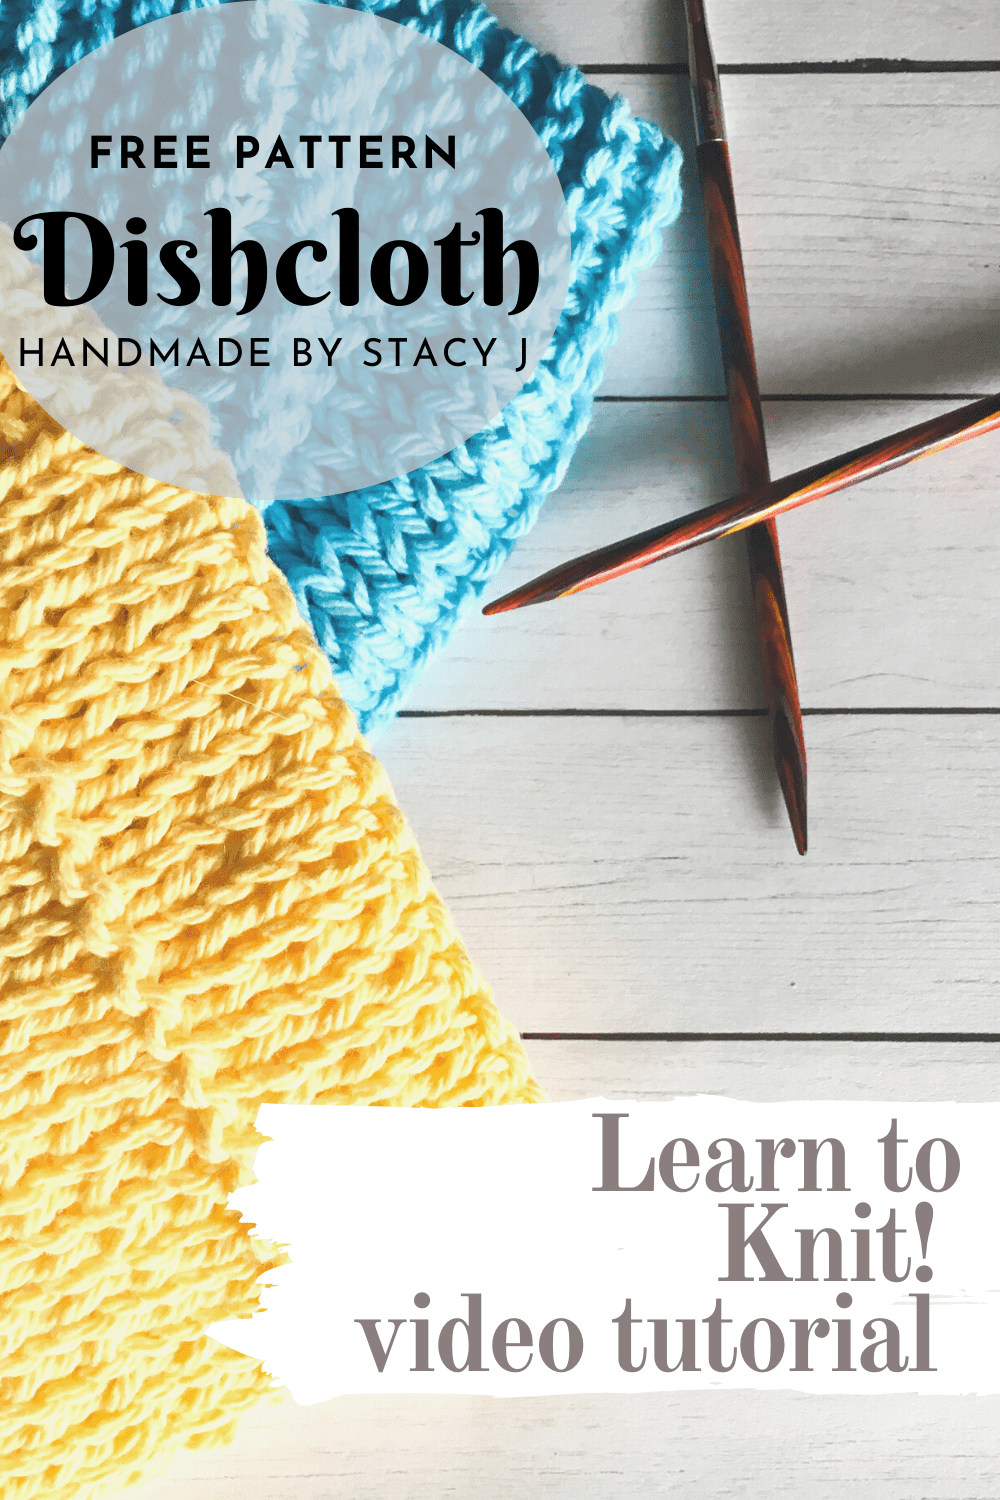
The written pattern for the Learn to Knit – Dishcloth can be used with the video tutorial on the “Handmade by Stacy J” YouTube channel: https://youtu.be/INhNJzggDj8. It‘s a beginner friendly knit pattern that only uses Knit and Purl. Enjoy!
At the bottom of this post you will find a chart and a pdf.
Disclosure: This post contains affiliate links. As an affiliate, when you purchase through my links, you allow the company to pay me a small commission without costing you a penny more, which allows me to continue making free content. Thank you for your support!
Difficulty level:
Easy / Beginner
Measures:
11” x 10” / Gauge isn’t critical
Stitches used:
Knit (k) and Purl (p)
Here’s a pin for your Pinterest board 🙂
Materials Needed:
Peaches & Cream (100% Cotton, Medium 4 weight) 85 yards
This pattern is not to be sold or copied in any way. The images, pattern and charts are copyrighted by Handmade by Stacy J and may not be duplicated. You are welcome to sell your makes, however I ask that you credit me as the designer. Also, you are responsible for providing your own photographs. Thank you!
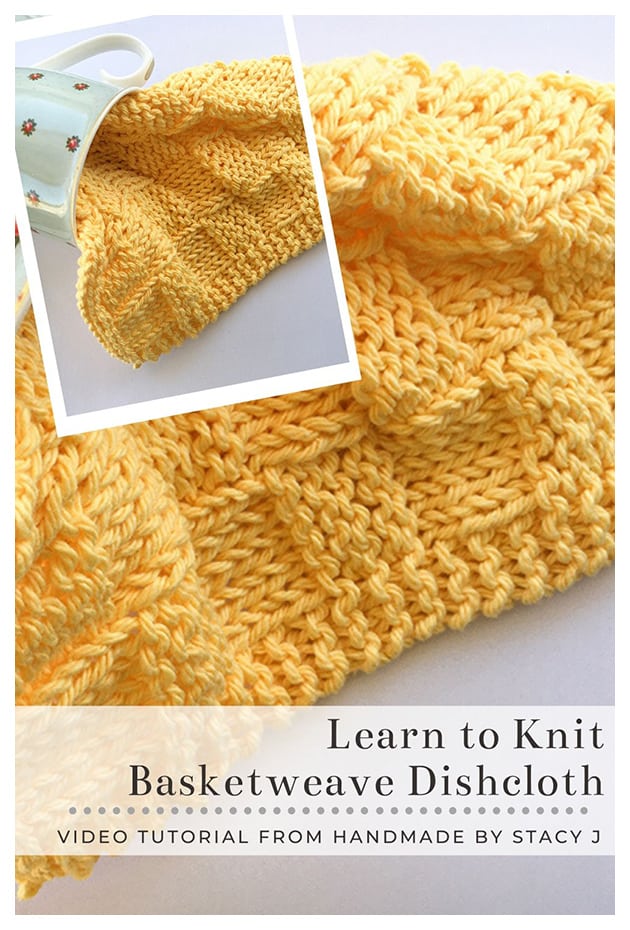
The written pattern for the Basketweave Dishcloth can be used with the video tutorial on the “Handmade by Stacy J” YouTube channel. This stitch is a modified basket weave that features large blocks and is a beginner friendly knit pattern that only uses Knit and Purl. Enjoy!
Tutorial available on YouTube at: https://youtu.be/eoONkIvoXgU At the bottom of this post, you will find a chart and checklist.
Difficulty level:
Easy / Beginner
Measures:
11” x 10” / Gauge isn’t critical
Stitches used:
Knit (k) & Purl (p)
Materials Needed:
Peaches & Cream yarn (100% Cotton, Medium 4 weight) 80 yards Size 7 (4.50 mm) Knitting Needles 2 stitch markers (optional for garter edge) Tapestry needle and scissors
Here’s a pin for your Pinterest board 🙂
Note: Pattern length can be adjusted by continuing to do more repeats. End with “Final Row” repeat when you come to desired length. To adjust the width, calculate the number of stitches in increments of 10 + 6.
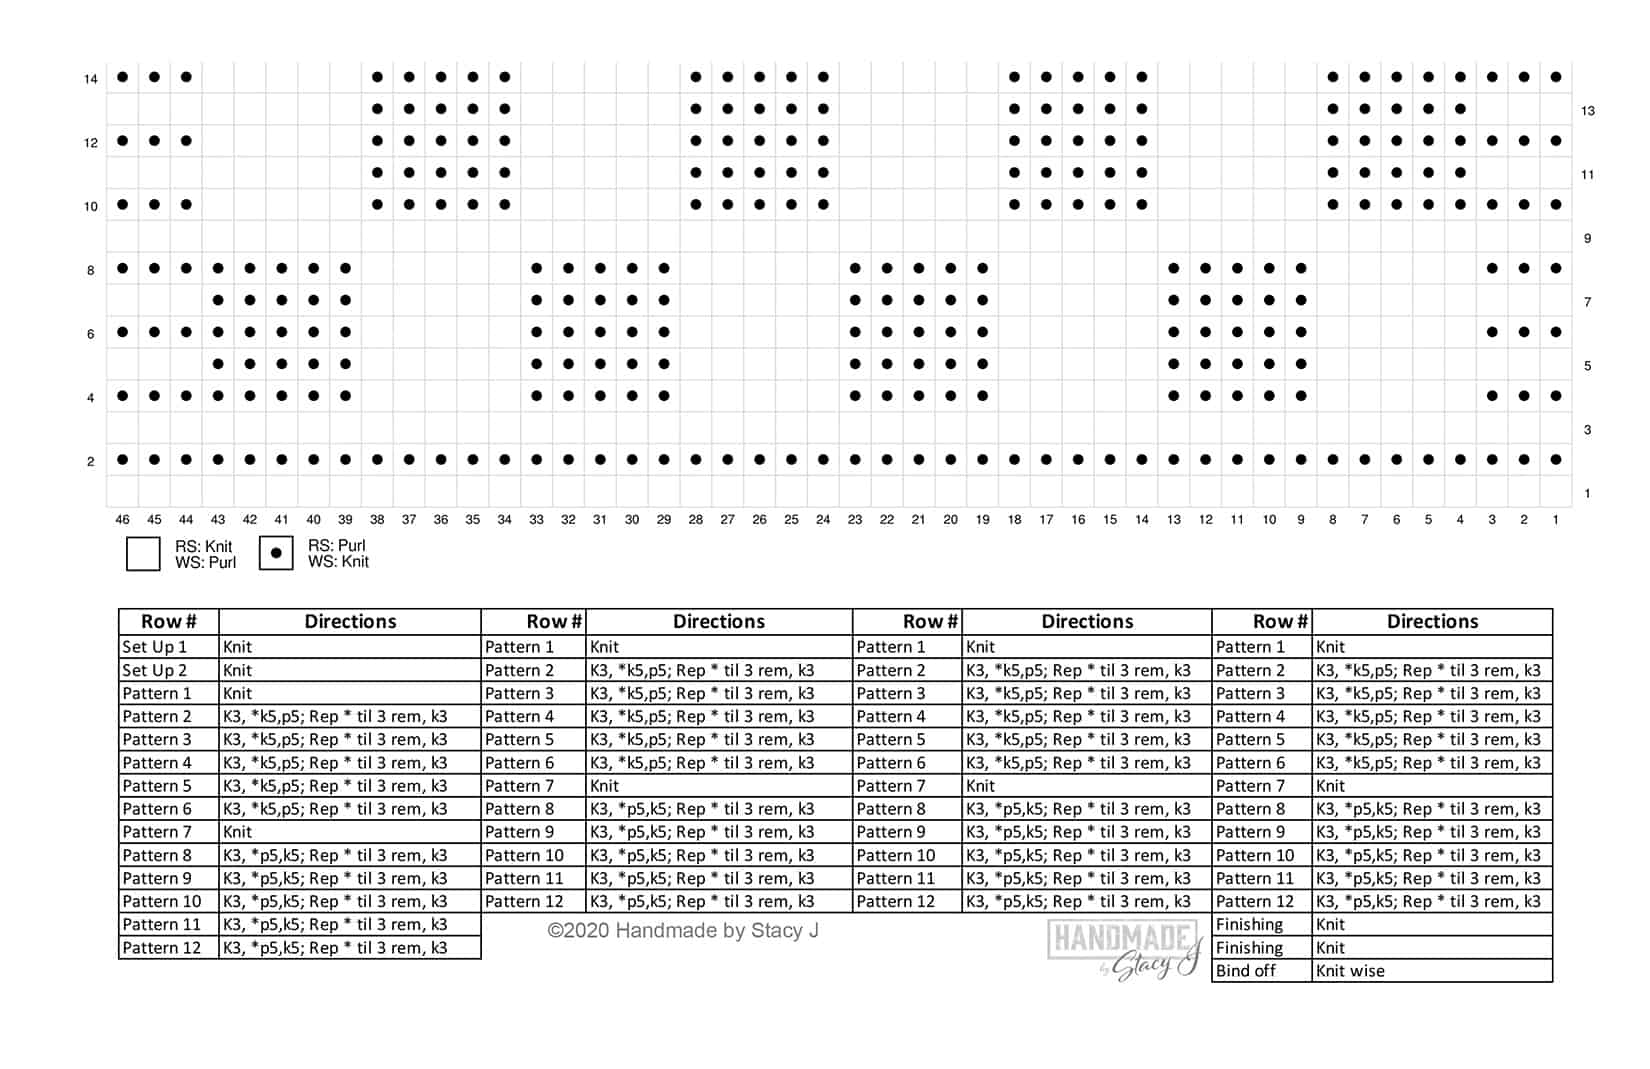
Directions for Basketweave Dishcloth:
Set up Rows
Cast on 46 K across for 2 rows
Pattern
Insert stitch markers after beginning k3 and before ending k3 on row 2. Slip the markers and then remove them when you start the final rows.
1: (RS) Knit
2 – 6: K3, *k5, p5; rep * to last 3 sts, k3
7: Knit
8-12: K3, *p5, k5; rep * to last 3 sts, k3
Rep rows 1-12 three more times
Final Rows
Knit across for 2 rows Bind off knit wise and weave in ends.
Below is the chart and a checklist to help you along with your Basketweave Dishcloth. 🙂
When you make your Basketweave dishcloth, please tag me social media @handmadebystacyj and #handmadebystacyj. I’d love to see them!
This pattern is not to be sold or copied in any way. The images, pattern and charts are copyrighted by Handmade by Stacy J and may not be duplicated. You may sell and gift your makes, however I ask that you credit me as the designer. Also, you are responsible for providing your own photographs. Thank you!
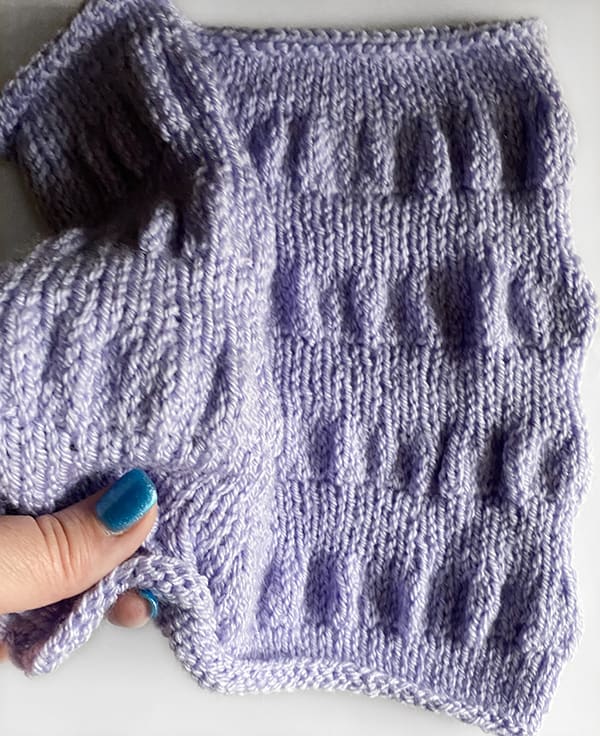
This is the knitting pattern for the Ruching block 2. These squares can be used as practice blocks or as an addition to a blanket that uses squares. Or, extend the length to make a scarf or use cotton yarn and create a dishcloth – the options are endless!
This square offers straighter edges and lays flatter then the Ruching Block 1. The ruching of this stitch pattern is created by doubling the amount of stitches in indicated rows by using a smaller needle. The ruching is then brought together by reducing the amount of stitches and then switching to larger needles.
If you’d like to see the video tutorial, you can click above or click HERE. Also, if you don’t have time to try this amazing stitch right away, there’s a Pin below that you can save to your Pinterest board.
Notes:
To obtain a cleaner edge, slip the first stitch purl wise with the yarn in front
This block is easily adaptable to any size, as the stitch pattern works in multiples of 1.
The ruching of this stitch pattern is created by doubling the amount of stitches in indicated rows by using a smaller needle. Then the ruching is then brought together by reducing the amount of stitches and then switching to larger needles.
Here’s a pin for your Pinterest board 🙂
Measures:
9.5 x 9.5″ / 24 cm x 24 cm blocked
Gauge:
22 sts x 30 rows = 4″ / 10 cm in stockinette stitch
Materials needed:
Please note that the materials listed are affiliate links – by purchasing your materials through these links you allow the companies to pay me a small commission without costing you a penny more; thank you for your support!
1 lockable stitch marker or scrap piece of yarn to mark the RS (optional)
2 stitch markers to indicate where edging borders are located (optional)
Stitches & abbreviations used:
Bind off
Cast on
Ea: each
K: Knit
K2tog: Knit 2 together
Kfb: Knit front and back
P: Purl
RS: Right Side
SM: Stitch marker
St (s): Stitch (es)
WS: Wrong side
Directions for Ruching Block 2
With US 6 / 4 mm needles, cast on 44
Knit
Knit (with lockable stitch marker or scrap piece of yarn, mark this row to indicate RS)
(WS): Knit
(RS): Knit
Knit
Knit
Knit
Knit
Knit
K5, insert SM, kfb in ea st to last 5 sts, insert SM k5; (78 sts) change to smaller needles for next row
K5, purl to SM, k5
Knit
K5, purl to SM, k5
Knit
K5, purl to SM, k5
K5, k2tog to SM, k5; change to larger needles for next row
Rep rows 3 – 16 three more times slipping SM as you come to it
Rep rows 3 – 9 once more
Knit
Bind off knit wise
Please remember to tag me on your makes @handmadebystacyj and #handmadebystacyj – I’d love to see them!
Stacy J
This pattern is copyright 2022 Handmade by Stacy J. Please do not duplicate or copy any portion of this pattern, as well as photographs. You are encouraged to share images of your final product and are allowed to sell final products; If you sell your final product, I just ask that you please purchase the ad-free pdf and credit Handmade by Stacy J as the designer. Thank you!
This is the knitting pattern for the Ruching block 1. These squares can be used as practice blocks, as an addition to a blanket that uses squares, extend the length to make a scarf or use cotton yarn and create a dishcloth – the options are endless! Each square is noted with the multiples with which each stitch pattern is worked so that the pattern is completely customizable.
If you’d like to see the video tutorial, you can click above or click HERE. And, if you don’t have time to try this amazing stitch right away, there’s a Pin below that you can save to your Pinterest board.
Notes:
To obtain a cleaner edge, slip the first stitch purl wise with the yarn in front
This block is easily adaptable to any size – the pattern works in multiples of 1.
The ruching of this stitch pattern is created by doubling the amount of stitches in indicated rows using a smaller needle. The ruching is then brought together by reducing the amount of stitches and then switching to larger needles.
Measures:
10″ x 10″ / 25.5 cm x 25.5 cm blocked
Gauge:
22 sts x 30 rows = 4″ / 10 cm in stockinette stitch
Materials needed:
Please note that the materials listed are affiliate links – by purchasing your materials through these links you allow the companies to pay me a small commission without costing you a penny more; thank you for your support!
1 lockable stitch marker or scrap piece of yarn to mark the RS (optional)
Stitches & abbreviations used:
Bind off
Cast on
Ea: each
K: Knit
K2tog: Knit 2 together
Kfb: Knit front and back
P: Purl
RS: Right Side
St (s): Stitch (es)
WS: Wrong side
Here’s a pin for your Pinterest board 🙂
Directions for Ruching Block 1
With US 6 / 4 mm needles, cast on 44
Knit
Knit
(WS): K2, purl to last 2 sts, k2
(RS): Knit
K2, purl to last 2 sts, k2
Knit
K2, purl to last 2 sts, k2
Knit
K2, purl to last 2 sts, k2
K2, kfb in ea st to last 2 sts, k2; (84 sts) change to smaller needles for next row
K2, purl to last 2 sts, k2
Knit
K2, purl to last 2 sts, k2
Knit
K2, purl to last 2 sts, k2
K2, k2tog across row, k2; change to larger needles for next row
Rep rows 3 – 16 three more times
Rep rows 3 – 8 once more
Knit
Bind off knit wise
Please remember to tag me on your makes @handmadebystacyj and #handmadebystacyj – I’d love to see them!
Stacy J
This pattern is copyright 2022 Handmade by Stacy J. Please do not duplicate or copy any portion of this pattern, as well as photographs. You are encouraged to share images of your final product and are allowed to sell final products; If you sell your final product, I just ask that you please purchase the ad-free pdf and credit Handmade by Stacy J as the designer. Thank you!
I designed the Lattice Cable Washcloth pattern for part 6 of the “Learn to Knit” series so that you can try cabling after learning the basics. The Lattice Cable Washcloth is a perfect pattern for the ambitious beginner that wants to try their hand at cabling on a small, as well as useful project. It uses only Knit and Purl, as well as cabling to create a beautiful pattern. Below you will find the written directions and a chart, as well as a video tutorial.
Difficulty level:
As the final project for the Learn to Knit series, this can be made by the ambitious beginner, as long as your comfortable with knit & purl, you should have no problems catching on. If you haven’t cabled before, I do recommend trying on a small swatch to get a feel for it prior to starting a project; or, you can be like me and dive on in anyways!
Measures:
9” x 9” / Gauge isn’t critical, but will affect size and yarn usage
Stitches used:
Knit (k), Purl (p) Back Cross (BC): Slip 1 st to CN and hold at back, k2 from left needle, then p1 from CN Front Purl Cross (FPC): Slip 2 sts to CN and hold at front, p1 from left needle, then k2 from CN C4B: Slip 2 sts to CN and hold at back, k2 from left needle, then k2 from CN C4F: Slip 2 sts to CN and hold at front, k2 from left needle, then k2 from CN
Cable Needle (cn) or 1 double pointed needle (dpn)
2 stitch markers recommended / 4 stitch markers is optimal
Tapestry needle and scissors
Here’s a pin for your Pinterest board 🙂
Note:Pattern length can be adjusted by continuing to do more repeats. End with either row 10 or row 20 when you come to desired length. To adjust width, simply calculate the number of stitches in increments of 12 + 10.
I hope you enjoyed this dishcloth pattern as much as I did. Please remember to subscribe to the YouTube channel and tag me on your makes @handmadebystacyj. I love to see them!
This pattern is copyright 2022 Handmade by Stacy J. Please do not duplicate or copy any portion of this pattern, as well as photographs. You are encouraged to share images of your final product and are allowed to sell final products; If you sell your final product, I just ask that you please purchase the ad-free pdf and credit Handmade by Stacy J as the designer. Thank you!
The Bamboo Stitch Dishcloth written pattern can be used with the video tutorial on the “Handmade by Stacy J” YouTube channel. It‘s a beginner friendly knit pattern that only uses Knit, Purl and Yarn Over while slipping a stitch.There is also a row by row checklist to help you with keeping track. Enjoy!
Tutorial available on YouTube at: https://youtu.be/6-GagTi5av4j At the bottom of this post you will find a pdf that contains a checklist.
Disclosure: This post contains affiliate links. As an affiliate, when you purchase through my links, you allow the company to pay me a small commission without costing you a penny more, which allows me to continue making free content. Thank you for your support!
Difficulty level:
Easy / Beginner
Measures:
8.5” x 8.5” / Gauge not important, but if you knit loose, you will use more yarn.
Stitches used:
Knit (k)
Purl (p)
Yarn Over (yo)
Here’s a pin for your Pinterest board 🙂
Materials Needed:
Lilly, Sugar’n Cream yarn in Color “Swimming Pool” (100% Cotton, Medium 4 weight) 65 yards
1 lockable stitch marker (for marking front of work)
Tapestry needle and scissors
Notes:
Pattern length can be adjusted by continuing to do more repeats. End with “Final Row” repeat when you come to desired length. To adjust width, calculate the number of stitches in increments of 2 + 6.
Directions for the Bamboo Stitch Dishcloth:
Set up Rows
Cast on 44
K across for 3 rows
Pattern
Use lockable stitch marker to mark RS / Insert stitch markers after beg k3 and before ending k3; carry them up the work until final rows.
(RS) K3, *yo, k2, pass yo over k2; rep from * until 3 sts remain, k3
(WS) K3, p across until 3 sts remain, k3
Rep rows 1-2 sixteen more times or until piece measures 8”
Final Rows
K across for 3 rows
Bind off knit wise and weave in ends.
Please remember to tag me on your makes @handmadebystacyj and #handmadebystacyj – I’d love to see them!
If you prefer a pdf, please feel free to download this printable pdf 🙂
This pattern is not to be sold or copied in any way. The images, pattern and charts are copyrighted by Handmade by Stacy J and may not be duplicated. You are welcome to sell your makes, however I ask that you credit me as the designer. Also, you are responsible for providing your own photographs. Thank you!