Featured Friend Friday

Meet Kris Moore!


This week is my first Featured Friend Friday and I’d like for you to meet Kris Moore with Krissy’s Over The Mountain Crochet. Each Friday I’ll be introducing you to a wonderful designer. Kris is an amazing woman that I’ve had the pleasure to be friends with for almost a year. She has a heart of gold and is one of the sweetest ladies I’ve ever met. Now, I’d like for you to meet her, too!

Kris has had an online presence since early 2000 in one form or another, but her serious pursuit of presenting herself as a crochet designer has been in the last 5 years. When Kris’s children were young, she never dreamed that we would be able to connect to other crafter’s in the way that the internet has afforded us. She is always designing or making something in her head. 


A designer’s journey

When I asked Kris to tell me about her journey she said, “I never considered myself as a designer until a few years ago. I felt that I wasn’t worthy of that title. Since I haven’t had a formal education, I have always been creating. I have to create something or I become very sad. I feel like I live with my head in the clouds, my own creative cloud so to speak. My journey as a crochet designer started while spending time at my grandmother’s home. She pulled me to the couch and made me watch her crochet a granny square. I can still see how she executed a dc. She slowly walked me through the process, over and over.

That was all it took for me to become hooked. It made so much sense to me that I was confident that I could crochet. When I hit my 20’s (1980) I bought a crochet magazine and followed the stitch guide. There was no youtube or anything like that, but it just made sense. I crocheted all through the early years of my marriage, before I had children. After the children started making their appearance I shifted to sewing. I have a deep love for both crafts. They both fuel my creative juices.”

“I can’t think of what inspired me to become a crochet designer. I have always been this way, but I found ebay boutique through a friend around 2004. It was a happening place back then where you could buy pageant wear for children, boutique handbags, anything you could find in a boutique. There were many group’s that you could join. The group’s which consisted of about 10 or 12 folks would have launches. It would have a strict date and a theme, like around Valentine’s day. The launch would have a title, something like “Sweet Kisses”, then you would design something around kisses. It was so much fun!

We would then all promote one another during the launch to help each other sell our items. Someone mentioned they would love to have a crocheted hat to go with an outfit they were designing, and I volunteered. I became one of the go to crochet members. Then ebay made major changes, and we all made a mass exodus to Etsy. I started on Etsy selling custom boutique pageant wear, with crocheted accessories, and I started getting requests for the crochet patterns. I didn’t even know it was a thing and I thought, why not, let’s try this and see.”

Current project

Her favorite part of being a designer is that she can manipulate fabric and string to create something beautiful. “Currently I am working on a line of baby/toddler sweaters. I am so hooked on making faux pleated skirts in adorable prints for little girls. And then creating a sweater to match that print. The first was a sweater to match baby foxes. Then I found “Gobble Till You Wobble” fabric that had turkey’s all over it. The fabric is so cute, so I designed a “Turkey Tail” pullover hoodie. It is such a fun design! Next is a snowman sweater.”

Her hand-picked patterns

I asked my featured friend to share a few of her favorite patterns that she’s designed and is offering as patterns for sale. When you click on any of the images below, you will be redirected to the pattern on her Ravelry Store.

Pattern link for featured friend Kris
Lace Storage bin link for featured friend Kris Moore
Pattern link for featured friend Kris Moore

Biggest tip!

I asked Kris what her biggest tip would be to share with a new crafter and she has such a lovely answer, “Don’t be afraid to spread your wings and explore. Use mixed media, and you don’t always have to do things like everyone else is. Just be yourself and don’t apologize for it.”

And, although it’s great to get to know designers on a professional level, I also think it’s great to get to know them on a personal level. Kris’ passion “for life and living is Jesus Christ. Without him I could do nothing of any value. It is because of him that I have a joy in my life that over takes any sadness that comes my way.” Kris and her husband are very active in their church helping members recover from substance abuse, depression, finances or anything else that they are currently struggling with in life. Her husband is currently the RU director at their church and she has been teaching the children in Jr. Church ministries for 34 years.

A little personal tidbit

Kris lives in Looneyville, WV. Her home place is Wiseburg WV, and she giggles about how ironic the names are. She was born in upstate New York. Her father was in the Air Force and was stationed in Plattsburg and her family came back to WV after he left the service. Kris has been married 40 years, and she has 5 children and 4 grandchildren. She says, “I love my children and I am so proud of each one. But, those grand-babies have stolen my heart!”
Logo for featured friend Krissy's Over the Mountain Crochet

To follow my featured friend, Kris on social media and visit her website, here are the links:

WebsiteFacebookInstagramYouTubeRavelryPinterestEtsy

Thank you for taking the time to read and learn more about my featured friend! Check back next week (or subscribe to my newsletter) to meet the wonderful Courtney with Creations by Courtney.

Enjoy your weekend and thank you again!

Stacy J

Vandyke Lace Panel

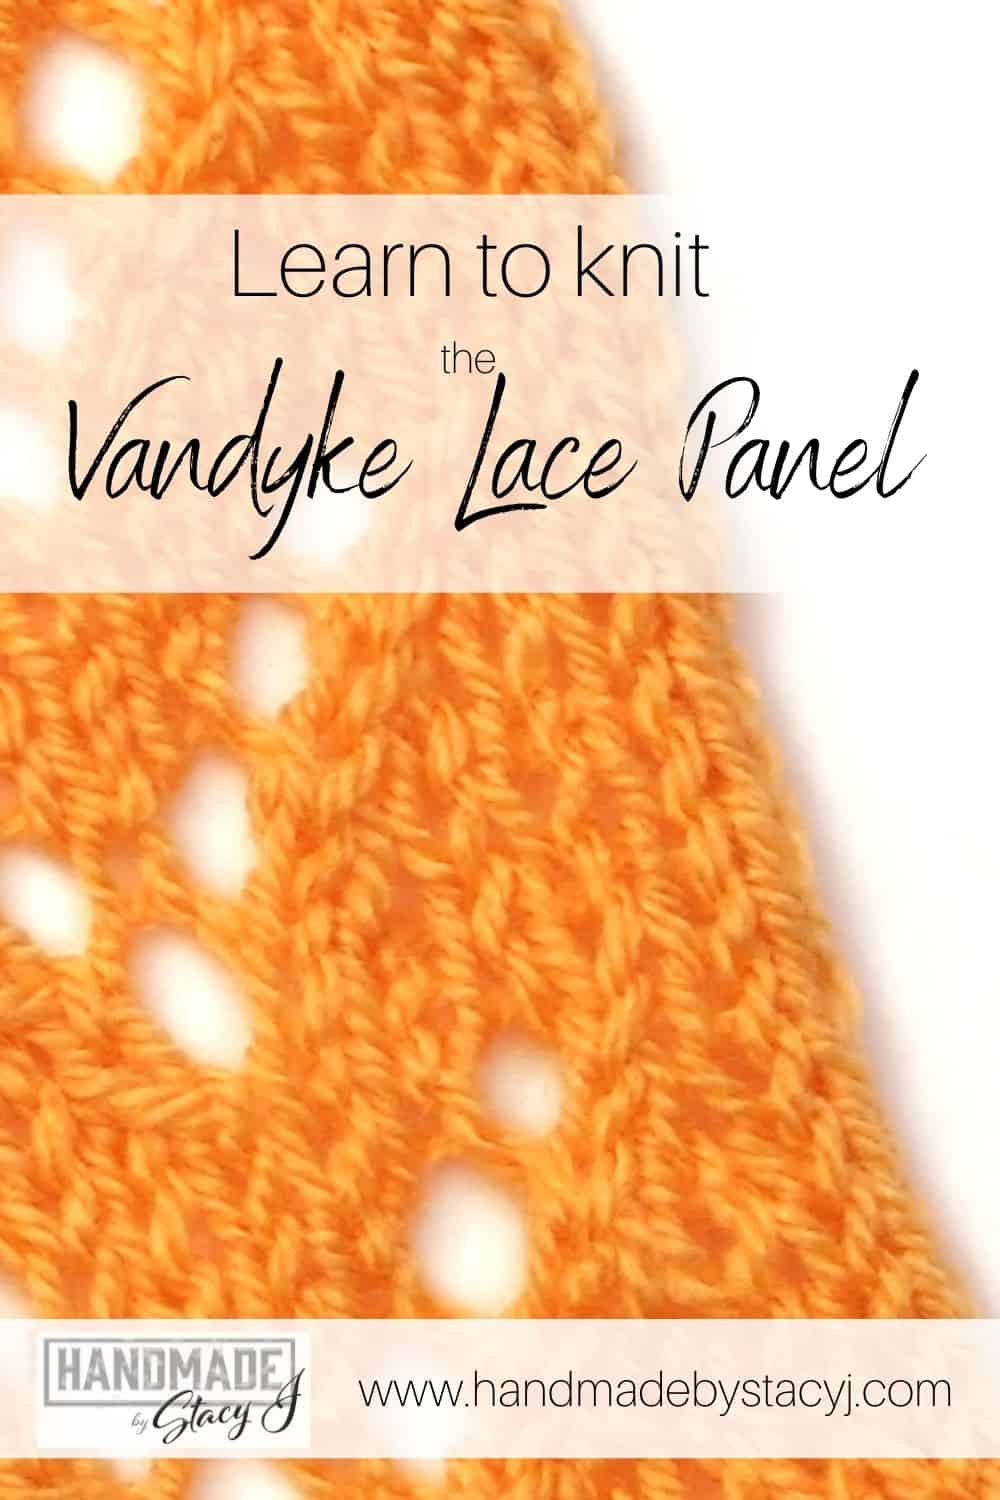
The Vandyke Lace Panel is a very simple knit panel that is worked over 9 stitches and 8 rows on a background of Stockinette Stitch. Join me as I show you step by step how to create this beautiful lace panel. It creates a gorgeous panel that can be used in so many ways – shawls, scarves, garments, blankets….I could go on. I just love this stitch!

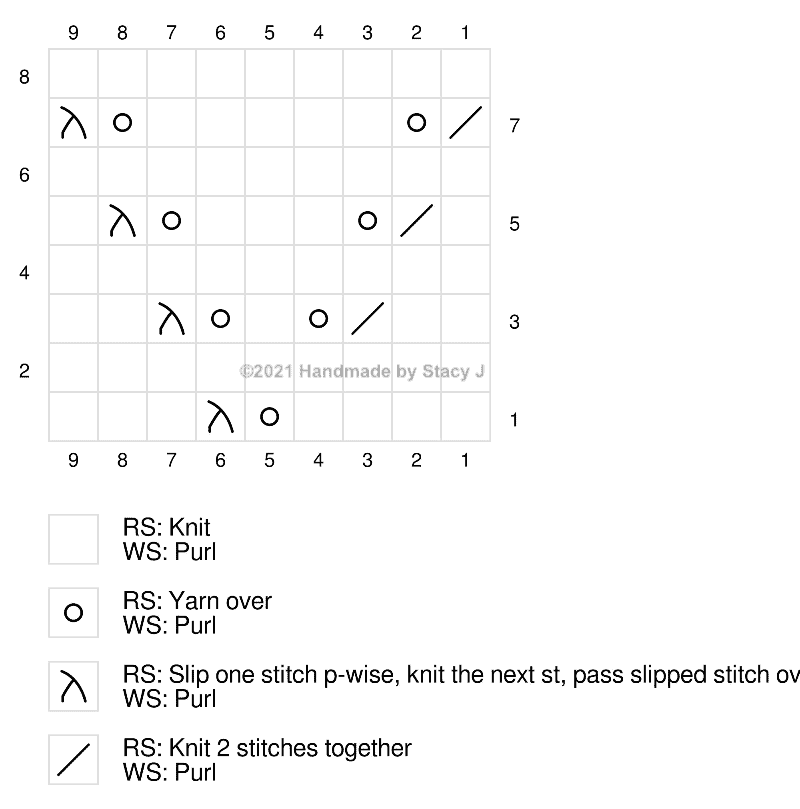
Written directions are below, as well as a chart and a video tutorial.

The yarn and needles used are some of my absolute favorites. So much so that I became an affiliate with the companies. What that means for you is that when you purchase using my link, you allow the company to pay me a small commission without costing you a penny more. This helps me to continue making free tutorials and patterns. Here are the links if you’d like to check them out:

Yarn: LoveCrafts Paintbox Simply DK

Needles: KnitPicks Radiant Wood

Vandyke Lace Panel

Difficulty level

Easy

Stitches used:

Knit (k)

Purl (p)

Yarn Over (yo)


Pin of Vandyke Lace Panel from Handmade by Stacy J
Here’s a pin for your Pinterest board 🙂

Special Stitches used:

Skpo: Slip, knit, pass over (slip one stitch purl wise, knit the next st, pass slipped stitch over – one stitch decreased)

Materials Needed:

Paintbox Yarns – Simply DK (100% Acrylic; 100g / 3.5oz; Light #3 weight); Color #116 Melon Sorbet

KnitPicks Straight Knitting needles, size 6 (4.00 mm)

Directions for Vandyke Lace Panel

For the sample in the YouTube video, I cast on 15 for a st st background of 3 sts on each side. Directions below are for the lace panel only.

1 (RS): K4, yo, skpo, k3

2 and all WS rows: Purl

3: K2, k2tog, yo, k1, yo, skpo, k2

5: K1, k2tog, yo, k3, yo, skpo, k1

7: K2tog, yo, k5, yo, skpo

8: Purl

Rep rows 1-8 until desired length is reached ending by binding off purl wise as row 8


Chart of Vandyke Lace Panel knitting instructions from Handmade by Stacy J

Here’s the video tutorial for you: https://youtu.be/EdUIEAbPS8M

If you’d like a printable pdf, you can download the file below.

Thanks again for visiting! I’m so grateful to have you joining on our yarny adventures 🙂

Stacy J

Subscribe on YouTubeJoin me on FacebookFollow on Instagram

Patterns on RavelryInspiration on Pinterest

Horizontal Chevron Stitch

For this tutorial, I’ve decided to demonstrate how to crochet a modified version of the Horizontal Chevron Stitch. It uses only single crochet and a modified version of Front Post Treble Crochet. It’s modified in the sense that there is no gap in the back where a stitch is usually skipped when working post stitches. That modification makes it great for use with garments and even blankets when you aren’t wanting gaps in your fabric. There is a video tutorial below the written directions, as well. 

Disclosure: This post contains affiliate links. As an affiliate, when you purchase through my links, you allow the company to pay me a small commission without costing you a penny more, which allows me to continue making free content. Thank you for your support!


Have you ever used a Furl’s hook?? I just got my first ones earlier this year and all I can say is “WOW!” I love it! They have a lovely weight to them and I love how the tip is not too blunt. I feel like it even shaved a bit of time off of a baby afghan I made a couple months ago. If you ever feel like trying one, please consider using my affiliate links below in the Materials section.

Difficulty level:

Easy-ish

Terms and Abbreviations used:

Directions are written using US terminology

Ch: Chain

Ea: Each

Lp: Loop

Rep: Repeat

Sc: Single Crochet

St (s): Stitch (es)


Pin of Horizontal Chevron stitch from Handmade by Stacy J
Here’s a pin for your Pinterest board 🙂

Special Stitches used:

Modified Front Post Treble Crochet (Mod FpTr): Yarn over twice and insert hook around indicated post from front to back, yo, draw up a lp, yo, draw through 2 loops, yo, draw through 2 loops (2 loops remain on hook), insert hook in next sc st (the one that you would normally skip when working a front post stitch), yo, draw through remaining 3 loops.


Materials Needed:

Paintbox Yarns – Simply DK (100% Acrylic; 100g / 3.5oz; Light #3 weight); Color #131 Seafoam Blue

Crochet Hook Size G (4 mm)


Directions for the Horizontal Chevron Stitch

Note: Ch 1 at the beg of row does not count as a stitch

Stitch is worked in increments of 6+3; For the sample in the YouTube video, I chained 21.

1 (WS): Sc in second ch from hook and in ea ch across; turn.

2 (RS): Ch 1, sc in first 2 sts, using a lockable stitch marker mark the post of the sc that was just made, then work 1 sc in ea st across; turn.

3: Ch 1, sc in ea st across; turn.

4: Ch 1, sc in first 6 sts, work Mod FpTr around marked st 2 rows below, *1 sc in ea of next 2 sc sts from previous row, work 1 Mod FpTr around post in the third st past the previous one worked (there will always be 2 sts between the posts); rep * to last st, 1 sc, turn.

5: Ch 1, sc in ea st across; turn.

6: Ch 1, 1 sc in same st, *work 1 Mod FpTr around Mod FpTr post in the 2 rows below (remember, there will always be 2 sts between the posts), 1 sc in ea of next 2 sts; rep * to last 4 sts, 1 sc in ea of last 4 sts; turn

7 – 9: Ch 1, sc in ea st across; turn.

Repeat rows 2-9 for pattern


If you prefer a printable pdf of the stitch pattern, you can download the file below

     Horizontal-Chevron-Tutorial

I thank you so much for joining me on our yarny adventures. Please remember to tag me on your makes @handmadebystacyj

Stacy J

YouTubeFacebookInstagramRavelryPinterest


Lace Rib Panel

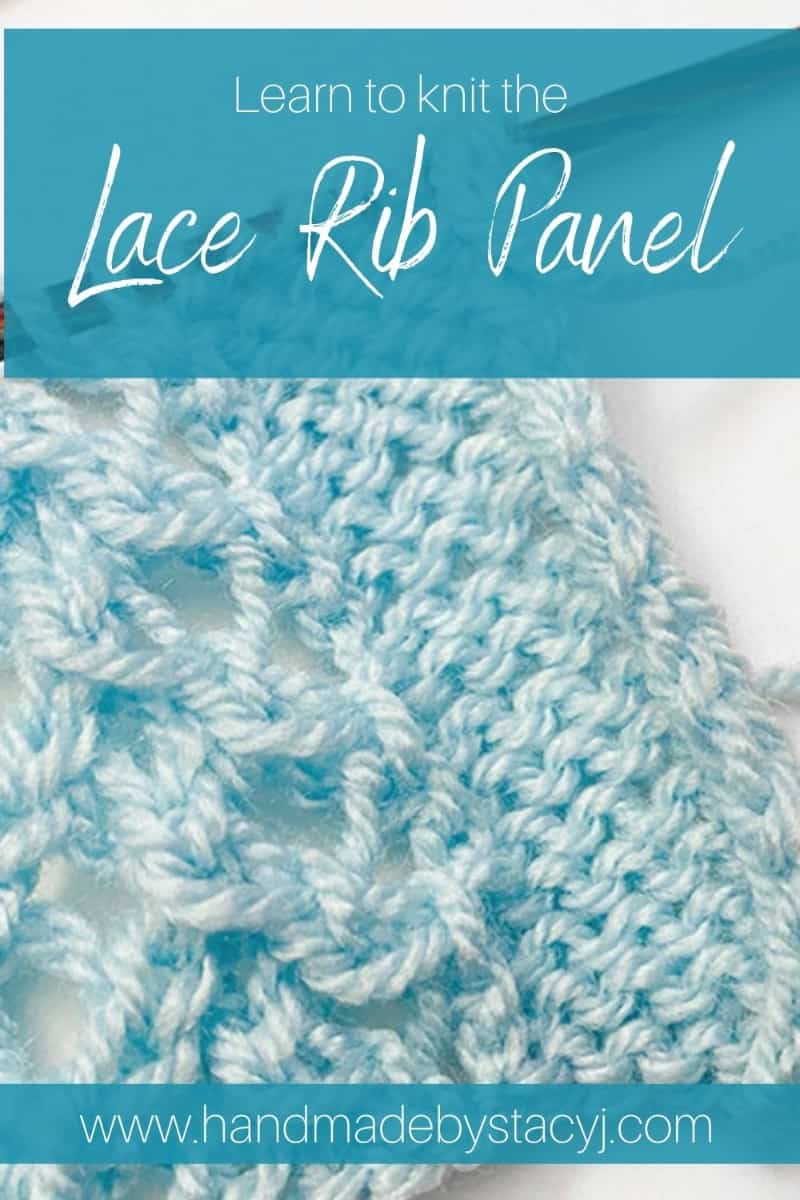
The Lace Rib Panel is a great way to get started if you haven’t knit lace before. The Lace Rib Panel is worked over 7 stitches and 4 rows – easy peasy, right? The video shows you step by step how to work the stitch which is really beautiful! (Oh! And, I apologize ahead of time. When you listen to the background, my little dog was snoring ?).


Disclosure: This post contains links to companies that I am affiliated with. By purchasing through that link, you allow the companies to pay me a small commission. And, as a result allows me to continue providing free content. Thank you for your support!

Difficulty level:

Easy

Stitches used:

Knit (k)

Purl (p)

Yarn Over (yo)


Pin of Lace Rib Panel from Handmade by Stacy J
Here’s a pin for your Pinterest board 🙂

Special Stitches used:

Skpo: Slip, knit, pass over (slip one stitch purl wise, knit the next st, then pass slipped stitch over – one stitch decreased)

Sk2po: Slip, k2tog, pass over (slip one st purlwise, knit next 2 stitches together, then pass slipped stitch over – 2 stitches decreased)

Materials Needed:

Paintbox Yarns – Simply DK (100% Acrylic; 100g / 3.5oz; Light #3 weight); Color #131 Seafoam Blue

KnitPicks Straight Knitting needles, size 6 (4.00 mm)


Directions for the Lace Rib Panel:

For sample, I cast on 17 for a border of rev st st of 5 sts on each side. Directions below reflect only the lace portion of the pattern.

1 (RS): P1, yo, skpo, k1, k2tog, yo, p1

2 (WS): K1, p5, k1

3: P1, k1, yo, sk2po, yo, k1, p1

4: K1, p5, k1

Rep rows 1-4 until desired length is reached, binding off on row 4 as pattern.

If you prefer to be able a pdf, there is a free downloadable pdf below:

I hope you enjoy the tutorial and find it helpful! Please remember to tag me @handmadebystacyj so that I can see your makes. Thank you so much!

Stacy J

Subscribe on YouTubeJoin me on FacebookFollow on Instagram

Patterns on RavelryInspiration on Pinterest

Lattice Cable Dishcloth

I designed the Lattice Cable Washcloth pattern for part 6 of the “Learn to Knit” series so that you can try cabling after learning the basics. The Lattice Cable Washcloth is a perfect pattern for the ambitious beginner that wants to try their hand at cabling on a small, as well as useful project. It uses only Knit and Purl, as well as cabling to create a beautiful pattern. Below you will find the written directions and a chart, as well as a video tutorial.

Difficulty level:

As the final project for the Learn to Knit series, this can be made by the ambitious beginner, as long as your comfortable with knit & purl, you should have no problems catching on. If you haven’t cabled before, I do recommend trying on a small swatch to get a feel for it prior to starting a project; or, you can be like me and dive on in anyways!

Measures:

9” x 9” / Gauge isn’t critical, but will affect size and yarn usage

Stitches used:

Knit (k), Purl (p)
Back Cross (BC): Slip 1 st to CN and hold at back, k2 from left needle, then p1 from CN
Front Purl Cross (FPC): Slip 2 sts to CN and hold at front, p1 from left needle, then k2 from CN
C4B: Slip 2 sts to CN and hold at back, k2 from left needle, then k2 from CN
C4F: Slip 2 sts to CN and hold at front, k2 from left needle, then k2 from CN

Materials Needed:

Hobbii, Rainbow 8/8 (100% Cotton, DK 3 weight) “3 Nude” 60 yards

Size 5 (3.75 mm) Knitting Needles

Cable Needle (cn) or 1 double pointed needle (dpn)

2 stitch markers recommended / 4 stitch markers is optimal

Tapestry needle and scissors


Pin of Lattice Cable Washcloth from Handmade by Stacy J
Here’s a pin for your Pinterest board 🙂

Note: Pattern length can be adjusted by continuing to do more repeats. End with either row 10 or row 20 when you come to desired length. To adjust width, simply calculate the number of stitches in increments of 12 + 10.


Directions for Lattice Cable Washcloth:

Cast on 46

Rows 1-4: Knit
5 [RS]: K3, p40, k3
6 [WS]: Knit
7 [RS]: k3, p2 *p4, C4F, p4; rep * twice more, p2, k3
8 [WS]: k5, *k4, p4, k4; rep * twice more, k5


Pattern Repeat

Note: All RS rows begin with k3, p2 and end with p2, k3;

All WS rows begin and end with k5

1 [RS]: k3, p2 *p3, BC, FPC, p3; rep * twice more, p2, k3

2 [WS]: k5, *k3, p2, k2, p2, k3; rep * twice more, k5

3 [RS]: k3, p2, *p2, BC, p2, FPC, p2; rep * twice more, p2, k3

4 [WS]: k5, *k2, p2, k4, p2, k2; rep * twice more, k5

5 [RS]: k3, p2, *p1, BC, p4, FPC, p1; rep * twice more, p2, k3

6 [WS]: k5, *k1, p2, k6, p2, k1; rep * twice more, k5

7 [RS]: k3, p2, *BC, p6, FPC; rep * twice more, p2, k3

8 [WS]: k5, *p2, k8, p2; rep * twice more, k5

9 [RS]: k3, p2, k2, *p8, C4B; rep * once more, p8, k2, p2, k3

10 [WS]: k5, *p2, k8, p2; rep * twice more, k5

11 [RS]: k3, p2, *FPC, p6, BC; rep * twice more, p2, k3

12 [WS]: k5, *k1, p2, k6, p2, k1; rep * twice more, k5

13 [RS]: k3, p2, *p1, FPC, p4, BC, p1; rep * twice more, p2, k3

14 [WS]: k5, *k2, p2, k4, p2, k2; rep * twice more, k5

15 [RS]: k3, p2, *p2, FPC, p2, BC, p2; rep * twice more, p2, k3

16 [WS]: k5, *k3, p2, k2, p2, k3; rep * twice more, k5

17 [RS]: k3, p2, *p3, FPC, BC, p3; rep * twice more, p2, k3

18 [WS]: k5, *k4, p4, k4; rep * twice more, k5

19 [RS]: k3, p2, *p4, C4F, p4; rep * twice more, p2, k3

20 [WS]: k5, *k4, p4, k4; rep * twice more, k5

Repeat Pattern Repeat rows 1-20 once more


Finishing Rows:

1. [RS]: K3, p40, k3
2. Knit 3 rows
3. Bind off your washcloth knit wise and then weave in ends


Here’s the link to the video tutorial for you: https://youtu.be/_h0j-qid0PQ

If you’d like a printable pdf, you can download it below or grab it from Ravelry here.

I hope you enjoyed this dishcloth pattern as much as I did. Please remember to subscribe to the YouTube channel and tag me on your makes @handmadebystacyj. I love to see them!

Thank you!

Stacy J

Subscribe on YouTubeJoin me on FacebookFollow on Instagram

Patterns on RavelryInspiration on Pinterest

This pattern is copyright 2022 Handmade by Stacy J. Please do not duplicate or copy any portion of this pattern, as well as photographs. You are encouraged to share images of your final product and are allowed to sell final products; If you sell your final product, I just ask that you please purchase the ad-free pdf and credit Handmade by Stacy J as the designer. Thank you!

Little Waves Crochet Stitch

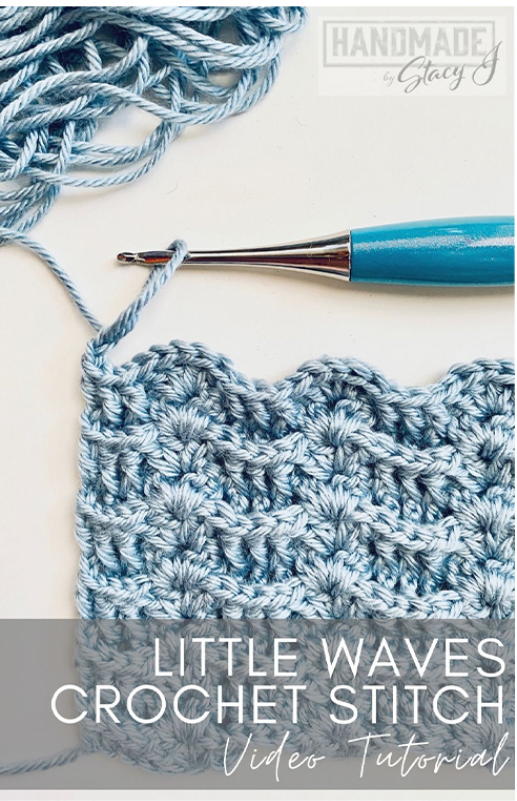
The Little Waves Crochet Stitch is a fun and simple stitch that incorporates Double Crochet  and Front Post Double Crochet stitches. It makes a beautiful, reversible pattern that is both airy and fairly dense. Below you will find the written directions and a video tutorial to walk you through creating this beautiful stitch. Also, I have a pin for you to save to your Pinterest Boards 🙂

Disclosure: This post contains affiliate links. As an affiliate, when you purchase through my links, you allow the company to pay me a small commission without costing you a penny more, which allows me to continue making free content. Thank you for your support!


About the hook!

The hook that I’m using is the Furl’s Odyssey hook in Turquoise and Silver (I absolutely LOVE this hook!). And, I just happen to be an affiliate for Furl’s. What that means is that if you click on this link and decide to purchase a hook, you will NOT be charged a penny more and I’ll receive a small commission (which helps me continue to make free content). Here is the link 🙂


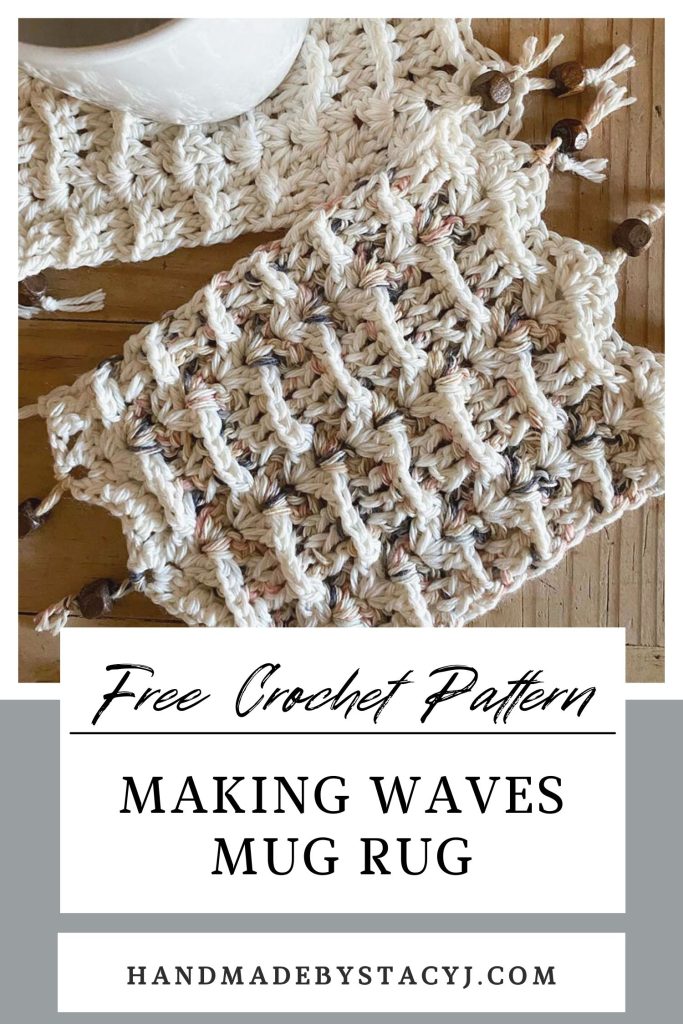
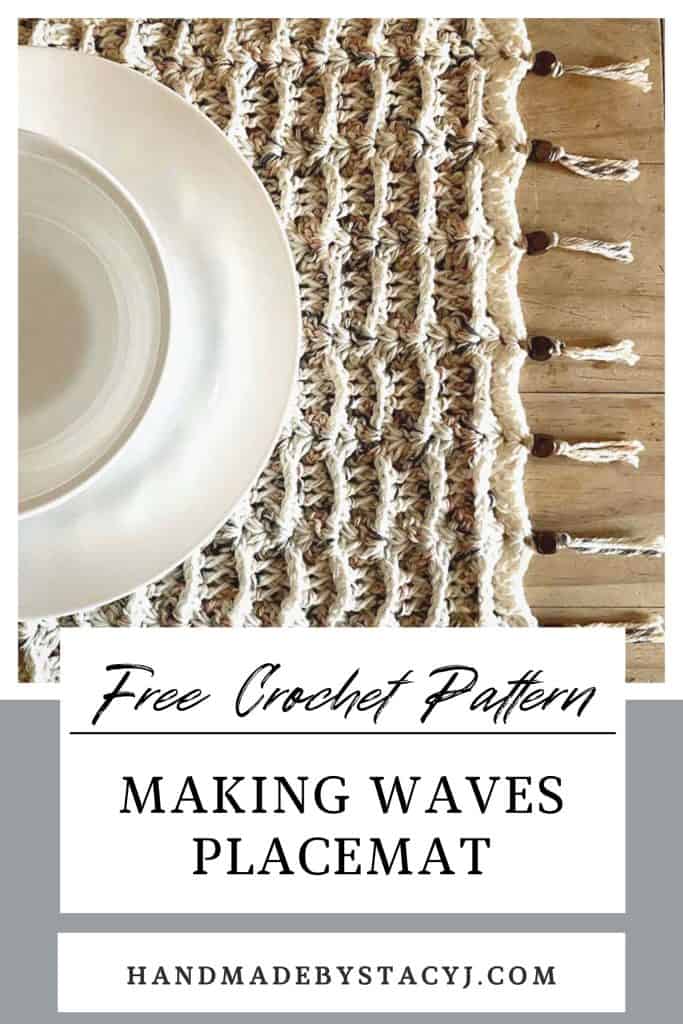
If you’d like to see the Making Waves Table Set that uses the Little Waves crochet stitch, all three patterns from this set are free to view on my website. Simply click on the image and you’ll be directed to the free crochet patterns.


Directions for the Little Waves Crochet Stitch:

Chain in multiples of 8 +5

Row 1: Dc in 4th chain from hook (3 skipped chains count as dc) and in next ch, *sk next 2 chs (2dc, ch1, 2dc) in next ch, sk next 2 chs, 1 dc in ea of next 3 chs; rep * across. Turn

Row 2 (Pattern Repeat): Ch 2 (some folks ch3, but I prefer to ch2), work Fpdc around ea of the next 2 dc posts, (2dc, ch1, 2dc) in next ch-1 sp, *sk next 2 dc, work Fpdc around ea of next 3 dc, sk next 2 dc, work (2dc, ch1, 2dc) in next ch-1 sp; rep * to last 5 sts, sk next 2 dc, work Fpdc around next 2 dc, dc in top of turning ch.

Repeat row 2 until desired length is reached. Fasten off and weave in ends.


Pin of crocheted Little Waves Stitch from Handmade by Stacy J
Here’s a pin for your Pinterest board 🙂

Thank you so much for visiting and supporting our yarny adventures. Please tag me @handmadebystacyj so that I can see your makes – I love to see them!

Stacy J

Subscribe on YouTube • Join me on Facebook Follow on Instagram

Patterns on Ravelry • Inspiration on Pinterest

Bamboo Stitch Dishcloth

The Bamboo Stitch Dishcloth written pattern can be used with the video tutorial on the “Handmade by Stacy J” YouTube channel. It‘s a beginner friendly knit pattern that only uses Knit, Purl and Yarn Over while slipping a stitch.There is also a row by row checklist to help you with keeping track.  Enjoy!

Tutorial available on YouTube at: https://youtu.be/6-GagTi5av4j
At the bottom of this post you will find a pdf that contains a checklist.


Disclosure: This post contains affiliate links. As an affiliate, when you purchase through my links, you allow the company to pay me a small commission without costing you a penny more, which allows me to continue making free content. Thank you for your support!


Difficulty level:

Easy / Beginner


Measures:

8.5” x 8.5” / Gauge not important, but if you knit loose, you will use more yarn.


Stitches used:

Knit (k)

Purl (p)

Yarn Over (yo)


Pin of Bamboo Stitch Dishcloth from Handmade by Stacy J
Here’s a pin for your Pinterest board 🙂

Materials Needed:

Lilly, Sugar’n Cream yarn in Color “Swimming Pool”  (100% Cotton, Medium 4 weight) 65 yards 

Size 7 (4.5mm) Knitting Needles

2 stitch markers (optional for garter edge)

1 lockable stitch marker (for marking front of work) 

Tapestry needle and scissors


Notes:

Pattern length can be adjusted by continuing to do more repeats. End with “Final Row” repeat when you come to desired length. To adjust width, calculate the number of stitches in increments of 2 + 6.


Directions for the Bamboo Stitch Dishcloth:

Set up Rows

Cast on 44

K across for 3 rows


Pattern

Use lockable stitch marker to mark RS / Insert stitch markers after beg k3 and before ending k3; carry them up the work until final rows.

(RS) K3, *yo, k2, pass yo over k2; rep from * until 3 sts remain, k3

(WS) K3, p across until 3 sts remain, k3

Rep rows 1-2 sixteen more times or until piece measures 8”


Final Rows

K across for 3 rows

Bind off knit wise and weave in ends. 


Please remember to tag me on your makes @handmadebystacyj and #handmadebystacyj – I’d love to see them!

If you prefer a pdf, please feel free to download this printable pdf 🙂

This pattern is not to be sold or copied in any way. The images, pattern and charts are copyrighted by Handmade by Stacy J and may not be duplicated. You are welcome to sell your makes, however I ask that you credit me as the designer. Also, you are responsible for providing your own photographs. Thank you!

Let’s get social!

Subscribe on YouTubeJoin me on Facebook

Follow on InstagramPatterns on RavelryInspiration on Pinterest

Seersucker Dishcloth

The Seersucker Dishcloth written pattern can be used with the video tutorial on the “Handmade by Stacy J” YouTube channel. It‘s a beginner friendly knit pattern that only uses Knit and Purl. There is also a checklist & chart attached to this pattern to help keep track of rows. Enjoy!


At the bottom of this post you will find a pdf that contains a chart and a checklist.


Disclosure: This post contains affiliate links. As an affiliate, when you purchase through my links, you allow the company to pay me a small commission without costing you a penny more, which allows me to continue making free content. Thank you for your support!


Difficulty level:

Easy / Beginner


Measures:

10” x 9.5” / Gauge not important


Stitches used:

Knit (k)

Purl (p)


Learn to knit the Seersucker dishcloth from Handmade by Stacy J
Here’s a pin for your Pinterest board 🙂

Materials Needed:

Solid Color yarn  (100% Cotton, Medium 4 weight) 80 yards  

Size 6 (4 mm) Knitting Needles

2 stitch markers (optional)

Tapestry needle and scissors


Notes:

Pattern length can be adjusted by continuing to do more repeats. End with “Final Row” repeat when you come to desired length. To adjust width, calculate the number of stitches in increments of 4 + 6.


To check out the baby blanket that this pattern inspired, please click HERE or on the picture below

Tiny Gems Baby Blanket free knitting pattern from Handmade by Stacy J
This baby blanket uses the same stitches as the Seersucker Dishcloth and was inspired by it. To see the free pattern, please click HERE.

Directions for the Seersucker Dishcloth:

Set up Rows

Cast on 46

K across for 5 rows


Pattern

  1. K3, *k1, p1; rep from * until 3 sts remain, k3
  2. K3, *k1, p1; rep from * until 3 sts remain, k3
  3. K3, *p1, k3; rep from * until 3 sts remain, k3
  4. K3, *p3, k1; rep from * until 3 sts remain, k3
  5. K3, *k1, p1; rep from * until 3 sts remain, k3
  6. K3, *k1, p1; rep from * until 3 sts remain, k3
  7. K3, *k2, p1, k1; rep from * until 3 sts remain, k3
  8. K3, *p1, k1, p2; rep from * until 3 sts remain, k3

Rep rows 1-8 four more times

Rep rows 1-5 once more


Final Rows

K across for 5 rows

Bind off knit wise and weave in ends. 

If you’d like to download a free Dishcloth wrapper for gifting your dishcloth, please visit the “Printables” page or click HERE.


Please remember to tag me on your makes @handmadebystacyj and #handmadebystacyj – I’d love to see them!

If you prefer a pdf, please feel free to download this printable pdf 🙂

This pattern is copyright 2020 Handmade by Stacy J. Please do not duplicate or copy any portion of this pattern, as well as photographs. You are encouraged to share images of your final product and are allowed to sell final products; If you sell your final product, I just ask that you please purchase the ad-free pdf and credit Handmade by Stacy J as the designer. Thank you!

Let’s get social!

Subscribe on YouTubeJoin me on Facebook

Follow on InstagramPatterns on RavelryInspiration on Pinterest

Split Front Post Treble Crochet (Modified Prong Stitch)

Learn how to crochet the Split Front Post Treble Crochet Stitch (or the Modified Prong Stitch). Today you’ll learn how to add incredible texture and design to your crochet pieces without having the gap in the back that results from front post crochet. I’ll walk you through the steps and you’ll get to experience for yourself how fun this stitch really is.

Courtney, from Creations by Courtney, asked me to make this tutorial for her. She designs amazing garments that utilize this stitch and I know that she would just LOVE if you would visit her website. She’s constantly creating beautiful, new and innovative garment patterns made for all body types. Her website is: https://creationsbycourtney.com

Please consider subscribing to my YouTube channel, as I’m uploading fun stitches that are easy to follow on a weekly (or more!) basis! Thank you!!


Disclosure: This post contains affiliate links. As an affiliate, when you purchase through my links, you allow the company to pay me a small commission without costing you a penny more, which allows me to continue making free content. Thank you for your support!


Stitch Technique for Split Front Post Treble Crochet

1. YO twice, working in front of previous row, insert hook from front to back around post of dc indicated 2 rows below, YO, pull up a loop, [YO, pull through 2 loops on hook] twice

2. YO, insert hook in next st, YO, pull up a loop (4 loops on hook), YO, pull through 2 loops (3 loops on hook)

3. YO twice, sk next 3 sts 2 rows below, insert hook front to back around the post of next dc, YO, pull up a loop (6 loops on hook), [YO, pull through 2 loops] twice, YO, pull through 4 loops.

Note: There will always be 3 dc between the legs of each Split FpTr


Pin of Split Front Post Treble Crochet Stitch
Here’s a pin for you Pinterest board ??

Looking for a great hook? Check out Furls!


Directions for Split Front Post Treble Crochet stitch pattern

Stitch is worked in multiples of 8 + 9

1: (Right side): Dc in fourth ch from hook and in ea ch across. Mark this as your right side; turn

2: Ch 1, sc in ea st across, turn

3: Ch 2 (counts as dc), 1 dc in ea of next 2 sts, Split FpTr beg around second dc 2 rows below, *dc in next 7 sts, sk next 3 dc 2 rows below, Split FpTr beg around next dc; rep from * until 3 sts remain, dc in last 3 sts; turn

4: Ch 1, sc in ea st across, turn

5: Ch 2 (counts as dc), 1 dc in ea of next 6 sts, Split FpTr beg around sixth dc 2 rows below, *dc in next 7 sts, sk next 3 dc 2 rows below, Split FpTr beg around next dc; rep from * until 7 sts remain, dc in last 7 sts; turn

Repeat rows 2 – 5 until you reach desired length

Thank you for joining me on our yarny adventures!

Stacy J

Subscribe on YouTubeJoin me on FacebookFollow on Instagram

Patterns on RavelryInspiration on Pinterest

Crosshatch Crochet Stitch

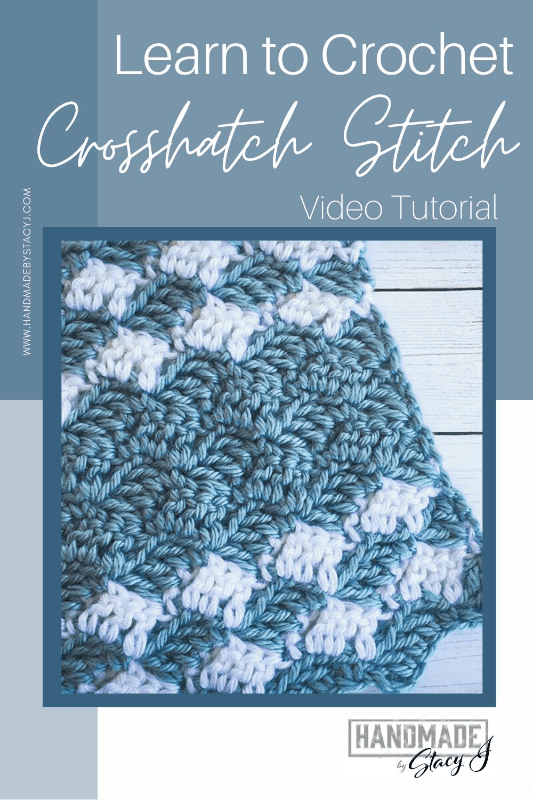
The Crosshatch Crochet Stitch is a super simple stitch that only uses the chain, single crochet and double crochet. Come join me as I show you how to do this using a G hook and Medium (4) weight yarn – step by step. Written directions are below, as well as the video tutorial and a pin to save to your boards.

Please subscribe to my YouTube channel, as I upload a new crochet tutorial every Tuesday.

https://youtu.be/HEm5MKo9sUs

Directions for Crosshatch Crochet Stitch

Crosshatch Crochet Stitch works in multiples of 7 sts + 4 (+3 for the base chain)

1: Sk 2 ch (counts as dc), 2 dc in 3rd ch from hook, *sk 3 ch, 1 sc in next ch, ch 3, 1 dc in ea of next 3 ch; rep * until 4 ch remain, sk 3 ch, 1 sc in last ch, turn.

2: Ch 3 (counts as dc), work 2 dc in first sc, *sk 3 dc, 1 sc in 1st ch of ch-3, ch 3, 1 dc in ea of next 2 ch and 1 dc in next sc; rep from * across, ending with sk 2 dc, 1 sc in top of turning ch, turn.

Repeat Row 2 until you reach the desired length.

Here is the video tutorial for you: https://youtu.be/HEm5MKo9sUs


Pin of Crosshatch Crochet Stitch from Handmade by Stacy J
Here’s a pin for your Pinterest board 🙂

I hope you found this tutorial helpful. Thank you for joining me on our yarny adventures! Happy Crocheting!

? Stacy J

Subscribe on YouTubeJoin me on FacebookFollow on Instagram

Patterns on RavelryInspiration on Pinterest