20+ Free Christmas Decor Crochet Patterns

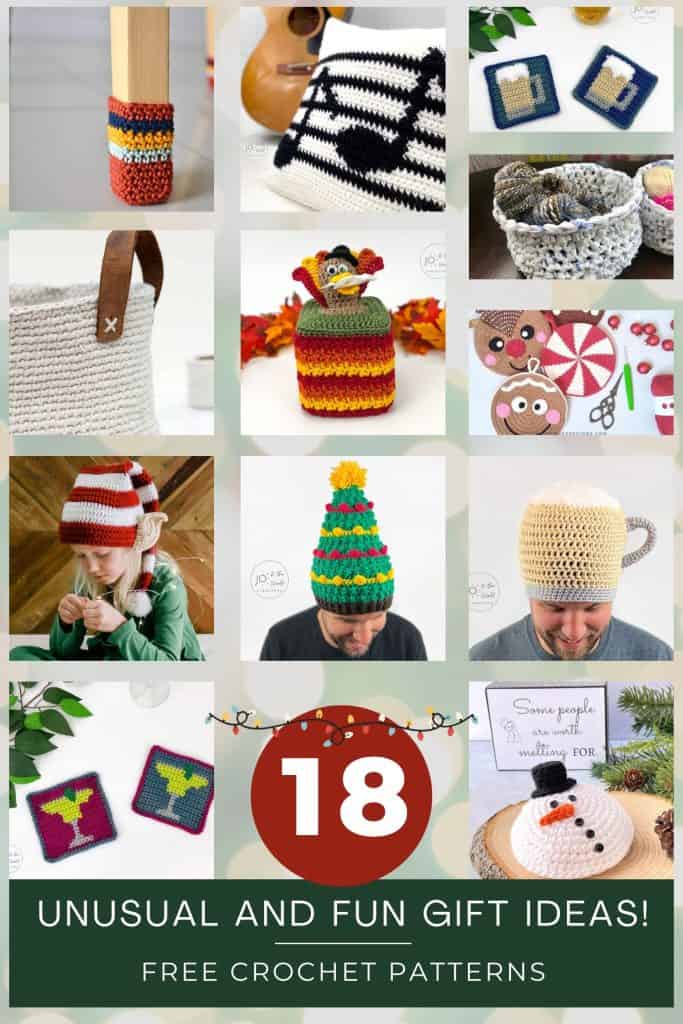
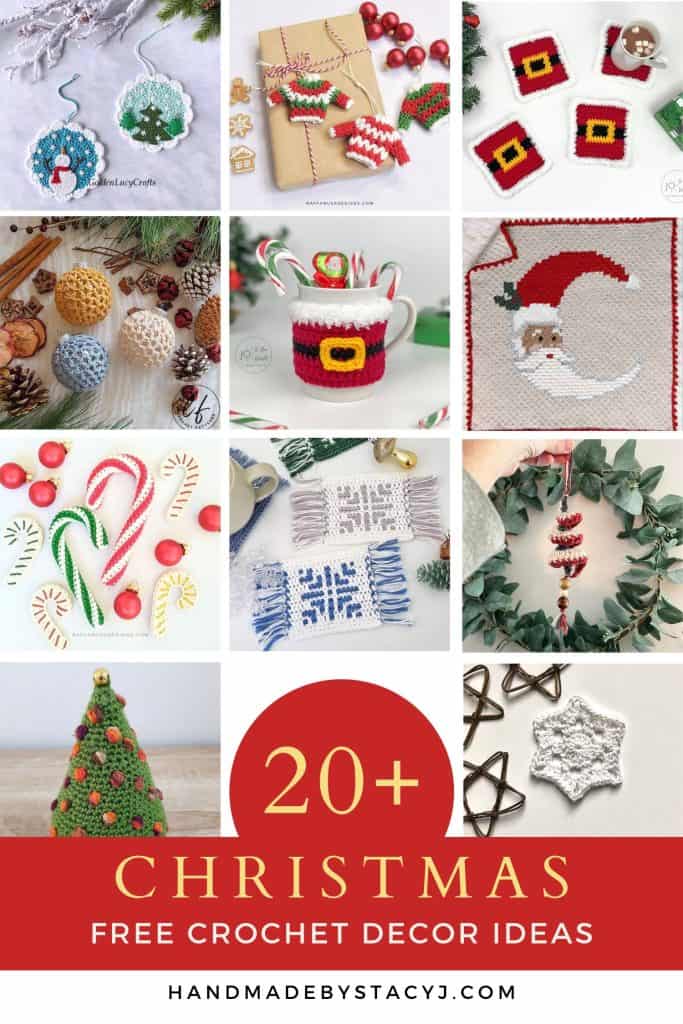
Are you looking for some Free Christmas Decor Crochet patterns? With the holidays among us, I thought it would be fun to ask some of my designer friends to share some of their free crochet patterns for Christmas Decor. They really came through! All of the patterns are free on their blog and they’re so much fun to check out.

There’s adorable ornaments, some cute amigurumi, wine bottle (and glass) holders, coasters, a pillow, a blanket and more! And, if you enjoy knitting, I have a little Merry Matt Mug Rug pattern for you at the bottom of this post.

In this pattern round up you’ll find 21 free crochet patterns from lots of designers! The list below (in no particular order) links directly to the designer’s web page so that you can access their stocking patterns, too. Which one (or two… or five) will you make?

Here’s a pin for you. Pinterest board 🙂

While you’re on the designer’s web pages, please look around and check out more of their patterns. You may even find more to add to your list of things to make for the upcoming year!

If you enjoy knitting, I also have the Merry Mat Mug Rug pattern for you – it’s a free pattern that is simple and quick to knit!

Merry Matt Mug Rug from Handmade by Stacy J

I hope you enjoyed this round up of Christmas Decor patterns! I’d love to know which one (or ones!) you choose to make.

Subscribe on YouTubeJoin me on FacebookFollow on Instagram

Patterns on RavelryInspiration on Pinterest

10+ FREE Christmas Stocking Patterns

Are you looking for some amazing Christmas stocking patterns? Christmas stockings are such a fun project to make. And, with the holidays right around the corner, I thought a stocking would be a fun gift to make for each member of my family. So, I asked a bunch of my designer friends to show me their favorites. Wow! Did they ever deliver!!

In this pattern round up you’ll find 11 free Christmas stocking crochet patterns! The list below links directly to the designer’s web page so that you can access their stocking patterns, too. Which one (or two… or five) will you make?

Here’s a pin for you. Pinterest board 🙂

While you’re on the designer’s web pages, feel free to look around and check out more of their patterns. You may even find more to add to your list of things to make for the upcoming year!

I hope you enjoyed this round up of Christmas Stocking patterns! I’d love to know which one (or ones!) you choose to make. I’ll definitely be making at least 2 of the included designs, but probably more like 5! I’m super intrigued by the fur that is used in many of the designs. Have you worked with fur before?

Subscribe on YouTubeJoin me on FacebookFollow on Instagram

Patterns on RavelryInspiration on Pinterest

Striped Snarf Scarf – Free Crochet Pattern!

Today I am so excited to share with you the FREE crochet pattern for the Striped Snarf Scarf! This pattern is a crochet version of a knit Snarf Scarf that I designed in 2021.

The Striped Snarf Scarf is a dog scarf that was inspired by our latest addition to our family: Moxxi! We adopted her in 2021 and she makes the funniest sound when she gets a treat. It sounds like a big “SNARF!” Since we hadn’t had a little girl dog for ages, we decided that she needed a little wardrobe – hence, the Snarf Scarf was born!

You’ll notice that there aren’t any pictures of her actually wearing the Striped Snarf Scarf, though. Since she’s still a pup, her tendency is to eat the scarf, rather than model it. So, her big brother Bucket is the model for the pictures. 🙂

Disclosure: This post contains affiliate links. As an affiliate, when you purchase through my links, you allow the company to pay me a small commission without costing you a penny more, which allows me to continue making free content. The yarn for this pattern was provided to me from King Cole – I am a King Cole Brand Ambassador and this post is part of our ongoing collaboration. Thank you for your support!

About the Striped Snarf Scarf

The Snarf Scarf is triangular in shape and uses very little yarn; therefore it would be a great stash diving project. It uses DK weight yarn with only one color at a time, works up in just a couple hours and is completely customizable to the size of your critter. Bucket and Moxxi are both medium size dogs and the scarf fits them as the pattern is written. However, if you have a very large dog, you just continue repeating until it’s the right size; or, if you have a smaller critter, you can stop the repeats when the size is right.


If you prefer a printable pdf with a larger font and printable gift tags for gifting, you can grab your ad-free, pdf pattern on Ravelry HERE or at my Etsy shop HERE.

About the yarn

The yarn used is from King Cole’s “Cherished Baby Double Knitting” yarn. It’s a dream to work with, is super soft and has approximately 262 yards in each skein. So, you can make lots of snarf scarves with just a couple skeins!

This pattern is an EASY project. Therefore, a beginner could try this out, too. This pattern has been tested – thank you to all my lovely testers!

You can grab your pattern on Ravelry HERE or at my Etsy shop HERE.

Here’s a pin for you Pinterest board

Materials:

  • King Cole Cherished baby double knitting (100% Low-Pilling Acrylic; 262 yds / 240 m; 100g; #3 / dk weight) yarn in colors: Main Color (Red): 40 yds / 37 m and Contrast Color (White): 18 yds / 17 m (To find your local store that stocks King Cole yarns, here is the stockist finder link; Or, if you need to shop online, here is LoveCrafts link)
  • G+ / 4.5mm crochet hook (My favorite is Furls!)
  • Lockable stitch marker (optional)
  • Tapestry needle
  • Scissors
  • Measuring tape
Materials for Striped Snarf Scarf from Handmade by Stacy J

Measures: 

25” x 5” / 64 cm x 13 cm (to fit a critter with a 16” – 18” / 41 cm x 46 cm neck) Directions are written to customize to your own critter

Difficulty Level: 

Easy

Gauge: 

5 pattern repeats = 4″ or 10 cm (Gauge isn’t critical with this project)

Stitches & Abbreviations Used 

(Pattern is written in US terms):

  • BLO: Back loop only
  • CC: Contrast color
  • Ch: Chain
  • Ea: Each
  • Hdc: Half double crochet
  • Hdc2tog: Half double crochet 2 together
  • MC: Main color
  • Rep: Repeat
  • RS: Right side
  • Sc: Single crochet
  • Sc2tog: Single crochet 2 together
  • St (s): Stitch (es)
  • Tch: Turning chain
  • WS: Wrong side

Notes:

  • Ch 1 and ch 2 at the beginning of rows do not count as a stitch
  • When beginning the body of the scarf, use a lockable stitch marker to mark the right side of your work
  • Do not cut yarn; instead the yarn will be carried facing the WS with each row worked; when completing a row, give the carried yarn a small tug, but be careful not to pull too tight
  • When working the body of the scarf, each RS row will have an even number of stitches and each WS row will have an odd number of stitches
  • The tie straps are written to measure 6” / 15 cm on each side, but feel free to add or subtract length as needed for your critter

To view the tutorial on how to crochet the Striped Snarf Scarf, please click on the video link directly above or visit my YouTube channel at: https://youtu.be/PL667cnNhG0

Directions for Striped Snarf Scarf:

Before beginning the project, measure your critter’s neck and then subtract 3” / 7.6 cm (this will be the size of the body of the scarf). Then divide that number by 2  (that will be the halfway measurement for the body of the scarf).

First tie strap:

With MC, ch 4

  • Row 1: In third ch from hook, work 1 hdc and in next ch; ch 2, turn
  • Row 2: 1 hdc in first st, 1 hdc in next st and 1 hdc in top of tch; ch 2, turn (3 hdc)
  • Row 3: 1 hdc in first st and in ea st across (do not work tch); ch 2, turn (3 hdc)

Rep row 3 until piece measures approximately 6” / 15 cm or your desired length

Body of scarf:

Increase rows (Each row increases by one stitch)

  • Row 1 (RS) MC: 1 hdc in BLO in ea st across, 2 hdc in BLO of last st
  • Row 2 (WS) CC: ch 1, turn; 2 sc in first st and 1 sc in ea st across
  • Row 3 MC: Ch 2, turn; 1 hdc in BLO in ea st across, 2 hdc in BLO of last st

Rep rows 2-3 until the piece measures 6” / 15 cm or to the halfway point of your body of scarf measurement ending with completion of WS row

Decrease rows (Each row decreases by one stitch)

  • Row 1 (RS) MC: Ch 2, turn; 1 hdc in BLO in first st and in ea st across to last 3 sts, 1 hdc2tog in BLO, 1 hdc in BLO
  • Row 2 (WS) CC: Ch 1, turn; 1 sc in first st, 1 sc2tog, 1 sc in ea st across
  • Rep rows 1-2 until 5 sts remain; cut CC
  • Rep row 1 once more
  • Next row (WS): Ch 1, turn; 1 sc in first st, 1 sc2tog, 1 sc in next st; ch 2, turn (3 sc)
Striped Snarf Scarf flat lay from Handmade by Stacy J

Second tie strap:

Rep row 3 of First tie strap until piece measures 6” / 15 cm or your desired length ending with completion of RS row, do not turn

Border:

For this section of the pattern you will be working on the RS down the tie strap and the bottom of the scarf

  • Ch 1, evenly work sc down to the “point” of the triangular bottom of the scarf
  • At the “point” work 3 sc in the same st
  • Continue evenly working sc up to the end of the bottom section (where the beginning ch and 3 hdc are located)
  • Ch 1, work 1 sc in ea of the 3 beginning sts; fasten off and weave in ends.

Give to your critter, take pictures and tag me at #handmadebystacyj and @handmadebystacyj


If you like to knit, check out the original Holiday Snarf Scarf

Holiday Snarf Scarf from Handmade by Stacy J

Wishing you a happy, snarfy kind of day with lots of yarn (and snacks)!

Stacy J

Subscribe on YouTubeJoin me on FacebookFollow on Instagram

Patterns on RavelryInspiration on Pinterest

This pattern is copyright 2022 Handmade by Stacy J. Please do not duplicate or copy any portion of this pattern, as well as photographs. You are encouraged to share images of your final product and are allowed to sell final products; If you sell your final product, I just ask that you please purchase the ad-free pdf and credit Handmade by Stacy J as the designer. Thank you!

Unusual and Fun Gift Ideas

Unusual and fun crochet pattern ideas are what this post is all about. If you’re looking for unique gifts, this is definitely the right place to visit. Instead of the regular gifts, I thought I’d have some fun this year. So, I asked a bunch of my designer friends to show me their favorite unusual and fun crochet patterns. And, wow! Did they ever deliver!!

In this pattern round up you’ll find a bunch of really fun ideas! And, did I mention that they’re FREE crochet patterns?

From hats with elf ears, to a beer hat, to melted snowmen, baskets made with Dollar Store twine, to earbud holders and chair socks (yes, you heard me right…chair socks!) – there’s some really fun patterns to choose from. These will make great gifts and stocking stuffers. Which pattern (or patterns) will you make? There are 18 to pick from and I can think of a recipient for each pattern included – there will be a few on this list that will be for next year’s makes, too!

Here’s a pin for you. Pinterest board 🙂

While you’re on the designer’s web pages, feel free to look around and check out more of their patterns. It’s so much fun to look on their pages and see all of their creative ideas. You may even find more to add to your list of things to make for the upcoming year!

Let’s check out the unusual and fun crochet patterns!


I hope you enjoyed this round up to find your favorite unusual and fun crochet pattern! These are such amazing, fun and unique gift ideas. I’d love to know which one (or ones!) you choose to make. I’ll definitely be making at least 2 of the included designs, but probably more like 4 or 5!

Subscribe on YouTubeJoin me on FacebookFollow on Instagram

Patterns on RavelryInspiration on Pinterest

Holiday Snarf Scarf!

Today I am so excited to share with you the Holiday Snarf Scarf! The Holiday Snarf Scarf? What’s that, you might be asking yourself…

The Holiday Snarf Scarf is a dog scarf that was inspired by our latest addition to our family: Moxxi! She makes the funniest sound when she gets a treat and it sounds like a big “SNARF!” Since we hadn’t had a little girl dog for ages, I decided that she needed a little wardrobe – hence, the Snarf Scarf was born!

Disclosure: This post contains affiliate links. As an affiliate, when you purchase through my links, you allow the company to pay me a small commission without costing you a penny more, which allows me to continue making free content. Thank you for your support!

Holiday Snarf Scarf modeled by "Bucket" - free knitting pattern from Handmade by Stacy J

About the Holiday Snarf Scarf

The Snarf Scarf is triangular in shape and uses very little yarn, so it would be a great stash diving project. It uses DK weight yarn with only one color at a time, works up in just a couple hours and is completely customizable to the size of your critter. Bucket and Moxxi are both medium size dogs and the scarf fits them as the pattern is written. However, if you have a very large dog, there is a section where you would just repeat until it’s the right size and there’s a place marked where to stop if you have a smaller critter.

The pattern calls for 2 sets of size 1 snaps and an 18 mm bell. The snaps work as a safety feature making this scarf easy to break away from your critter in case their scarf gets caught on anything. (Just please always supervise your fur babies.)

Holiday Snarf Scarf pattern collage from Handmade by Stacy J

If you prefer a printable pdf of the Holiday Snarf Scarf that includes a chart, a checklist to help keep track of your rows and printable gift tags for gifting your scarf, you can purchase through Ravelry (or add to your favorites or que) or you can purchase through my Etsy store.

This pattern is written for an intermediate knitter. However, an ambitious beginner could try this out, too.

This pattern has been tested and tech edited – thank you to all my lovely testers and to Kathie, my rock star tech editor!

Holiday Snarf Scarf pin from Handmade by Stacy J
Here’s a pin for you Pinterest board

Materials:

Measures: 

22″  x 7″  / 56 cm x 18 cm – Fits neck circumference of 14″ to 21″ / 35.5 cm to 53.5 cm

Difficulty Level: 

Intermediate

Gauge: 

20 sts x 24 rows in Stockinette Stitch = 4″ or 10 cm

Stitches & Terms Used 

(Pattern is written in US terms):

CC: Contrast color.

K: Knit

Kfb: Knit front & back

K2tog: Knit two stitches together

MC: Main color

M1l (Make 1 knitwise left leaning): With left needle, pick up the horizontal strand between stitches from front to back, then knit into this new stitch through the back loop (1 stitch increased)

M1r (Make 1 knitwise right leaning): With left needle, pick up the horizontal strand between stitches from back to front, then knit into this stitch (1 stitch increased)

P: Purl

RS: Right side

Sl: Slip 1 stitch purlwise with yarn at back

Sl wyif: Slip 1 stitch purlwise with yarn in front

SM: Stitch marker

St(s): Stitch(es)

Stretchy bind-off method: K1, k2tog, return those 2 sts back to left needle, then repeat until all stitches are bound off

WS: Wrong Side

If you prefer a printable pdf of the Holiday Snarf Scarf that includes a chart, a checklist to help keep track of your rows and printable gift tags for gifting your scarf, you can purchase through Ravelry (or add to your favorites or que) or you can purchase through my Etsy store.

Notes:

  • Do not cut yarn until instructed to do so; instead, carry up side of work.
  • Be sure to slip stitch marker as you come to it – it will mark the center of the snarf scarf.
  • Pattern is easily adaptable to any size critter. For a smaller critter, simply work to the circumference size of your critter’s neck ending on a Stockinette Transition section, then move to the finishing section. For a larger critter, repeat the final stockinette section until you obtain the neck circumference needed, then move to the finishing section.
  • When working M1L or M1R in center of scarf, be sure to use the strands of yarn worked on previous row.

Simple Snarf Scarf Collage from Handmade by Stacy J
If you would like to check out the Simple Snarf Scarf, please click on the image above.

Directions for Holiday Snarf Scarf:

With MC, cast on 3

1 (RS): Using MC, kfb, k1, kfb. (5 sts)

2 (WS): k2, p1, k2.

3: (k1, m1r) × 2, (k1, m1l) × 2, k1. (9 sts)

4: k2, p5, k2.

5: (k1, m1r) × 2, k2, m1r, k1, m1l, k2, (m1l, k1) × 2. (15 sts)

6: k2, p11, k2.

7: (k1, m1r) × 2, k5, m1r, insert SM, k1, m1l, k5, (m1l, k1) × 2. (21 sts)

8: k2, p17, k2.

9: (k1, m1r) × 2, k8, m1r, k1, m1l, k8, (m1l, k1) × 2. (27 sts)

10: k2, p23, k2. Do not cut MC

Slip Stitch pattern 1

11: Using CC, (k1, m1r) × 2, k11, m1r, k1, m1l, k11, (m1l, k1) × 2. (33 sts)

12: Using CC, knit; Do not cut CC

13: Using MC, (k1, m1r) × 2, sl, (k2, sl × 2) × 3, k1, m1r, sl, m1l, k1, (sl × 2, k2) × 3, sl, (m1l, k1) × 2. (39 sts)

14: Using MC, k2, p2, sl wyif, (p2, sl wyif x 2) × 3, p2, sl wyif, (p2, sl wyif × 2) × 3, p2, sl wyif, p2, k2.

15: Using CC, (k1, m1r) × 2, k17, m1r, k1, m1l, k17, (m1l, k1) × 2. (45 sts)

16: Using CC, k2, p41, k2.

17: Using MC, (k1, m1r) × 2, k1, (sl × 2, k2) × 4, sl × 2, k1, m1r, s1, m1l, k1, (sl × 2, k2) × 4, sl × 2, (k1, m1l) × 2, k1. (51 sts)

18: Using MC, k2, p3, (sl wyif × 2, p2) × 5, sl wyif, (p2, sl wyif × 2) ×5, p3, k2.

19: Using CC, (k1, m1r) × 2, k23, m1r, k1, m1l, k23, (m1l, k1) × 2. (57 sts)

20: Using CC, knit.

Stockinette Transition 1

21: Using CC, (k1, m1r) × 2, k to m, m1r, k1, m1l, k to last 2 sts, (m1l, k1) × 2. (63 sts)

22: Using CC, k2, p to last 2 sts, k2. (If you are making this snarf scarf for a smaller critter, this is a good time to measure and see if it will fit at this point. If it does fit, then move to the “Finishing” section.)

Slip Stitch pattern 2

23: Using MC, (k1, m1r) × 2, k29, m1r, k1, m1l, k29, (m1l, k1) × 2. (69 sts)

24: Using MC, knit.

25: Using CC, (k1, m1r) × 2, k1, (sl × 2, k2) × 7, sl × 2, k1, m1r, sl, m1l, k1, (sl × 2, k2) × 7, sl × 2, (k1, m1l) × 2, k1. (75 sts)

26: Using CC, k2, p3, (sl wyif × 2, p2) × 8, sl wyif, (p2, sl wyif × 2) × 8, p3, k2.

27: Using MC, (k1, m1r) × 2, k35, m1r, k1, m1l, k35, (m1l, k1) × 2. (81 sts)

28: Using MC, k2, p77, k2.

29: Using CC, (k1, m1r) × 2, sl, (k2, sl × 2) × 9, k1, m1r, sl, m1l, k1, (sl × 2, k2) × 9, sl, (m1l, k1) × 2. (87 sts)

30: Using CC, k2, p2, sl wyif, p2, (sl wyif × 2, p2) × 9, sl wyif, p2, (sl wyif × 2, p2) × 9, sl wyif, p2, k2.

31: Using MC, (k1, m1r) × 2, k41, m1r, k1, m1l, k41, (m1l, k1) × 2. (93 sts)

32: Using MC, knit. Cut MC.

Stockinette Transition 2

33 – 36:  Using CC, repeat Stockinette Transition1 rows 21 & 22 two times (105 sts) (If you are making this snarf scarf for a larger critter, repeat this section as many times as needed to reach desired circumference, then proceed to the “Finishing” section).

Finishing

37: Using CC, cast on 10 using knitted cast on method, k10, k2tog, (k1, m1r) × 2, k to m, m1r, k1, m1l, knit to last 2 sts, (m1l, k1) × 2, cast on 10 using knitted cast on method. (130 sts) – This adds approximately 2.75″ / 7 cm to each side.

38: Using CC, k 10, k2tog, k across. Cut CC.

39: Using MC, bind off using stretchy bind-off method or your bind-off method of choice.

  • Place scarf around critter to determine snap placement, then sew on snaps.
  • Using yarn and tapestry needle, sew bell to bottom center point of snarf scarf (you may want to block your item prior to this step).
  • Give to your critter, take pictures and tag me at #handmadebystacyj and @handmadebystacyj

Wishing you a happy, snarfy kind of day with lots of yarn (and snacks)!

Stacy J

Subscribe on YouTubeJoin me on FacebookFollow on Instagram

Patterns on RavelryInspiration on Pinterest

This pattern is copyright 2021 Handmade by Stacy J. Please do not duplicate or copy any portion of this pattern, as well as photographs. You are encouraged to share images of your final product and are allowed to sell final products; If you sell your final product, I just ask that you please purchase the ad-free pdf and credit Handmade by Stacy J as the designer. Thank you!

Merry Mat Mug Rug

The Merry Mat Mug Rug is a quick and easy gift to make for someone, or to gift to yourself. There is an option for making the Merry Mat without fringe, as well. The written pattern can be used with the video tutorial on the “Handmade by Stacy J” YouTube channel.

Disclosure: This post contains affiliate links. By purchasing through that link, you allow the companies that I’m affiliated with to pay me a small commission without costing you a penny more. This allows me to continue making free content. Thank you for your support!

Difficulty level:

Easy

Stitches used:

Written in US Terms

K – Knit

P – Purl

Sl2 – Slip 2 stitches off, one at a time, purl wise  

If you prefer a printable pdf that includes a checklist to help keep track of your rows and printable gift tags for gifting, you can purchase through Ravelry (or add to your favorites or que).

Materials Needed:

Gauge: 

13 rows x 10 sts: 2” in Stockinette Stitch

Measures: 

8″x 6″

Notes: 

• When slipping stitches with RS facing, yarn will be held at the back; when slipping stitches with WS facing, yarn will be held at the front; You can adapt the pattern to be wider by adding stitches in increments of 4 and taller by doing more repeats of the pattern.

If you prefer a printable pdf that includes a checklist to help keep track of your rows and printable gift tags for gifting, you can purchase through Ravelry (or add to your favorites or que).

Directions for the Merry Mat Mug Rug

Set up

Color A: Cast on 36

Color A: Knit one row 

Pattern

1. (RS) Color A:  Knit

2. (WS) Color A: K2, p to last 2 sts, k2

3. Color B: K5, *sl2 wyib, k2; rep * to last 3 sts, k3

4. Color B: K2, P3, *sl2 wyif, p2; rep * to last 3 sts, p1, k2

5. Color A: Knit

6. Color A: K2, p to last 2 sts, k2

7. Color B: K3, *sl2 wyib, k2; rep * to last st, k1

8. Color B: K2, p1 *sl2 wyif, p2; rep to last 5 sts, sl2 wyif, p1, k2


Rep Pattern rows 1-8 three more times

Rep Pattern rows 1-6 once more

Knit 2 rows

Bind off knit wise

MerryMatt_01.jpg

Finishing Options:

Fringe: Cut 18 – 6” pieces of color B & 20 – 6” pieces of color A; Add as fringe using one strand to short edge of mug rug in coordinating rows. Then, trim fringe for consistent length.

Without Fringe: Pick up stitches along short edge (1 st per row) and knit 2 rows;

Bind off knitwise and do the same for the other side.

Block and enjoy with your favorite snack and drink!


I’d love to see your Merry Mat – please take pictures, tag me on social media with #handmadebystacyj and link to the Ravelry project page!


You are welcome to gift and / or sell your finished items. If you are selling them, I simply ask that you credit Handmade by Stacy J as the designer and purchase the ad-free pdf.


Thank you! 

Stacy J

YouTubeFacebookInstagramRavelryPinterest

This pattern is copyright 2020 Handmade by Stacy J. Please do not duplicate or copy any portion of this pattern, as well as photographs. You are encouraged to share images of your final product and are allowed to sell final products; If you sell your final product, I just ask that you please purchase the ad-free pdf and credit Handmade by Stacy J as the designer. Thank you!