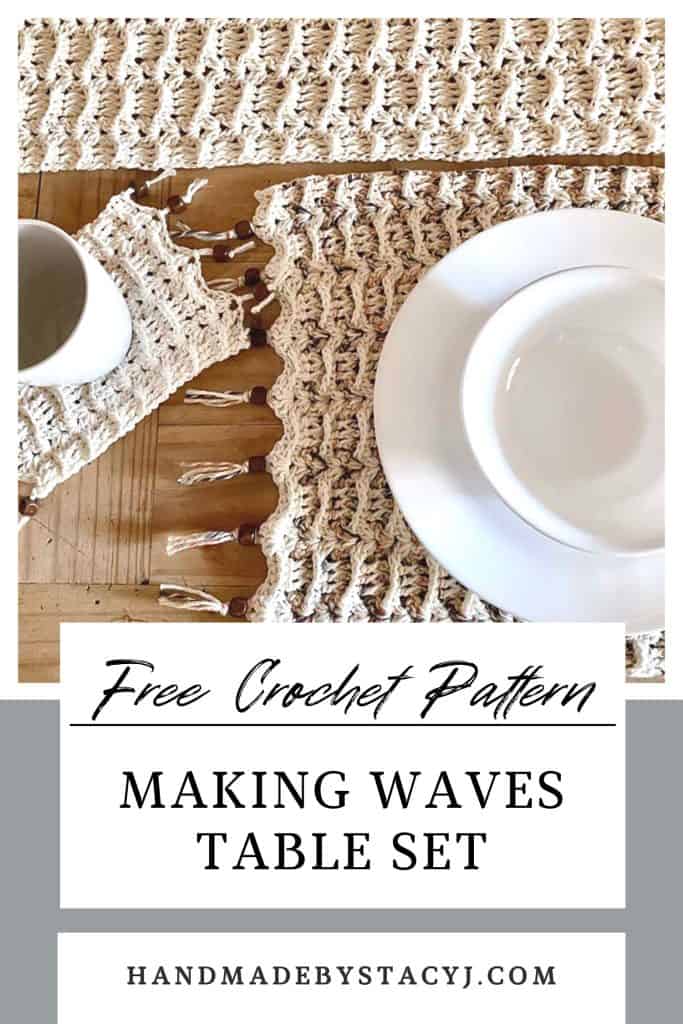
Making Waves Table Runner

Today I am so excited to share with you the FREE crochet pattern for the Making Waves Table Runner!

Disclosure: This post contains affiliate links. As an affiliate, when you purchase through my links, you allow the company to pay me a small commission without costing you a penny more, which allows me to continue making free content.

About the Making Waves Table Runner

The Making Waves Table Runner was designed for the 2023 “Cozy at Home” Crochet along with CAL Central. This crochet along’s theme was to make something cozy and comfy for your home, but also included home decor and utilitarian projects.

Each week from January 9, 2023 – March 13, 2023 a different designer released a new, never before released free crochet pattern. Well, this is my contribution! When I placed the entire set on my table to photograph, my hubby even came up to me and said, “Wow! The table looks fantastic!” So, it looks like I’ll be completing the set of placemats and mug rugs for our table now 🙂

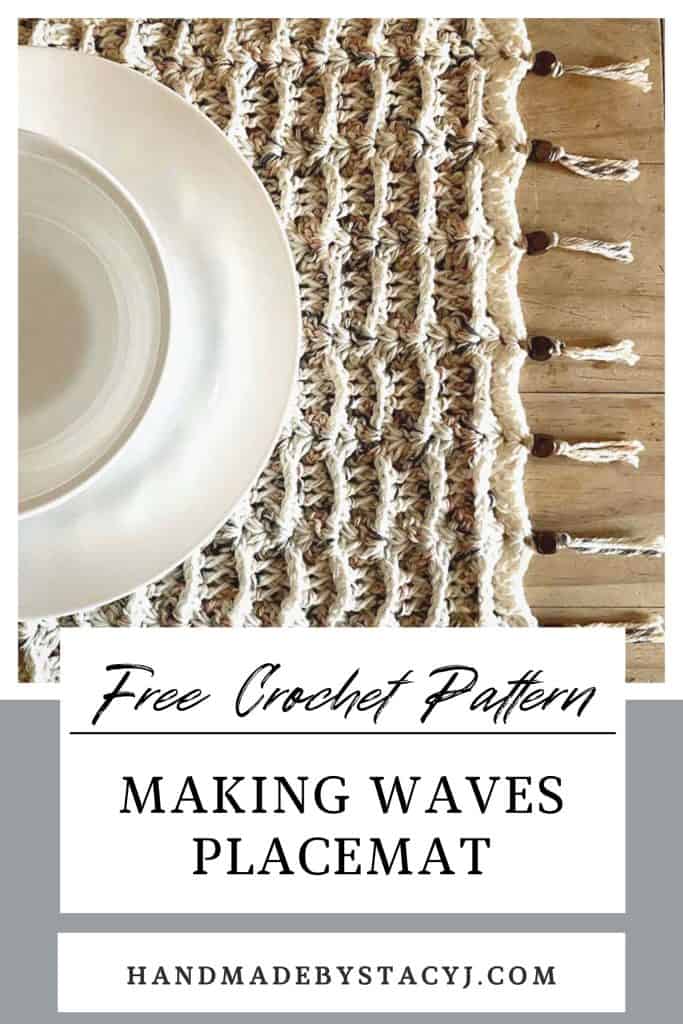
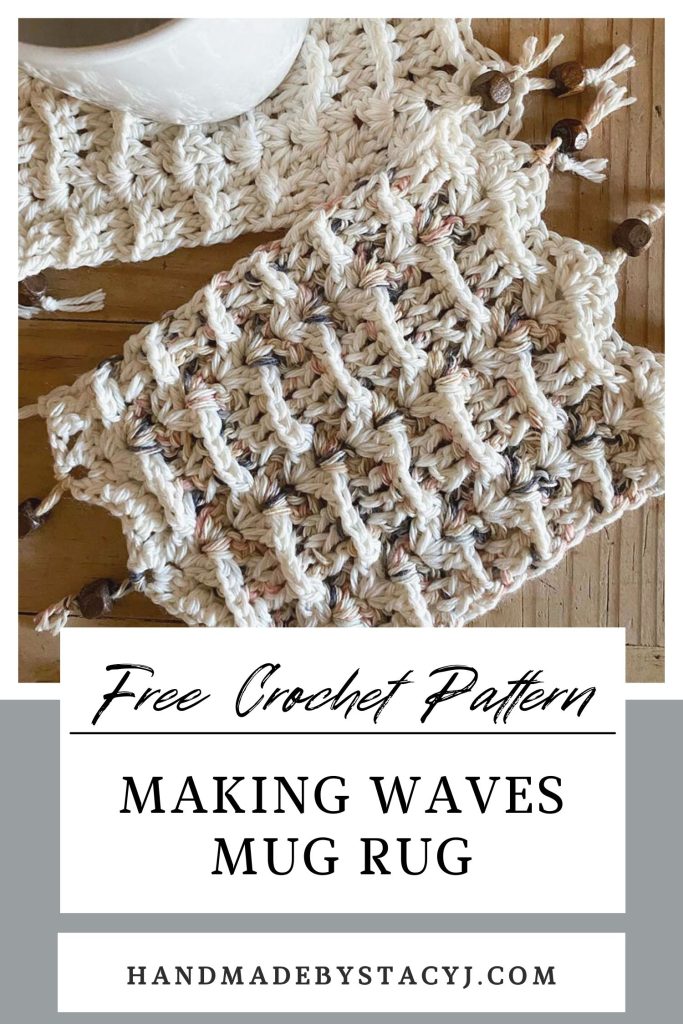
If you’d like to see the free crochet pattern for the placemat and the mug rug, please click on the image below to be taken to the free pattern on the website.


About the yarn

The yarn used is the Comfy Cotton Blend from Lion Brand. This is a DK / #3 light weight yarn. It offers lots of drape, is soft to use and offers lots of yardage in one skein.

The Making Waves Table Runner is an EASY project. Therefore, a beginner could try this out, too. This pattern has been tested – thank you to all my lovely testers!


If you prefer a printable pdf that includes printable gift tagsfor gifting you can purchase through Ravelry (or add to your favorites or que) or you can purchase through my Etsy store.

Or, purchase the COMPLETE Making Waves Table Set

The complete set includes individual pdfs of the Making Waves table runner, placemat and mug rug pdf patterns at a discounted price in comparison to if they were purchased individually. If you prefer to shop with Ravelry, simply add all three patterns to your cart and a discount will automatically apply or you can purchase through my Etsy store.

Please note that due to this being a digital download, all sales are final and no refunds will be given. Thank you for your support!

Making Waves Table Runner Pattern from Handmade by Stacy J

Materials:

  • Lion Brand Comfy Cotton Blend Yarn (50% Cotton / 50% Polyester; 392 yds / 358 m; 7 oz / 200g; DK / #3 Light weight) – 904 yds / 827 m in color “Whipped Cream” (If you need to shop online, here is LoveCrafts link and here is my affiliate link to Lion Brand)
  • US H / 5mm crochet hook (My favorite is Furls!)
  • 12 Wood Barrel Beads in color “Walnut” for decorative fringe (optional)
  • 10 smaller wood beads for decorative fringe (optional)
  • Tapestry needle
  • Scissors
  • Measuring tape
Here’s a pin for you Pinterest board 🙂

Measures: 

  • 72” x 13.5” / 183 cm x 34 cm without fringe
  • 82” x 13.5” / 208 cm x 34 cm with fringe

Difficulty Level: 

Easy

Gauge: 

Pattern for gauge is included below, right before the pattern directions (Gauge isn’t critical with this project, but will affect yarn usage)

Stitches & Abbreviations Used 

(Pattern is written in US terms):

  • Ch(s): Chain(s)
  • Dc: Double crochet
  • Ea: Each
  • Fpdc: Front post double crochet – Yarn over, insert hook from front to back around post indicated, yarn over and draw up a loop, (yarn over and draw through 2 loops) twice
  • Rep: Repeat
  • Sk: Skip
  • Sp: Space
  • St(s): Stitch(es)
  • Tch: Turning chain

Notes:

  • Before beginning the Making Waves Table Runner, measure your table and add 3” – 6” / 8 cm – 15 cm for each edge for the draping of the table runner. The runner will “grow” a little with blocking if you use the recommended yarn; my runner grew approximately 6” / 15 cm in length. My table length is 54” / 1.37 m and I added 6” / 15 cm for each side.
  • Each cake of yarn gave me approximately 32” / 81 cm of length.
  • When shopping for beads for your table runner, take 2 pieces of yarn with you to determine if the yarn will fit through the bead. You want it to fit through with ease, but you don’t want the hole of the bead to be too large, as it might slide over the knot. Unfortunately, when I purchased my beads, they didn’t have a specific measurement, so I used my best judgment.
  • To make your table runner wider or thinner, add or subtract in increments of 8.
  • For the beginning chain, chain loosely or go up a hook size.

To view the tutorial on how to crochet the Making Waves Table Runner, please click on the video link directly above or visit my YouTube channel at: https://youtu.be/bsJ1usbaD3o

Gauge Pattern:

(Gauge is not critical in this project, but will affect yarn usage)

  • With US H / 5mm crochet hook ch 21
  • Work row 1 of pattern
  • Work row 2 of pattern four times
  • Gauge swatch should measure 4.75” / 12 cm wide x 3” / 7.6 cm tall from the top of a shell to the bottom of the piece.

Directions for Making Waves Table Runner:

With US H / 5mm crochet hook, loosely chain 61

Row 1: Dc in 4th ch from hook (3 skipped chs count as dc) and in next ch, *sk next 2 chs, (2 dc, ch 1, 2 dc) in next ch, sk next 2 chs, 1 dc in ea of next 3 chs; rep * across, turn. Stitch count: 24 dc, 7 (2 dc, ch 1, 2 dc) clusters

Row 2 (Pattern repeat): Ch 2, work fpdc around ea of next 2 dc posts, sk 2 dc, (2 dc, ch 1, 2 dc) in next ch-1 sp, *sk next 2 dc, work fpdc around ea of next 3 dc , sk next 2 dc, work (2 dc, ch 1, 2 dc) in next ch-1 sp; rep * to last 5 sts, sk next 2 dc, work fpdc around next 2 dc, dc in top of tch, turn. Stitch count: 7 (2 dc, ch 1, 2 dc) clusters, 22 fpdc, 1 ch-2, 1 dc

Rep row 2 until the piece measures 66” or your desired length

Fasten off.

Weave in ends and block prior to adding the beads.

Making Waves free crochet pattern table runnerfrom Handmade by Stacy J

Fringe for the Making Waves Table Runner (Optional)

  • Cut a total of 24 strands of yarn that are 18” / 46 cm for fringe (12 for each end)
  • Note: To make feeding the yarn through the bead easier, use a tapestry needle.
  • Attach 1 strand of fringe for each of the outer edge “points”, then attach 2 strands on each of the inner “points” (insert diagram or picture).

Using the larger Barrel beads, attach using the following sequence:

  • Outer fringe (2 strands) and 2 strands of the next fringe, then continue across using the remaining 2 strands from the previous fringe and 2 strands from the next fringe, ending with the remaining 2 strands from the last inner point and the 2 strands from the final outer edge.
  • Align the beads how you like so that they all look consistent and secure with a knot.
  • Using the smaller beads, attach the outer edge 4 strands with 2 strands from the next fringe, then continue across using the remaining 2 strands from the previous fringe and 2 strands from the next fringe, ending with the last 2 strands from the last inner fringe and the 4 strands from the outer edge.
  • Align the beads for consistency, then secure with a knot.
  • Trim the final ends to have approximately 1.5” / 4 cm of fringe left.
 

I hope you enjoyed this free crochet pattern as much as I enjoyed designing it. Please take pictures and tag me at #handmadebystacyj and @handmadebystacyj

Stacy J

Subscribe on YouTubeJoin me on FacebookFollow on Instagram

Patterns on RavelryInspiration on Pinterest

This free crochet pattern is copyright 2023 Handmade by Stacy J. Please do not duplicate or copy any portion of this pattern, as well as photographs. You are encouraged to share images of your final product and are allowed to sell final products; If you sell your final product, I just ask that you please purchase the ad-free pdf and credit Handmade by Stacy J as the designer. Thank you!

Diagonal Knot Stitch


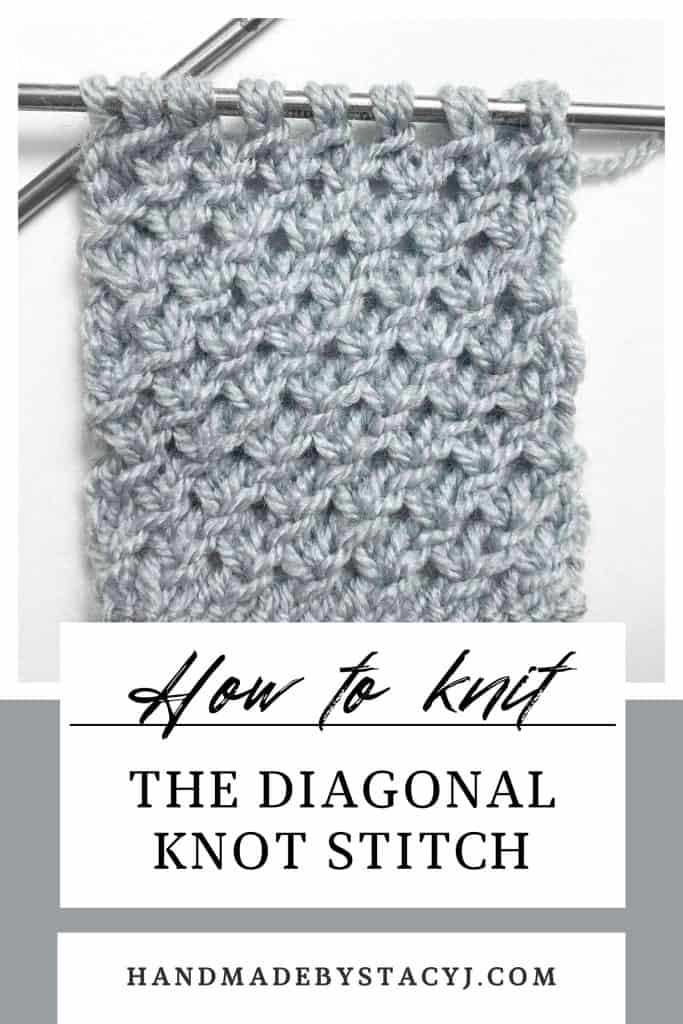
The Diagonal Knot Stitch is an interesting stitch that creates it’s diagonal effect by making knots. As a result, that knots adds interest and create a lovely airy, yet dense fabric that would be a great to use for a dishcloth, scarf or a slouchy beanie. This stitch is worked in stitch multiples of 3 + 1 over a 6 row repeat.

Disclosure: This post contains affiliate links. That means that I may receive compensation when you purchase through my links at no additional cost to you. I am a King Cole Brand Ambassador and this post is part of our ongoing collaboration. Thank you for your support!


Here’s a pin for your Pinterest board 🙂

Materials needed

(listed below is what I used to create the sample of the stitch pattern)

Stitches and abbreviations used

K: Knit

P: Purl

RS: Right side

St(s): Stitch (es)

Rep: Repeat

WS: Wrong side

Special stitch used:

Mk: Make knot – Purl 3 stitches together leaving the stitches on needle, yarn over, then purl same 3 stitches together again


Notes:

  • Stitch is worked in multiples of 3 + 1; for the YouTube video I cast on 22

Directions for the Diagonal Knot Stitch:

  • Row 1 and every RS row: Knit
  • Row 2 (WS): *Mk; rep * across to last st, p1
  • Row 4: P2, *Mk; rep * to last 2 sts, p2
  • Row 6: P1, *Mk; rep * to end

Repeat rows 1-6 to desired length and then bind off in pattern.


If you enjoyed this stitch, here are a few more stitches to check out 🙂

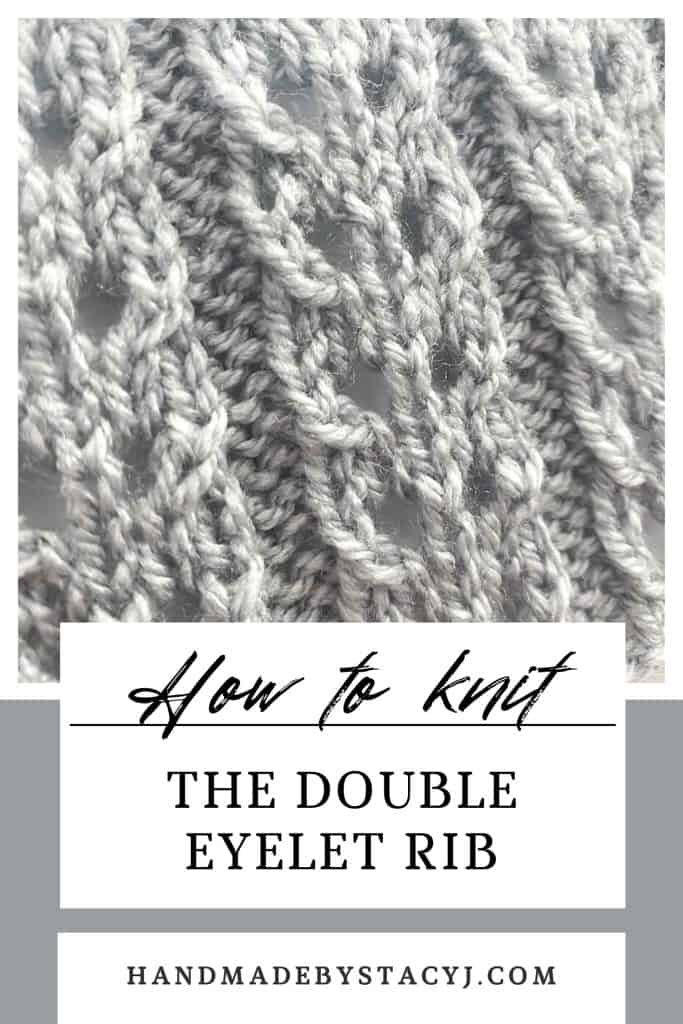
How to knit the Double Eyelet Rib from Handmade by Stacy J
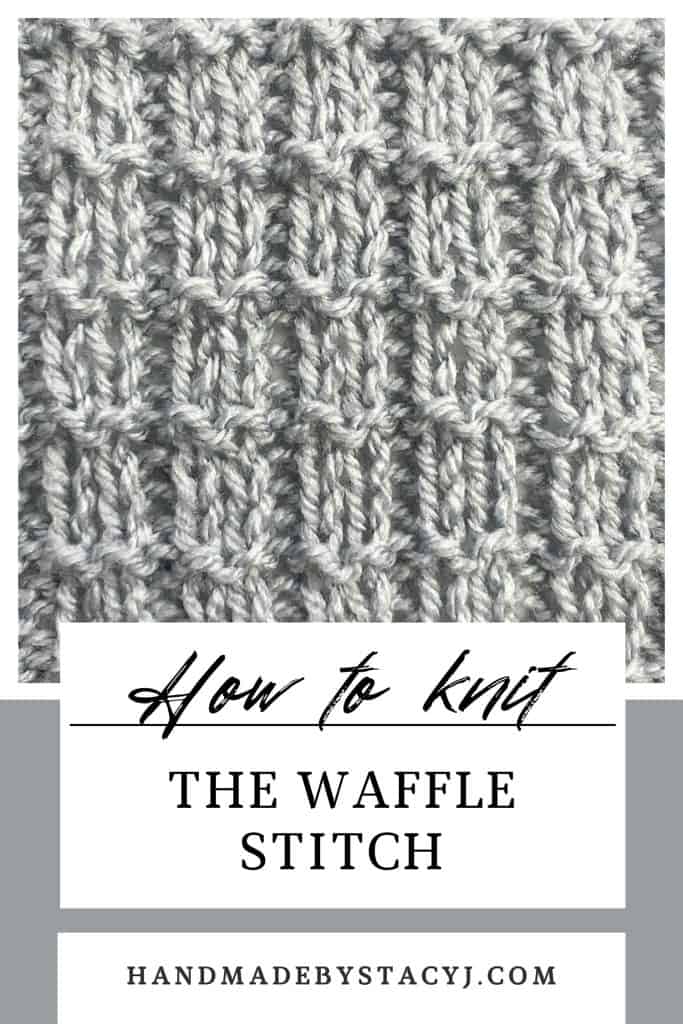
How to knit the Waffle Stitch pin from Handmade by Stacy J


I hope you enjoyed learning this stitch as much as I did. Please tag me @handmadebystacyj when posting on social media – I’d love to see your makes!

Stacy J

Subscribe on YouTubeJoin me on FacebookFollow on Instagram

Patterns on RavelryInspiration on Pinterest

Low Tide Throw – Free Knitting Pattern

Inspiration of the Low Tide Throw

When Iearned this specific cable stitch, not only did I fall in love with it, it spoke to me to the be the Low Tide Throw. The texture, the simplicity, all of it called to me to be a large throw that you could cuddle up in on a chilly evening. With the help of King Cole Yarns, that vision became a reality for this blanket and is now a free knitting pattern.

The name “Low Tide” came to me as I looked at the texture. It reminded me of a time when I was walking barefoot at Bunbeg Beach in County Donegal, Ireland during our 2019 family vacation. My oldest son and I had taken the day to leave our shoes in the car, do some fishing, explore the ship wreck, do some walking and barefoot hiking. Before we knew it, we had walked miles barefoot on the beach. The tide was low and the sand glimmered with the shallow water with the sunlight highlighting the textures that this stitch offers. It’s one of my favorite memories of that trip. Whenever I think of my “Happy place,” this memory is always what comes to the forefront of my mind.

About the yarn

The King Cole Big Value Super Chunky “Stormy” yarn called to me to be a big, cuddly, cabled blanket. It’s 100% Premium Acrylic with a beautiful marling effect. It’s nice & soft, and comes in an 88 yds / 81 m skein – I used just under 18 skeins for this project.

The Low Tide Throw uses size US 15 / 10 mm knitting needles and works over an 8 row repeat.


Disclosure: This post contains affiliate links. As an affiliate, when you purchase through my links, you allow the company to pay me a small commission without costing you a penny more, which allows me to continue making free content. The yarn for this pattern was provided to me from King Cole – I am a King Cole Brand Ambassador and this post is part of our ongoing collaboration. Thank you for your support!

About the blanket

The Low Tide Throw works over an 8 row repeat and the stitches are worked in increments of 12. The framing is worked as you work the blanket. That means that there isn’t any stitches to pick up or adding to the blanket once the body is completed.

The blanket is sized for a 50″ x 60″ and the terms are written using US terminology. I’ve created a video to help with your blanket.


If you prefer a printable pdf that includes a chart, a checklist to help keep track of your rows and printable gift tags for gifting your blanket, you can purchase through Ravelry (or add to your favorites or que) or you can purchase directly through my Etsy store.

Please note that due to this being a digital download, all sales are final and no refunds will be given. Thank you for your support!

Here’s a pin to add to your Pinterest board

Materials needed:

Measures: 50” x 60” / 127 cm x 152.4 cm

Gauge: 9 sts x 12 rows = 4” x 4” / 10 cm x 10 cm in stockinette stitch – Gauge isn’t critical in this project, but will affect yarn usage

Pattern Difficulty level: Easy-ish

If you prefer a printable pdf that includes a chart, a checklist to help keep track of your rows and printable gift tags for gifting your blanket, you can purchase through Ravelry (or add to your favorites or que) or you can purchase directly through my Etsy store!

Please note that due to this being a digital download, all sales are final and no refunds will be given. Thank you for your support!

Stitches & Terms Used

(Pattern is written in US terms):

Bind off in pattern

K: Knit

K2tog: Knit two stitches together

Kfb: Knit into the front and back of the same stitch

Long Tail cast on

P: Purl

Pm: Place marker

Rep: Repeat 

Rs: Right side

Sm: Stitch marker

St(s): Stitch(es)

Ws: Wrong side

X: Times (3x = 3 times)

Special Stitches Used:

C6B: Cable 6 Back – Slip next 3 sts onto cable needle and hold at back, knit next 3 stitches from left needle, then knit 3 stitches from cable needle

C6F: Cable 6 Front – Slip next 3 sts onto cable needle and hold at front, knit next 3 stitches from left needle, then knit 3 stitches from cable needle

Notes:

  • To avoid weaving in multiple yarn tails, I recommend working the Russian join as you join a new skein of yarn. To see a video tutorial of this technique, please visit: https://youtu.be/iU9rszpZzoQ
  • This stitch pattern is worked in multiples of 12. If you’d like to adjust the size of your blanket, be sure to adjust the “set up” row to increase evenly to 12 stitches. Then be sure to adjust the “decrease” row, as well.

Low Tide Throw Free Knitting Pattern from Handmade by Stacy J

Directions for Low Tide Throw

Click here to view the video tutorial

Using Long tail cast on method, cast on 150

Ribbing

Row 1 (RS): (K2, p2) across, ending with k2

Row 2 (WS): (P2, k2) across, ending with p2

Rep rows 1-2 five more times

Set up row

(K2, p2) 3x, pm, (k9, kfb) 12x, k6, pm, (p2, k2) 3x – 12 sts increased for a total of 162 sts

Low Tide Throw Free Knitting Pattern from Handmade by Stacy J

Pattern

  • Row 1 and all ws rows (WS): (P2, k2) 3x, p to sm, (k2, p2) 3x
  • Row 2 (RS): (K2, p2) 3x, c6f, *k6, c6f; rep * to sm, (p2, k2) 3x
  • Row 4: (K2, p2) 3x, k to sm, (p2, k2) 3x
  • Row 6: (K2, p2) 3x, k6, *c6b, k6; rep * to sm, (p2, k2) 3x
  • Row 8: As row 4

Rep rows 1 – 8 until blanket measures 55” / 140 cm ending with completion of either row 3 or 7. For my blanket, I did a total of 17 more repeats.

Low Tide Throw Free Knitting Pattern from Handmade by Stacy J

Decrease row

In this row we are decreasing by a total of 12 sts to bring the stitch count back to the original cast on amount

RS): (K2, p2) 3x, (k9, k2tog) 12x, k6, (p2, k2) 3x – 150 sts

Ribbing

WS): (P2, k2) across, ending with p2 and removing markers as you come to them

Work rows 1 – 2 of the beginning Ribbing section five times

Bind off in pattern, weave in the ends and enjoy!

When you’re all done, please take pictures and tag me on social media. @handmadebystacyj or #handmadebystacyj so that I can see your beautiful blanket 🙂

Subscribe on YouTubeJoin me on FacebookFollow on Instagram

Patterns on RavelryInspiration on Pinterest

This Low Tide Throw free knitting pattern is copyright 2023 Handmade by Stacy J. Please do not duplicate or copy any portion of this pattern, as well as photographs. You are encouraged to share images of your final product and are allowed to sell final products; I just ask that if you sell your final product, please purchase the ad-free pdf, provide your own photographs and that you please credit Handmade by Stacy J as the designer. Thank you for your support!

Cables & Lace Dishcloth

The Cables & Lace Dishcloth came to be when I was learning some Japanese knitting stitches. This particular stitch really called out to me. This wonderful stitch requires some concentration, but is not nearly as difficult as it looks.

The yarn used is Cottonsoft  DK from King Cole. It’s a lovely 100% cotton yarn that is a light #3 / DK weight yarn. It is wonderful to work with & you can make a couple dishcloths with only one skein!

I’d like to extend a huge “Thank you” to my wonderful testers that helped me to finalize this pattern. To see their beautiful dishcloths, check out their projects linked in Ravelry.

Disclosure: This post contains affiliate links. That means that I may receive compensation when you purchase through my links at no additional cost to you. I am a King Cole Brand Ambassador and this post is part of our ongoing collaboration.

Free knitting pattern cables and lace dishcloth pin from Handmade by Stacy J
Here’s a pin for your Pinterest board 🙂

Measures:

9” x 9” / 22.9 cm x 22.9 cm

Gauge:

20 sts x 24 rows of stockinette stitch = 4” / 10 cm (Gauge isn’t critical in this project but will affect yarn usage)

Difficulty Level: Intermediate


To see a video tutorial on how to knit the Cables & Lace Dishcloth, please click on the video link below.

If you prefer a printable pdf that includes a chart, a checklist to help keep track of your rows, printable gift tags and printable dishcloth wrappers for gifting your dishcloth, you can purchase through Ravelry (or add to your favorites or que) or you can purchase directly through my Etsy store.

Please note that due to this being a digital download, all sales are final and no refunds will be given. Thank you for your support!

Materials needed:

  • King Cole Cottonsoft DK (100% Cotton; 229 yds / 210 m; 100g; #3 / DK weight) – 64 yds in color “Pale Blue” (To find your local stockist, click HERE; or you can purchase online through LoveCrafts at this affiliate link)
  • US size 3 / 3.25 mm knitting needles
  • Cable needle
  • Tapestry needle
  • Scissors
  • Lockable stitch marker or scrap piece of yarn (optional)

Stitches and abbreviations used:

Pattern is written in US terms

  • Bind off knitwise
  • C4F (Cable 4 Front): Slip next 2 stitches to cable needle and place at front of work, k2, then k2 from cable needle
  • C4B (Cable 4 Back): Slip next 2 stitches to cable needle and place at back of work, k2, then k2 from cable needle
  • K2tog: Knit 2 stitches together
  • K: Knit
  • Long tail cast on
  • P: Purl
  • SKP: Slip a stitch knit-wise, k1, then pass the slipped stitch over
  • Yo: Yarn over
  • X: Times (Example: 2x = 2 times)
Cables and Lace Dishcloth Knitting pattern example from Handmade by Stacy J

Directions for Cables & Lace Dishcloth

Using long tail cast on method or preferred method, cast on 48

Set up rows:

Knit for 4 rows

Pattern (optional: use lockable stitch marker or scrap piece of yarn to indicate RS of work):

  • Row 1 (RS): K3, (P2, C4B, C4F) × 4, p2, k3 
  • Row 2 and all WS rows: K3, (K2, p8) × 4, k5 
  • Row 3: K3, (P2, k1, (k2tog, yo) × 3, k1, p2, k8) × 2, p2, k3 
  • Row 5: K3, (P2, k1, (yo, skp) × 3, k1, p2, k8) × 2, p2, k3 
  • Row 7: K3, (P2, k1, (k2tog, yo) × 3, k1, p2, C4B, C4F) × 2, p2, k3
  • Row 9: Repeat row 5 
  • Row 11: Repeat row 3
  • Row 13: Repeat row 1
  • Row 15: K3, (P2, k8, p2, k1, (k2tog, yo) × 3, k1) × 2, p2, k3
  • Row 17: K3, (P2, k8, p2, k1, (yo, skp) × 3, k1) × 2, p2, k3 
  • Row 19: K3, (P2, C4B, C4F, p2, k1, (k2tog, yo) × 3, k1) × 2, p2, k3 
  • Row 21: Repeat row 17
  • Row 23: Repeat row 15
  • Row 24: Repeat row 2
  • Repeat rows 1 – 24 once more

Next row (In this row the cables will be worked in a different order): 

K3, (P2, C4B, C4F, p2, C4F, C4B,) x 2, p2, k3

Finishing rows:

Knit for 3 rows

Bind off knit-wise

If you prefer a printable pdf that includes a chart, a checklist to help keep track of your rows, printable gift tags and printable dishcloth wrappers for gifting your dishcloth, you can purchase through Ravelry (or add to your favorites or que) or you can purchase directly through my Etsy store.

Please note that due to this being a digital download, all sales are final and no refunds will be given. Thank you for your support!


If you’d like to grab yourself the dishcloth wrappers printable, simply click on this link and you can download it for FREE.

This pattern is copyright 2023 Handmade by Stacy J. Please do not duplicate or copy any portion of this pattern, as well as photographs. You are encouraged to share images of your final product and are allowed to sell final products; I just ask that if you sell your final product, please purchase the ad-free pdf, provide your own photographs and that you please credit Handmade by Stacy J as the designer. Thank you for your support!

Subscribe on YouTubeJoin me on FacebookFollow on Instagram

Patterns on RavelryInspiration on Pinterest

King Cole Unboxing

I recently received my latest box from King Cole and did an unboxing video. Together with the video, I thought that a blog post for the King Cole unboxing would be fun, as well. This way you can get to know the yarn a little more and get a closer look at it.

Disclosure: This post contains affiliate links. What that means is that I may receive compensation when you purchase through my links at no additional cost to you. I am a King Cole Brand Ambassador and this post is part of our ongoing collaboration.

To see the video of the unboxing, please click below.


To find your local store that stocks King Cole yarns, click HERE

Or, if you need to shop online, click HERE for my LoveCrafts affiliate link


Let’s dive in and take a look

I had 4 projects in mind when I placed the order for the yarn that’s in this box. As we go through each of the yarns, I’ll give you a little hint of what project will be made with which yarn any why I chose that particular yarn for that project.

If you’d like to download a handy “Caring for your makes” sheet that I’ve created, simply click HERE for the free pdf download.


King Cole Stormy

Big Value Super Chunky

• 100% Premium Acrylic

• 100g ball / Approximately 88 yds; 81 m

• Machine washable on Gentle at 30 degrees Celcius / 80 degrees Farenheit

• Iron at low temperature

• Dry clean with any solvent except trichlorethylene

• Do not bleach or tumble dry

• Dry by laying flat

The King Cole Stormy Big Value Chunky yarn really called out to me when I was first exposed to it. The colors that are offered are such a lovely variety and it’s a nice, chunky yarn that just cries out to be a throw… A cabled throw! When I swatched with it, it worked up super quickly, didn’t split and I didn’t find any knots in it, either. There’s a beautiful marling in the yarn that gives it a dimension and I can’t wait to work up the throw with it.


King Cole Subtle Drifter Chunky

King Cole Subtle Drifter Chunky yarn
King Cole Subtle Drifter Chunky Label

• 69% Premium Acrylic, 25% Cotton, 6% Wool

• 100g ball / Approximately 164 yds; 150 m

• Machine washable on Gentle at 40 degrees Celcius / 105 degrees Farenheit

• Do not bleach or iron

• Dry clean with any solvent

• Tumble dry on cool

A stunning blend of acrylic, wool and cotton is used to create the King Cole Subtle Drifter Chunky yarn. In addition to being soft, the blend of fibers also maintains the firmness that cotton is usually known for. It is a lighter chunky yarn that I think will be ideal for making a scarf out of. Using this particular yarn, I have found a simple, beautiful, and squishy stitch pattern to use. Depending on how much I have left, I may make a matching hat as well. 🙂


King Cole Cottonsoft DK

King Cole Cottonsoft yarn
King Cole Cottonsoft Label

• 100% Cotton

• 100g ball / Approximately 229 yds; 210 m

• Machine washable on Gentle at 40 degrees Celcius / 105 degrees Farenheit

• Do not bleach, iron or dry clean

• Lay flat to dry

The King Cole Cottonsoft DK is exactly that – SOFT! It’s such a lovely cotton to work with. This particular yarn is even one that can even be used with the “Knitted Knockers UK” program (if you’re not familiar with Knitted Knockers, it’s a wonderful program where volunteers knit prosthetic breasts for breast cancer survivors that have undergone a mastectomy). This is a true DK weight yarn that I’m planning on using for a dishcloth that I designed. It’s soft and I like and how light the yarn is so that the stitches can really shine.

If you’d like to check out the dishcloth that I made with the King Cole Cottonsmooth dk, click HERE for the free knitting pattern.


King Cole Drifter 4ply

• 69% Premium Acrylic; 25% Cotton; 6% wool

• 100g ball / Approximately 437 yds; 400 m

• Machine washable on Gentle at 40 degrees Celcius / 105 degrees Farenheit

• Do not bleach or iron

• Dry clean using any solvent

• Tumble dry on cool setting

The King Cole Drifter 4ply is an absolutely gorgeous yarn! It’s a 4ply yarn that we in the US call fingering weight yarn. This is wonderful for shawls, clothing and possibly even socks. It’s a very generous ball containing approximately 437 yds / 400 m; so you can easily make a one-skein project with these beauties. What really drew my attention to this yarn was the tones and varieties of purples in it. There are lighter and darker tones, as well as mid-tones and whites. For me, this called out to be shawl. I’ve been playing around with a half-pi shawl idea and I think this yarn is going to be perfect for that project.

I hope you enjoyed the King Cole unboxing with me. They really do have amazing yarns and I hope that you give them a go. Which ones would you like to try? I’d love to know!


To find your local store that stocks King Cole yarns, click HERE

Or, if you need to shop online, click HERE for my LoveCrafts affiliate link


Subscribe on YouTubeJoin me on FacebookFollow on Instagram

Patterns on RavelryInspiration on Pinterest

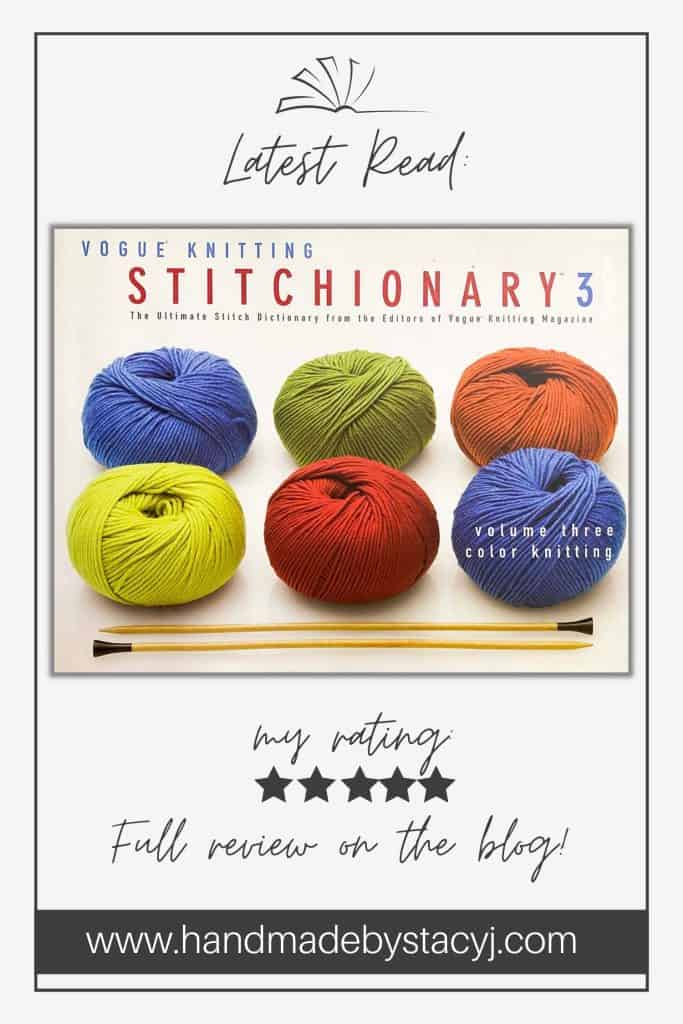
Review of “Vogue Knitting Stitchionary 3 – Color Knitting” book

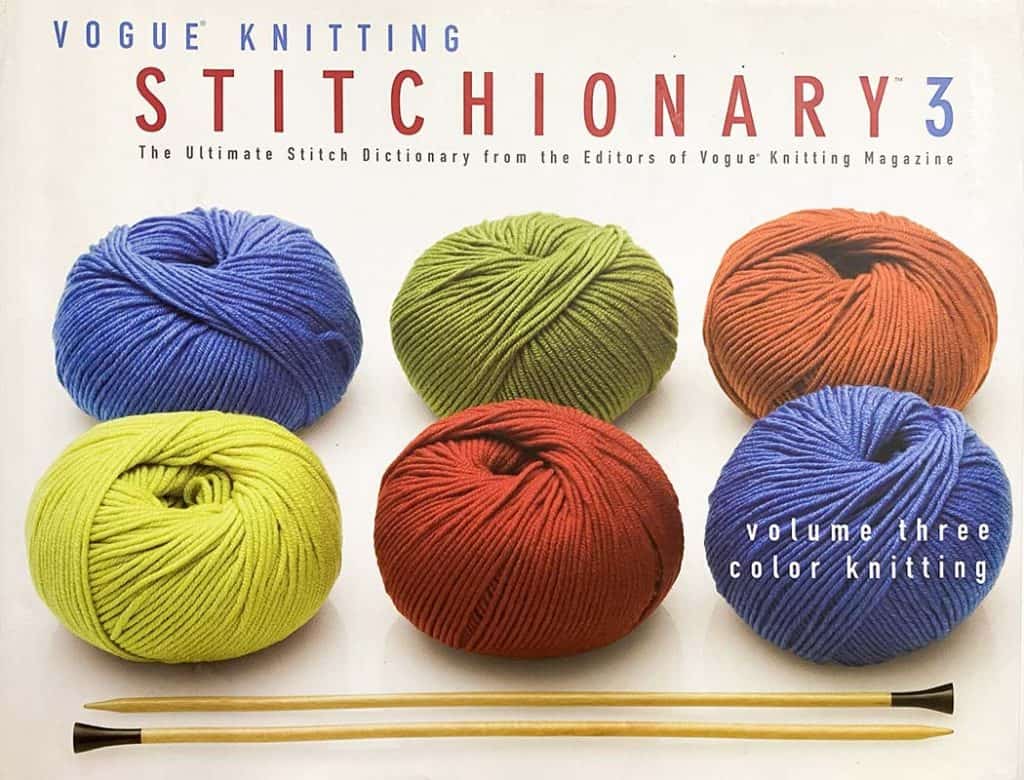
Over time I’ve been collecting quite a library of stitchionary books for knitting and crochet stitches. While looking on Amazon recently, I came across a used copy of “Vogue Knitting Stitchionary 3 – Volume 3 Color Knitting – The Ultimate Stitch Dictionary from the Editors of Vogue Knitting Magazine”. Since I haven’t really dabbled much in colorwork (and this book was offered for only $4 through ThriftBooks, so why not order it?), I decided this would be a great addition to my library for color knitting.

(Side note: Since I’m not an Amazon affiliate, I don’t have any affiliate links for this book. I just thought I’d share my experience with you with an honest, unbiased opinion.)

Let’s dive in and take a look

  1. This book is a hard copy, full color, measures 11.25” x 9” and has 188 pages
  2. It has beautiful, color photographs to show each of the stitch patterns
  3. The book includes 205 stitch patterns printed on lovely, high quality paper
  4. This book was published in 2006; even though it’s now 16 years old, it still looks and feels pretty modern

Beginning of the book

Typically, I prefer to have written directions for everything. However, they provide charts for some stitches and as an addition when written directions are provided. In this book they cover two-color, fair isle / multicolor, intarsia / motifs, adding texture and slip stitches. There’s a great variety of options available from your first try at color knitting to more advanced techniques.

At the beginning of the book, there is a section titled “How to use this book”. I highly recommend reading that section before proceeding to the stitches section. It very clearly breaks down how to use the book so that it makes sense. This is only one page, so that part is a pretty quick read.

I also appreciate how in the beginning of the book the authors state that they encourage you to “use your imagination and creativity,” as well as to change the color schemes to suit your own tastes. This book feels like it could be a friend sitting at my side helping me to learn color knitting.


Here’s a pin for your Pinterest board 🙂

Formatting

For the first 3 sections (two-color, fair isle / multicolor, intarsia / motifs) only charts are provided. In the “Adding Texture and Slip Stitch” sections, there are charts, as well as written directions. In some sections there aren’t charts, instead it’s only written directions.

I’m pretty happy with the written directions. The directions are clearly written with a font large enough that I can actually read them without needing a magnifier. They’re also written as such that I feel like I could tackle just about any of these techniques. 

Most pages have only 1 stitch pattern per page, and a handful show 2 stitch patterns on a page, which is wonderful. By formatting the book this way, the charts and swatches are nice and large. This way you can really see how the stitch pattern works up and the pages have a clean layout, so it’s easier on the eyes.

Most of the yarn that they chose has a pretty high contrast. My only complaint is that some of the colors that they chose to work with don’t have enough contrast – there’s a few where the colors used together are green and orange. Maybe my eyes play tricks on me, but to me, the colors seem to blend together. But, that’s okay – when I try the technique, I’ll just use different colors.

Let’s give it a try…

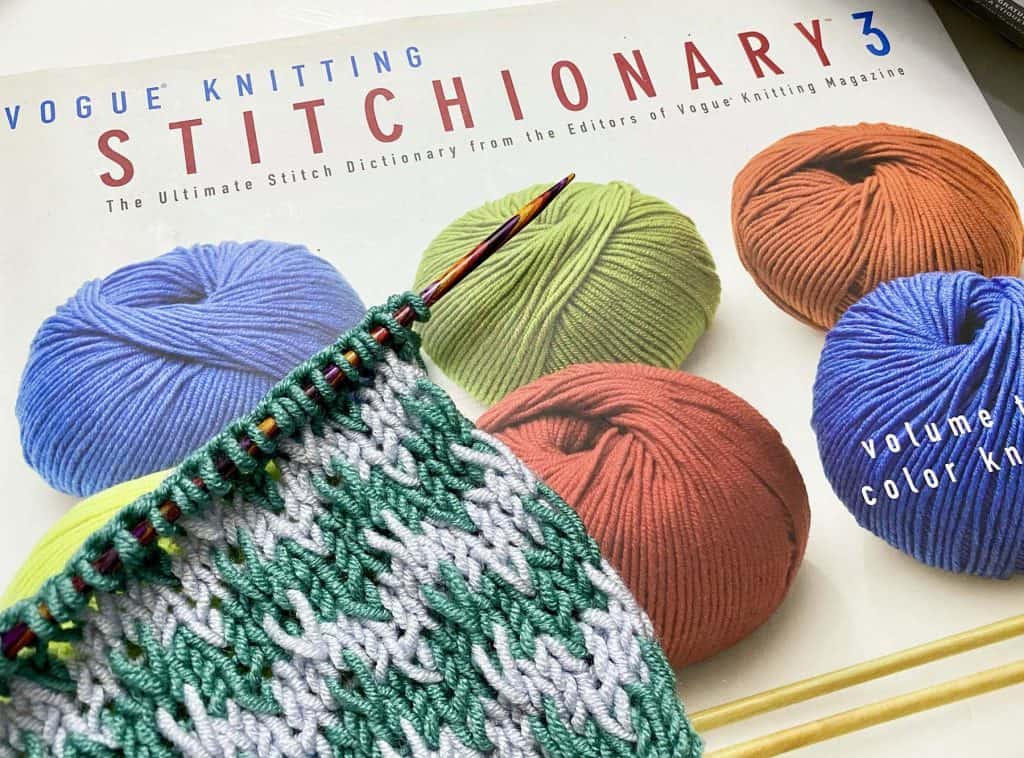
For my first swatch, I decided to give the stitch #173 Bargello in the “Slip Stitch” chapter a try. Instead of going with 4 colors, as they recommend, I went with only 2. And, I like how it’s coming along. The directions are very clear on how to achieve the look of the stitch and I think that I may give it a go with 4 colors next time. 

My first attempt at stitch #173 Bargello in the “Slip Stitch” chapter

Although the book isn’t meant to be a full course on colorwork, it’s a wonderful reference to help you learn new colorwork techniques and to help spark imagination. I would definitely recommend this book for anyone looking to expand their knitting knowledge.

Subscribe on YouTubeJoin me on FacebookFollow on Instagram

Patterns on RavelryInspiration on Pinterest

Linked in Lace Wrap

The inspiration of the Linked in Lace Wrap

The Linked in Lace Wrap was inspired by a stitch that I came across while perusing the web a couple of years ago. The stitch was in another language, so I had to do my best to translate it. Although I don’t speak Russian, I do speak knitting!

When I started swatching, I noticed how the pattern itself was absolutely gorgeous, and the stitch pattern also gave a lovely rippled edge. The more I played with the stitch, the more it called out to be a beautiful, lace wrap.

For many years I worked as a professional wedding photographer. As I continued working this wrap, I kept envisioning a bride or the bridesmaids, even one of the mothers, wearing this wrap. It’s elegant, delicate and lacy, yet adds warmth when you feel a breeze and need shoulder coverage.

King Cole Mulberry Soft DK yarn for the Linked in Lace Wrap from Handmade by Stacy J

About the yarn

The yarn used is Mulberry Soft from King Cole. It is, by far, the softest yarn I’ve ever worked with! It contains 70% baby alpaca and 30% mulberry silk. The hanks come In 50g and I used 6 hanks to make this wrap. When choosing your supplies, natural fibers will work really well to open up the lace and let the wrap bloom when it’s blocked.

I’d like to extend a huge “Thank you” to my wonderful testers that helped me to finalize this pattern. To see their pieces (which are gorgeous!), check out the projects in Ravelry.


Disclosure: This post contains affiliate links. As an affiliate, when you purchase through my links, you allow the company to pay me a small commission without costing you a penny more, which allows me to continue making free content. The yarn for this pattern was provided to me from King Cole – I am a King Cole Brand Ambassador and this post is part of our ongoing collaboration. Thank you for your support!

About the wrap

The wrap is sized for 84” x 15” / 216 cm x 38 cm blocked without fringe and the terms are written using US terminology. I’ve created a video to help with your wrap.

Click here for the Russian Join video tutorial


If you prefer and ad free pdf that includes a chart, checklist, larger font and gift tags for gifting, you can purchase off of Ravelry (or add it to your favorites or que), or you can purchase directly from my Etsy store.

Due to this being a digital download, no refunds will be issued. Thank you!

Linked in Lace Wrap free knitting pattern Pin from Handmade by Stacy J
Here’s a pin to add to your Pinterest board 🙂

Materials needed:

  • King Cole Mulberry Soft DK yarn (70% Baby Alpaca / 30% Mulberry Silk; 109 yd / 100 m; 50g; DK / #3 weight) in color Salt White – 6 hanks (654 yards / 600 m) King Cole stockist click HERE or visit LoveCrafts to purchase online)
  • US Size 9 / 5.5 mm 24” / 61 cm circular knitting needle
  • 2 Stitch markers (optional)
  • Scissors
  • Tapestry needle
  • Crochet hook or tool of choice to help with fringe

Measures: 84” x 15” / 216 cm x 38 cm blocked without fringe

Gauge: 2 pattern repeats = 5” / 12.7 cm

Pattern Difficulty level: Intermediate

If you prefer and ad free pdf that includes a chart, checklist, larger font and gift tags for gifting, you can purchase off of Ravelry (or add it to your favorites or que), or you can purchase directly from my Etsy store.

Due to this being a digital download, no refunds will be issued. Thank you!

Linked in Lace Wrap Pattern Collage from Handmade by Stacy J

Stitches & Terms Used

(Pattern is written in US terms):

  • German twist cast on
  • K: Knit
  • K2tog: Knit 2 stitches together
  • P: Purl
  • P2tog : Purl 2 together
  • Rep: Repeat
  • RS: Right side
  • Sl1, k2tog, psso : Slip next stitch purl-wise with yarn in back, knit 2 together, then pass slipped stitch over.
  • Sl wyif: Slip 1 stitch purl-wise with yarn in front
  • Ssk: Slip knit-wise, slip knit-wise, place 2 slipped sts back to left needle, knit 2 together through the back loop
  • Ssp: Slip knit-wise, slip knit-wise, place 2 slipped sts back to left needle, purl 2 together through the back loop
  • St (s): Stitch (es)
  • WS: Wrong side
  • Yo: Yarn over
  • X: Times (example: 2x = 2 times)
Linked in Lace Wrap free knitting pattern from Handmade by Stacy J

Notes:

  • To keep track of pattern repeats easily, insert a stitch marker in between each repeat on row 1 and then slip markers as you come to them with each subsequent row
  • To avoid weaving in ends, I highly recommend using the Russian Join technique to join a new hank of yarn
  • The chart below shows only the lace section of the wrap
  • Blocking is extremely important to open up the lace work of this wrap. It will grow considerably when you block.
  • Click here for the Russian Join video tutorial

Directions for Linked in Lace Wrap

Click here to view the video tutorial for the wrap

Click here for the Russian Join video tutorial

Using German Twist Cast On method or preferred method, cast on 76

Pattern

  • Row 1 (RS): K2, *k1, yo, k5, ssk, (p1, k1) × 3, p1, k2tog, k5, yo, k2; rep * to last 2 sts, k2
  • Row 2 (WS): K2, *p3, yo, p5, p2tog, (p1, k1) × 2, p1, ssp, p5, yo, p2; rep * to last 2 sts, k2
  • Row 3: K2, *k3, yo, k5, ssk, p1, k1, p1, k2tog, k5, yo, k4; rep * to last 2 sts, k2
  • Row 4: K2, *p5, yo, p5, p2tog, p1, ssp, p5, yo, p4; rep * to last 2 sts, k2
  • Row 5: K2, *k5, yo, k5, sl1, k2tog, psso, k5, yo, k6; rep * to last 2 sts, k2
  • Row 6: K2, purl to last 2 sts, k2
  • Row 7: K2, *Sl wyif × 2, p1; rep * to last 2 sts, k2
  • Rows 8 – 11: Repeat rows 6 – 7
  • Row 12: K2, purl to last 2 sts, k2
  • Linked in Lace Wrap free knitting pattern from Handmade by Stacy J
  • Linked in Lace Wrap free knitting pattern from Handmade by Stacy J
  • Linked in Lace Wrap free knitting pattern from Handmade by Stacy J
 

Repeat rows 1-12 until piece measures 60” / 152 cm (Approximately 24 more repeats)

Repeat rows 1-6 once more

Bind off knit-wise

Fringe:

  • Cut five 18” / 46 cm strands for each “point” on the ends of the wrap
  • Using a crochet hook or tool of your choice, attach the fringe
  • Trim to 8” / 20 cm or desired length

Block, making sure to accentuate the “points” at the ends and enjoy!

When you’re all done, please take pictures and tag me on social media @handmadebystacyj or #handmadebystacyj so that I can see your beautiful wrap 🙂

Subscribe on YouTubeJoin me on FacebookFollow on Instagram

Patterns on RavelryInspiration on Pinterest

This free knitting pattern is copyright 2022 Handmade by Stacy J. Please do not duplicate or copy any portion of this pattern, as well as photographs. You are encouraged to share images of your final product and are allowed to sell final products; I just ask that if you sell your final product, please purchase the ad-free pdf, provide your own photographs and that you please credit Handmade by Stacy J as the designer. Thank you for your support!

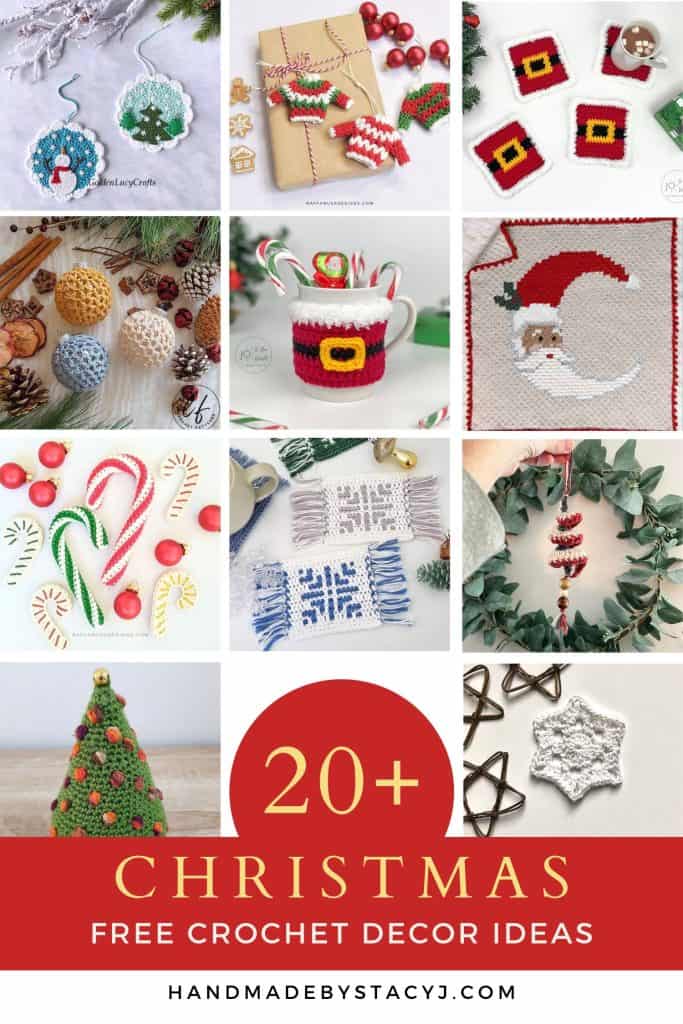
20+ Free Christmas Decor Crochet Patterns

Are you looking for some Free Christmas Decor Crochet patterns? With the holidays among us, I thought it would be fun to ask some of my designer friends to share some of their free crochet patterns for Christmas Decor. They really came through! All of the patterns are free on their blog and they’re so much fun to check out.

There’s adorable ornaments, some cute amigurumi, wine bottle (and glass) holders, coasters, a pillow, a blanket and more! And, if you enjoy knitting, I have a little Merry Matt Mug Rug pattern for you at the bottom of this post.

In this pattern round up you’ll find 21 free crochet patterns from lots of designers! The list below (in no particular order) links directly to the designer’s web page so that you can access their stocking patterns, too. Which one (or two… or five) will you make?

Here’s a pin for you. Pinterest board 🙂

While you’re on the designer’s web pages, please look around and check out more of their patterns. You may even find more to add to your list of things to make for the upcoming year!

If you enjoy knitting, I also have the Merry Mat Mug Rug pattern for you – it’s a free pattern that is simple and quick to knit!

Merry Matt Mug Rug from Handmade by Stacy J

I hope you enjoyed this round up of Christmas Decor patterns! I’d love to know which one (or ones!) you choose to make.

Subscribe on YouTubeJoin me on FacebookFollow on Instagram

Patterns on RavelryInspiration on Pinterest

10+ FREE Christmas Stocking Patterns

Are you looking for some amazing Christmas stocking patterns? Christmas stockings are such a fun project to make. And, with the holidays right around the corner, I thought a stocking would be a fun gift to make for each member of my family. So, I asked a bunch of my designer friends to show me their favorites. Wow! Did they ever deliver!!

In this pattern round up you’ll find 11 free Christmas stocking crochet patterns! The list below links directly to the designer’s web page so that you can access their stocking patterns, too. Which one (or two… or five) will you make?

Here’s a pin for you. Pinterest board 🙂

While you’re on the designer’s web pages, feel free to look around and check out more of their patterns. You may even find more to add to your list of things to make for the upcoming year!

I hope you enjoyed this round up of Christmas Stocking patterns! I’d love to know which one (or ones!) you choose to make. I’ll definitely be making at least 2 of the included designs, but probably more like 5! I’m super intrigued by the fur that is used in many of the designs. Have you worked with fur before?

Subscribe on YouTubeJoin me on FacebookFollow on Instagram

Patterns on RavelryInspiration on Pinterest

14 Free Pet Projects to crochet

Are you looking for some FREE pet projects to crochet? This month has been all about the pups for me. I’ve designed 2 snarf scarves (1 is crochet, the other is knit) this month and thought it would be fun to do a roundup of free pet projects to crochet. A bunch of my designer friends sent me links to crochet patterns that they’ve created just for our fur babies. At the very bottom of this post, you’ll also find the links to my 2 knit snarf scarves.

Wouldn’t your pet look fantastic in a new sweater? How about a new blanket to cozy up on? Or, if you’re joining friends for dinner, how about making a bandana for their fur baby as a thank you gift?

While your checking out everyone’s patterns, take some time to check out the rest of their website. I think you’ll find lots of patterns to add to your list of “Must makes” for the upcoming year!

Here’s a pin for your Pinterest board 🙂

In this roundup you’ll find wonderful bandanas, scarves, a hat and blankets to crochet, too. These projects will all be great to make for your own fur babies, or to make for shelters. The patterns are listed in no particular order.

Let’s check out the free patterns!


If you like to knit…

Below are 2 snarf scarves that I’ve created for our fur babies. They are also free on the blog!


Our rescue dog story

All of our doggos are rescues and they have brought so much joy to our lives. Bucket (our brown boy that always models) was found on the side of the road in Texas while I was driving cross country. He was only about 4 weeks old and I just couldn’t leave him behind. He has the sweetest disposition and is such a lovey boy.

We adopted Moxxi (our black lab / aussie shepherd / border collie mix) from a local shelter in April of 2021. She completed our family and was the doggo that inspired all of my snarf scarf designs.

And, Roscoe is a 13 year old chi-weenie mix that was also adopted at 8 weeks old from our local shelter. All of these babies have brought so much love, laughter and amazing energy to our family.

I just love all of these patterns and know that I’ll be making some for Bucket, Moxxi and Roscoe. So, which ones will you make?

Subscribe on YouTubeJoin me on FacebookFollow on Instagram

Patterns on RavelryInspiration on Pinterest