The Learn to Crochet – Dishcloth written pattern can be used with the video tutorial on the “Handmade by Stacy J” YouTube channel. It‘s a beginner friendly pattern that uses only 2 stitches: single crochet & double crochet.
Disclosure: This post may contain affiliate links. As an affiliate, when you purchase through my links, you allow the company to pay me a small commission without costing you a penny more. This allows me to continue making free content. Thank you for your support!
Materials needed:
Lily Sugar‘n Cream (100% Cotton, Medium 4 weight) 75 yards in the color Sage Green
8.75“ x 8.5“ / each 4 row pattern repeat measures 1.5“ tall
Pattern is written in US terms
Stitches / Abbreviations used:
Chain (ch)
Single Crochet (sc)
Double crochet (dc)
Here’s a pin for your Pinterest board 🙂
Notes:
Ch 1 at the beginning of a sc row does not count as a stitch.
Directions for the Learn to Crochet – Dishcloth:
1: Chain 31. In second ch from hook, work 1 sc; work 1 sc in ea ch across, turn (30 sc).
2: Ch 1, work 1 sc in ea stitch across, turn (30 sc).
3 & 4: Repeat step 2 twice more.
5: Ch 3 (counts as dc), work 1 dc in ea st across, turn (30 dc).
Repeat steps 2 – 5 four more times
Repeat step 2 four more times.
Border:
Ch 1, *work 1 sc in ea st working across top row; work [1 sc, ch 2, 1 sc] in corner st, work 1 sc in each row across edge; work [1 sc, ch 2, 1 sc] in corner st; Rep * to the last corner. Work 1 sc, ch 1 in stitch where first sc is located, join with slip stitch to top of first sc. Fasten off and weave in ends.
Alternate Border:
As seen on the video tutorial
Work border as instructed above, but when working on the edge that has the rows, instead of working 1 sc in each row across, work
1 sc in ea sc row and 1 dc in the 2nd stitch down on the dc rows.
If you’d like to download a pdf, please click on the file below.
Have fun with this and please tag me on social media @handmadebystacyj and #handmadebystacyj – I’d love to see your makes!
This pattern is copyright 2022 Handmade by Stacy J. Please do not duplicate or copy any portion of this pattern, as well as photographs. You are encouraged to share images of your final product and are allowed to sell final products. I ask that if you sell your final product, please credit Handmade by Stacy J as the designer. Thank you for your support!
The Blackberry Salad Crochet Stitch is a fun and simple crochet stitch that offers lots of texture! It works in increments of 4+1 and over a 4 row repeat. If you can chain and double crochet, YOU CAN DO THIS! There are written directions below for the Blackberry Salad Crochet Stitch, as well as a pin to save to your boards. The video tutorial is directly below.
DIRECTIONS for the Blackberry Salad Crochet Stitch:
Increments of 4+1 (+2 for the base chain)
1: Skip 3 chains (counts as dc), dc in the 4th ch from hook and in each ch across, turn.
2: Ch 1 (does not count as st), 1 sc in ea of the next 2 sts, *5 dc bobble, ch 1, 1 sc in ea of next 3 sts; rep * across until 3 sts remain; 5 dc bobble, 1 sc in last st and 1 sc in top of turning ch, turn.
3: Ch 3 (counts as dc), 1 dc in ea st across (when you come to the bobble, only dc in either the bobble or the ch-1, but not both; be sure to stay consistent with this choice throughout your work), dc in top of turning ch, turn.
4: Ch 1 (does not count as st), 1 sc in ea of the next 4 sts, *5 dc bobble in next st, ch 1, 1 sc in ea of the next 3 sts; Rep * across, 1 sc in top of turning ch, turn
5: Repeat row 3
Repeat rows 2 – 5 until you reach your desired length.
Here’s a pin for your Pinterest board 🙂
I do hope you found this tutorial helpful. This is such a fun stitch that I’m sure you’ll be using it for all kinds of crochet goodies. Thank you for joining me on our yarny adventures!
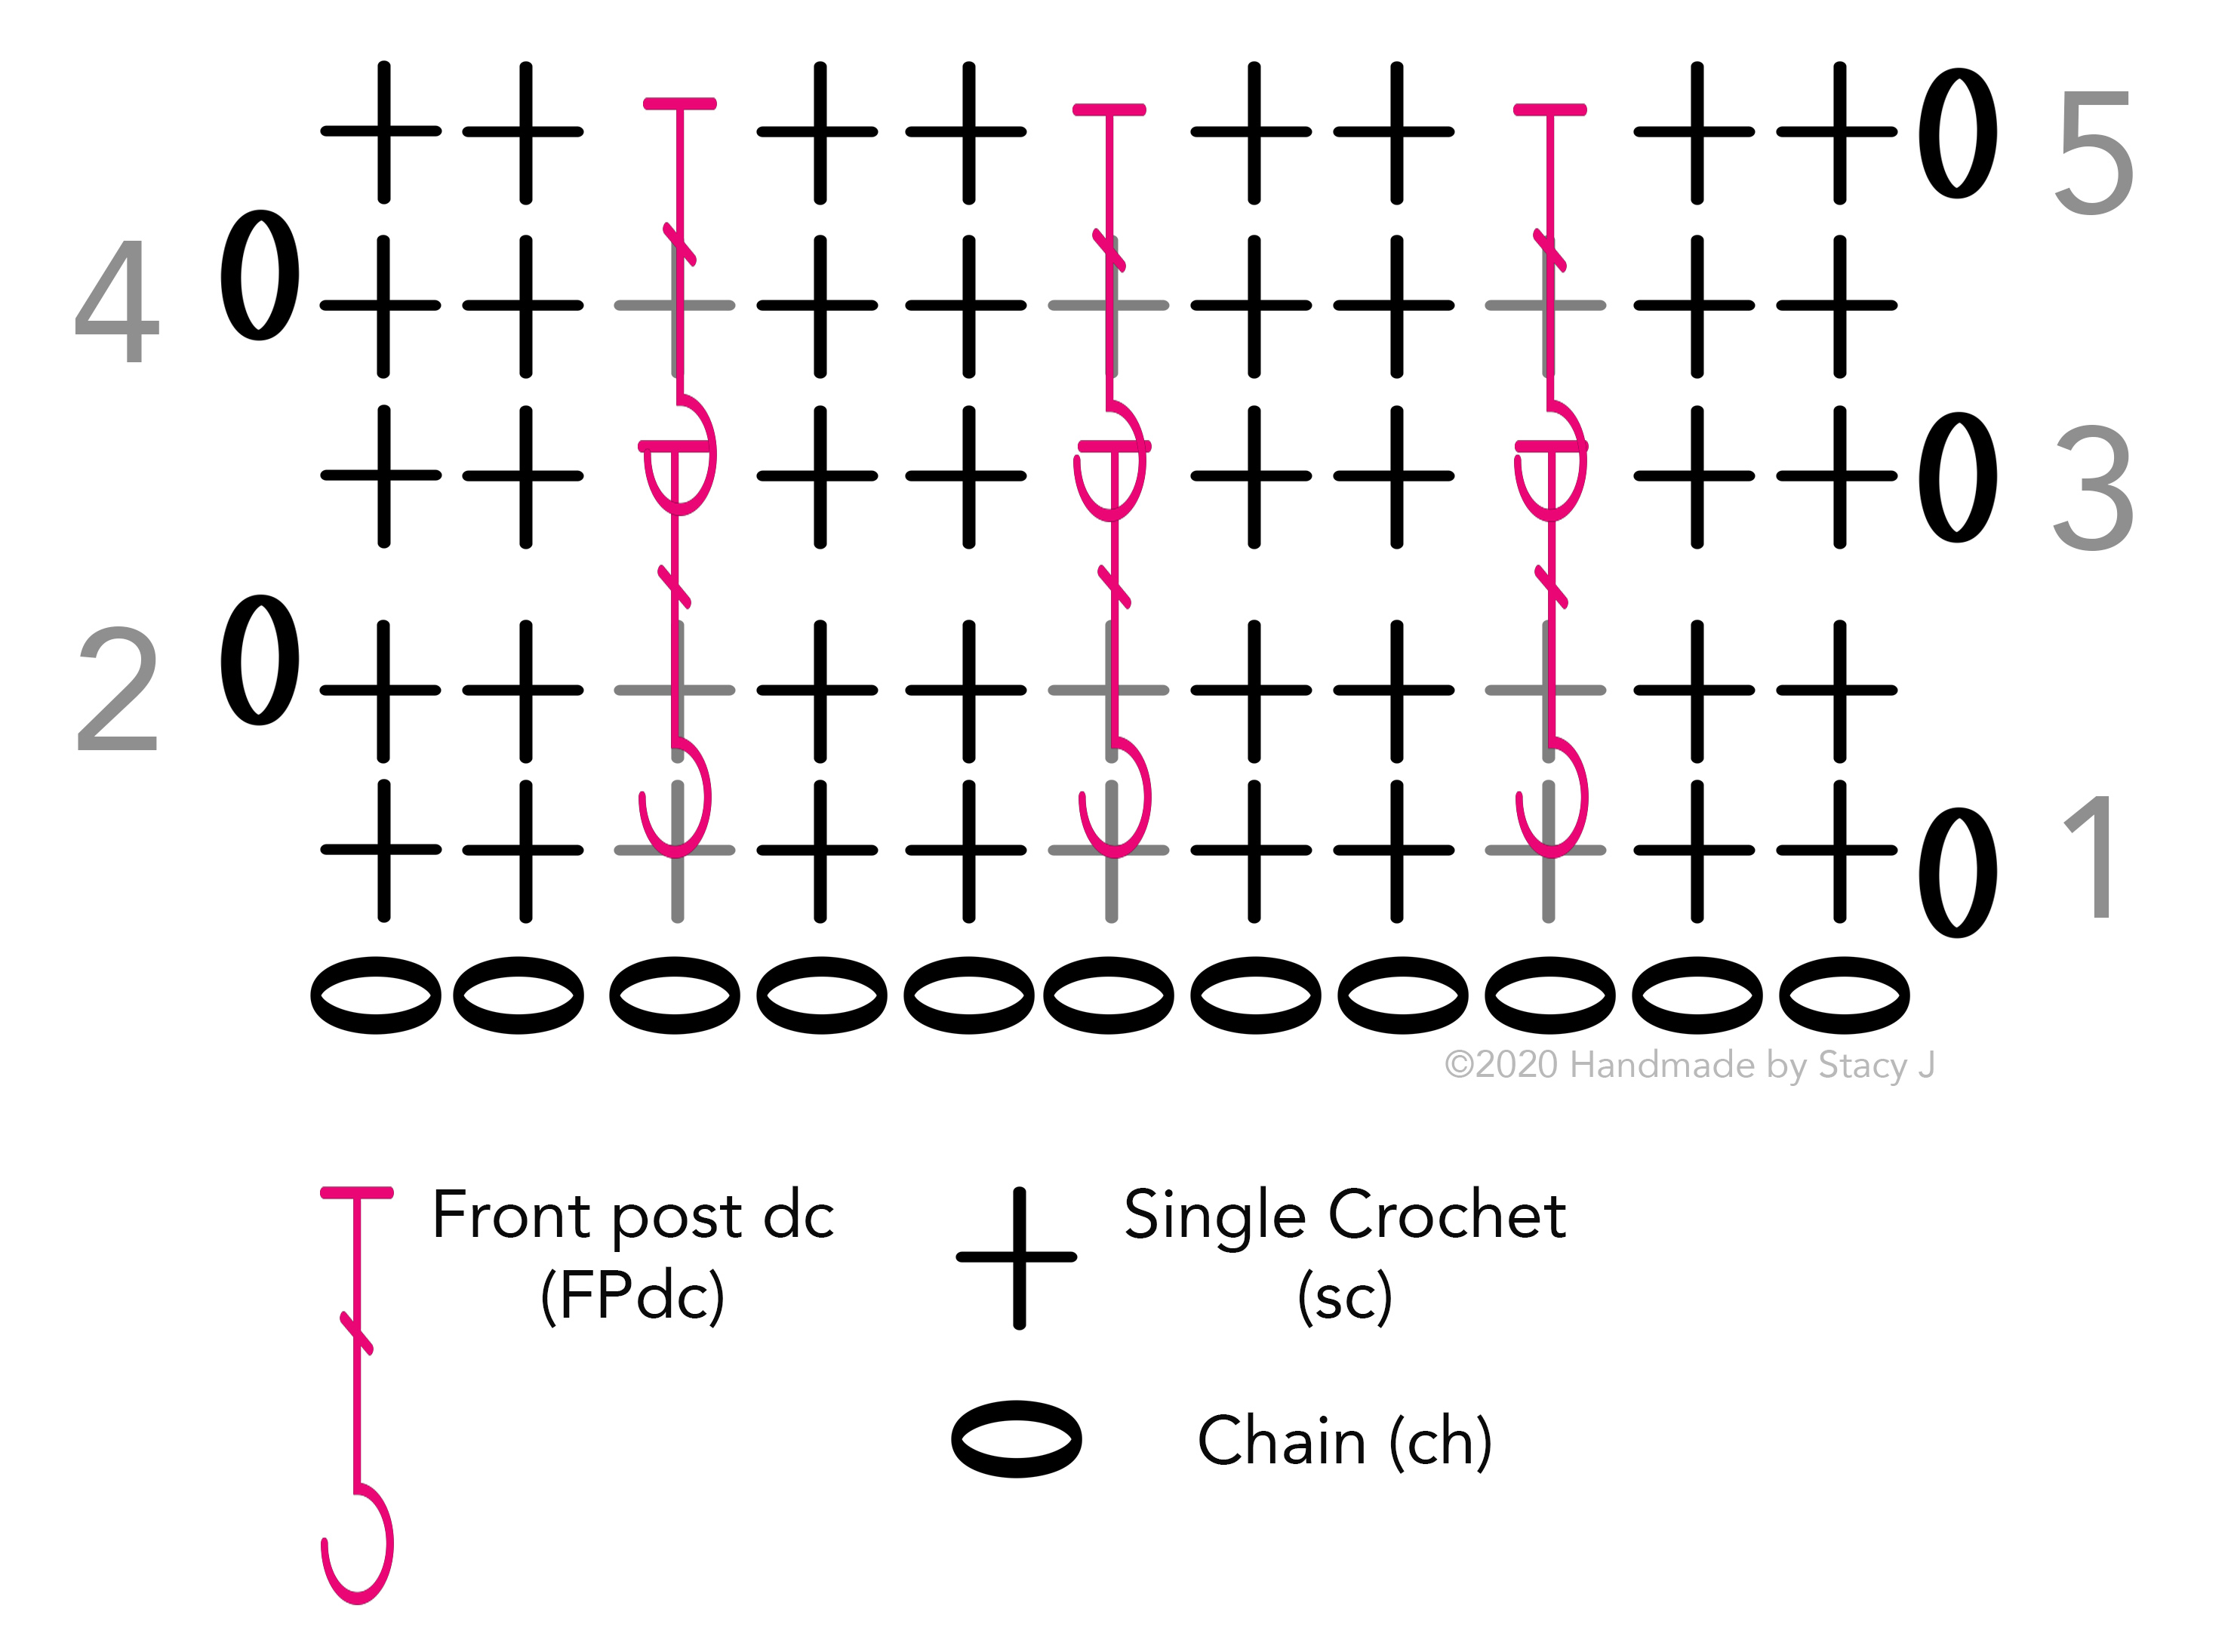
The Bar Stitch is a very quick and easy crochet stitch to learn. It only uses a couple of stitches and creates a very beautiful pattern. This would work well for a baby blanket, wash cloth or variety of garments. Below you will find the written directions, a chart and an image to pin to your Pinterest board. Enjoy!
Difficulty level:
Easy
Terms and Abbreviations used:
Directions are written in US terminology
Ch: Chain
FPdc: Front Post double crochet – work 1 dc around stem of stitch 2 rows below, inserting hook from right to left to draw up loops. You will skip the st behind this one, as it was just worked 2 rows below.
Rep: Repeat
Sc: Single Crochet
Directions for the Bar Stitch
Multiple of 3 sts +3
Note: Ch 1 does not count as a stitch.
Ch in increments of 3 to your desired length, then ch 3 more; work 1 sc in 2nd ch from hook and 1 sc in each ch across, turn.
Ch 1, work 1 sc across, turn.
Ch 1, work 1 sc in each of the first 2 sc, * work 1 FPdc around next sc 2 rows below, work 1 sc in each of next 2 sc (being sure to skip the st behind the FPdc). Rep from * to end, turn
Ch 1, work 1 sc across
Ch 1, work 1 sc in each of the next 2 sc, *1 FPdc around stem of FPdc in 2 rows below, 1 sc in each of the next 2 sts; rep from * across.
Repeat rows 4 & 5 until desired length, ending with a row 4.
Here’s a pin to add to your Pinterest board 🙂
If you would like a printable pdf, here is the file to download:
The Valentine’s Knit Cowl was my first design as I was learning how to knit in the round. It’s a very simple cowl to make and only uses one skein of yarn. It works up very quickly and the hearts really jump out.
At the bottom of this post you will find a chart and a pdf.
Disclosure: This post contains affiliate links. As an affiliate, when you purchase through my links, you allow the company to pay me a small commission without costing you a penny more, which allows me to continue making free content. Thank you for your support!
Difficulty level:
Easy / Beginner
Measures:
30” x 13.5”
Gauge:
20 sts across x 25 rows in stockinette stitch; Hearts measure 3.5” x 3”
Can be made larger or smaller by adding or subtracting in increments of 27. However, adjusting will throw off your purl accent row stitch placements and will need to be adjusted.
Stitch count is the same throughout project – 135 sts
Stitch marker indicating where the join is remains in the project throughout; do not remove this marker until binding off.
Directions for the Valentine’s Knit Cowl:
Cast on 135; Join in the round careful not to twist stitches. Use stitch marker to indicate beginning of the round.
When you choose to make your cowl, please tag me on your makes @handmadebystacyj and #handmadebystacyj – I’d love to see it!
This pattern is not to be sold or copied in any way. The images, pattern and charts are copyrighted by Handmade by Stacy J and may not be duplicated. You are welcome to sell your makes, however I ask that you credit me as the designer. Also, you are responsible for providing your own photographs. Thank you!
This Little Heart pattern is super quick, very easy and uses very little yarn. It works with my Valentine’s cup cozy project that you can find HERE. Also, the Little heart makes a great little accent as a gift some someone you love.
When I designed this, my mom ended up making about 30 of them for residents of a nursing home. From what I heard, they loved them!
Disclosure: There are affiliate links in most of my posts. By purchasing through those links, you allow the companies to pay me a small commission without costing you a penny more. Thank you for your support!
The stitch pattern itself is pretty easy, but I’ve made a video tutorial and you can access that by clicking the box above or clicking HERE.
3. Tighten up the magic ring a little, sc into ring, pull circle tight; fasten off leaving about 6” for weaving in ends.
This pattern is copyright 2020 Handmade by Stacy J. Please do not duplicate or copy any portion of this pattern, as well as photographs. You are encouraged to share images of your final product and are allowed to sell final products. I just ask that if you sell your final product, please credit Handmade by Stacy J as the designer. Thank you for your support!
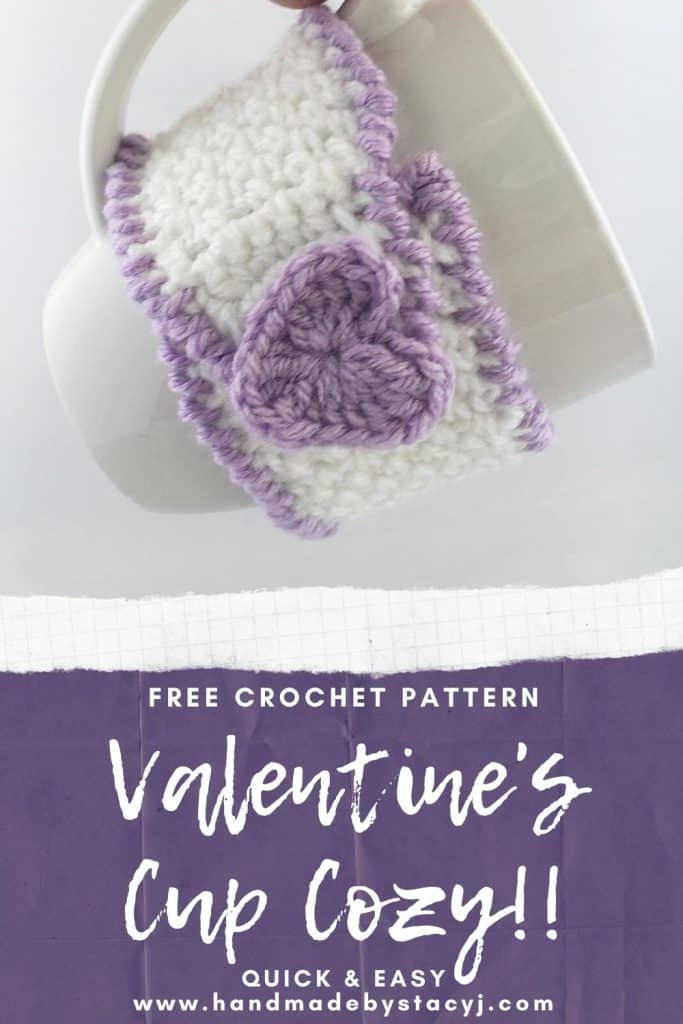
This Valentine’s Cup Cozy works up in almost no time and requires very little yarn. If you’re looking for a quick and easy gift to make for Valentine’s Day, this might be the perfect gift. It’s a great scrap project or something that would be fun to make for your mom, girlfriend, child’s teacher, whoever you think would enjoy a Valentine’s cup cozy!
Disclosure: There are affiliate links in this pattern post. By purchasing through those links, you allow the companies to pay me a small commission without costing you a penny more. Thank you for your support!
The stitch pattern itself is pretty easy, but I’ve made a video tutorial for the heart motif and you can access that by clicking the box above or clicking HERE.
Here’s a pin for your Pinterest board 🙂
Gauge isn’t super important with this piece, since you can measure as you go.
Materials needed:
Dk (#3) yarn: White (about 60 yards); Purple (20 yards) – 740 yds / 677 m
2. Insert hook in third ch from hook, *sc, ch 1; rep * across, ending with sc in last ch; turn
3. Rep row 2 until Cozy wraps around your favorite cup
4. Ch 1, sc2tog with first sc and ch sp, sc across until only ch sp and last sc remain, sc2tog, turn
5. Rep row 4 two more times
6. Ch 1, sc across
7. Ch 7, sc in last st, turn
8. Ch 1, work 1 hdc in first st one row below (this helps to make a smooth look in the transition rows), work 7 sc in ch sp, 1 hdc in last st one row below; fasten off and weave in ends.
9. With Contrasting Color, join with sl st in beginning corner with RS facing, ch 1, work Crab Stitch around the Cozy; join with sl st to first st; fasten off and weave in ends
10. Sew heart on far end from button loop sewing only in the center so that heart works like a button.
11. Wrap and secure around your cup and enjoy your Cozy!!
This pattern is copyright 2020 Handmade by Stacy J. Please do not duplicate or copy any portion of this pattern, as well as photographs. You are encouraged to share images of your final product and are allowed to sell final products. I just ask that if you sell your final product, please credit Handmade by Stacy J as the designer. Thank you for your support!
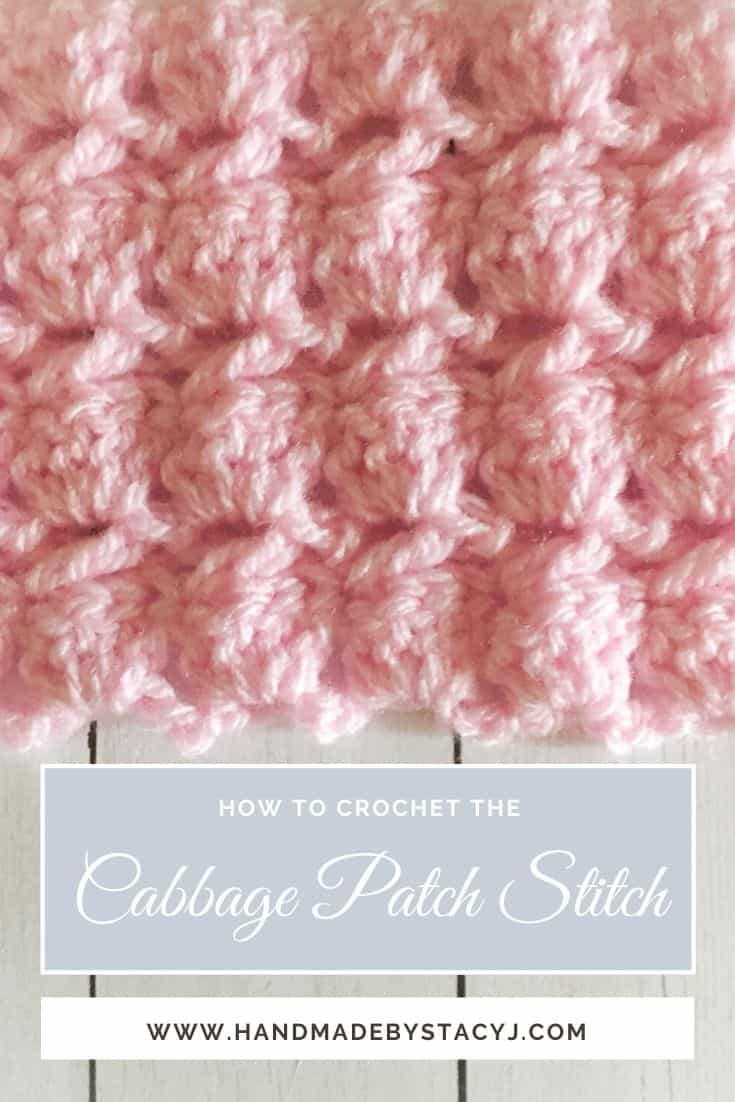
The Cabbage Patch Stitch is one of my favorite stitches to crochet. That’s because it’s beautiful, dense and works up very quickly! Below are written directions, a chart, a pin to save to your boards and a pdf.
Disclosure: This post contains affiliate links. As an affiliate, when you purchase from my links you allow the companies to pay me a small commission. This is at no additional cost to you, which allows me to continue making free content. Thank you for your support!
Are you looking for an amazing hook? Check out Furls!
Note:
This stitch works in multiples of 4 + 7
Special abbreviations:
Cross2dc: Skip 3 dc, work 1 dc into next dc, ch 2, working behind last dc work 1 dc into the 1st of the skipped dc.
Instructions for the Cabbage Patch Stitch:
1. (RS): Work 4 dc into 5th ch from hook, *sk 3 ch, 4 dc into next ch; rep from * to last 2 ch, 1 dc into last ch, turn.
2. Ch 3 (counts as dc), sk 1st dc, *cross2dc; rep from * to end, 1 dc into top of ch-3 at beg of previous row, turn.
3. Ch 3, work 4 dc into each ch-2 sp to end, 1 dc into top of ch-3 at beg of previous row, turn.
4. Rep rows 2-3.
Here’s a pin for your Pinterest Board 🙂
If you’d like a printable pdf, here’s the stitch pattern of the Cabbage Patch stitch to download:
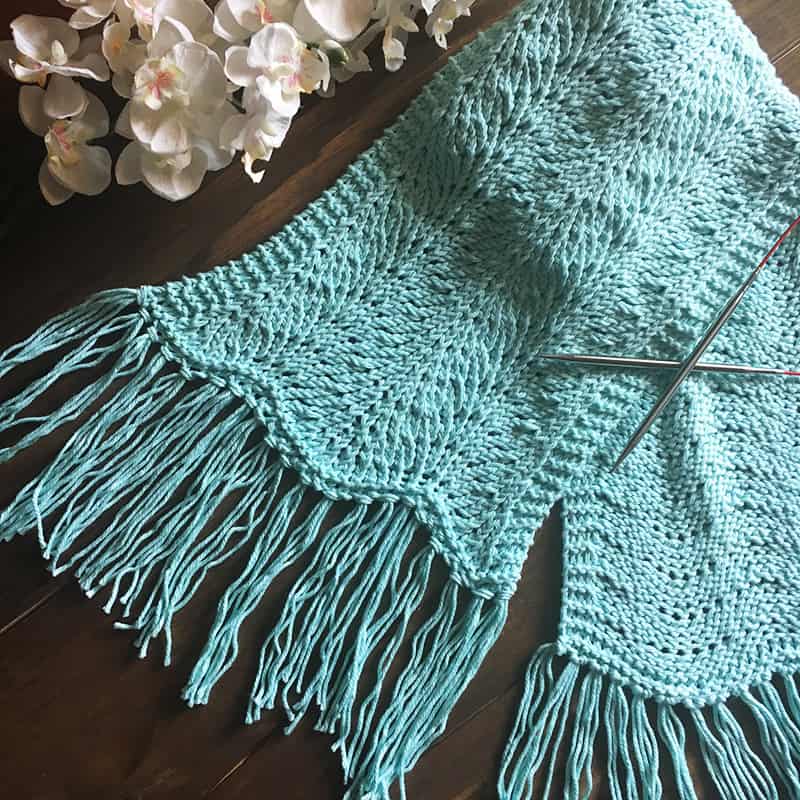
The Coastal Breeze Knitted Scarf was inspired from the Old Shale stitch. When I saw this stitch for the first time, it immediately spoke to me and I knew right away that this had to be a scarf that I could wear to the beach. I didn’t want anything too long or too heavy, so the Coastal Breeze Knitted Scarf was born. I chose to use cotton yarn because I love the weight and the drape, as well as how the stitches open up after blocking.
This is a beginning friendly pattern that only looks complicated. It has a 4 row repeat and can be adjusted to be made thicker by adding in increments of 18 stitches. To help you keep track of rows more easily, I’m attaching a checklist guide for you (I use these for every pattern that I work on). Enjoy!!
Disclosure: This post contains affiliate links. As an affiliate, when you purchase through my links, you allow the company to pay me a small commission without costing you a penny more, which allows me to continue making free content. Thank you for your support!
This pattern is copyright 2019 Handmade by Stacy J. Please do not duplicate or copy any portion of this pattern, as well as photographs. You are encouraged to share images of your final product and are allowed to sell final products; If you sell your final product, I just ask that you please purchase the ad-free pdf and credit Handmade by Stacy J as the designer. Thank you!