Light and Lacy Cascading Waves Cowlette

The Light & Lacy Cascading Waves Cowlette is perfect for when the weather is turning a little warmer, but you’d still like a little something to help take the chill off. It’s light, it’s lacy, it’s beautiful, AND it only uses one hank of yarn! You can adapt it to be a long infinity scarf, however the yarn quantities will increase.

It’s very simple to adapt for a larger size, but be aware that your yarn quantity will vary. I do recommend the yarn that I used, or something similar in a heavier fingering weight. I did another sample in a light fingering weight and it came out a couple inches smaller. However, casting on another 24 stitches should do the trick to make the circumference closer to the pattern size.

There is a video that I created on YouTube that is specific to this stitch technique for you (you can click on the box below or click here to see it on YouTube). The German Twist Cast On works really well for this stitch, however you’re welcome to use preferred method; I just recommend that it’s a little stretchy.

Disclosure: This post contains affiliate links. As an affiliate, when you purchase through my links, you allow the company to pay me a small commission without costing you a penny more, which allows me to continue making free content. Thank you for your support!


If you prefer a printable pdf that includes a chart and a checklist to help keep track of your rounds, you can purchase through Ravelry (or add to your favorites or que) or you can purchase through LoveCrafts.

Measures:

Circumference: 34 inches (86.36 cm);

Height: 15 inches (38.1 cm)


Difficulty Level:

Intermediate


Gauge in Stockinette Stitch:

22 Sts x 25 Rows = 4”


Materials Needed:

Here’s a pin for your Pinterest board 🙂

Notes: 

  • The recommended yarn is a slightly heavier fingering weight (almost like a sport weight); if you choose to use lighter yarn, you may want to cast on an additional 24 stitches for one more pattern repeat to make it closer to the indicated circumference.
  • To adjust the circumference width, add or subtract in multiples of 24 sts; to adjust height, add or subtract rows in increments of 12.
  • Place a stitch marker between each repeat of 24 sts on Round 1 to allow for easier tracking of repeats between the *.
  • Click here for the video tutorial for the Cascading Waves Knit Stitch in the Round, scroll to the top portion of this post or visit: https://youtu.be/xcXDPf0umLU

Stitches Used:

K: Knit

P: Purl

K2tog: Knit 2 stitches together

Psso: Pass slipped stitch over

Sl1, k2tog, psso: Slip next stitch, knit 2 together, then pass slipped stitch over.

Sl wyif: Slip 1 stitch purlwise with yarn in front

Ssk: Slip, slip, knit 

Yo: Yarn over

If you prefer a printable pdf that includes a chart and a checklist to help keep track of your rounds, you can purchase through Ravelry (or add to your favorites or que) or you can purchase through LoveCrafts.

Directions for the Light & Lacy Cascading Waves Cowlette

Set up:

Cast on 192 using the German Twist Cast on; join in the round taking care not to twist your stitches & place a unique or different colored stitch marker to designate beginning of the round

Knit one round

Pattern Directions:

1: *K1, yo, k5, ssk, (p1, k1) × 3, p1, k2tog, k5, yo, k2; rep * around

2: *K2, yo, k5, ssk, (k1, p1) × 2, k1, k2tog, k5, yo, k3; rep * around 

3: *K3, yo, k5, ssk, p1, k1, p1, k2tog, k5, yo, k4; rep * around 

4: *K4, yo, k5, ssk, k1, k2tog, k5, yo, k5; rep * around

5: *K5, yo, k5, sl1, k2tog, psso, k5, yo, k6; rep * around 

6: Knit

7: *Sl wyif × 2, p1; rep * around

8 – 11: Repeat rounds 6 – 7 

12: Knit

Pattern Repeat Instructions

Repeat rounds 1-12 five more times

Repeat rounds 1-6 once more

Knit one more round

Bind off knitwise


Weave in your ends, block, enjoy and tag me on your makes @handmadebystacyj or #handmadebystacyj – I’d love to see them!


I absolutely love seeing what others make with my patterns. Please tag me @handmadebystacyj or #handmadebystacyj so that I can see yours! Enjoy!!

This pattern is protected by copyright and is not to be sold or copied in any way. The images, pattern and charts are ©2021 Handmade by Stacy J and may not be duplicated. You are welcome to sell your makes. However, I ask that you purchase the ad-free pdf pattern and you are responsible for providing your own photographs. Thank you!

Subscribe on YouTubeJoin me on FacebookFollow on Instagram

Patterns on RavelryInspiration on Pinterest

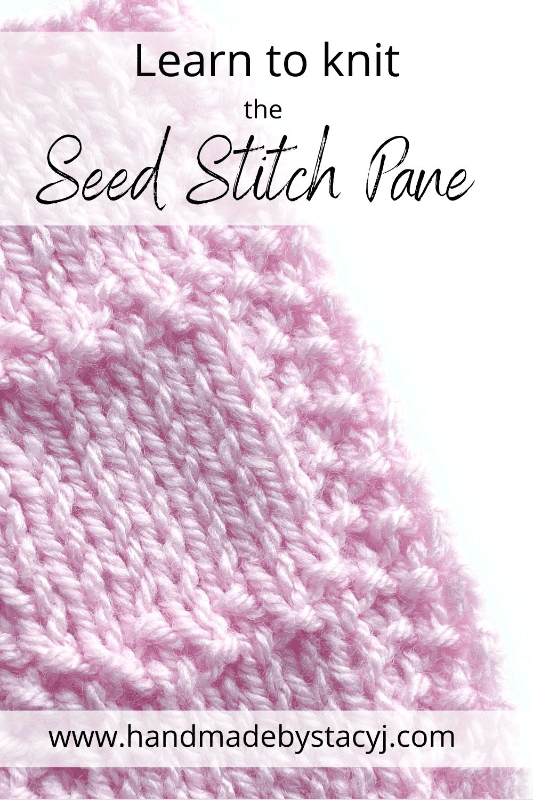
Seed Stitch Pane

The Seed Stitch Pane is a very simple, beginner friendly stitch that is worked over 10 stitches and 10 rows using only knits and purls. Join me as I show you step by step how to create this super easy and interesting stitch.

Disclosure: The links contained in this post are for companies that I am an affiliate for. By purchasing through those links you continue to allow me to provide free tutorials by allowing the company to pay me a small commission. Thank you for your support!

Below you will find the written instructions with a chart, as well as the video tutorial at the top of this post. If you haven’t already, can you please subscribe to my YouTube channel?

Difficulty level:

Easy / Beginner

Stitches used:

Knit (k)

Purl (p)

Pin of Seed Stitch Pane from Handmade by Stacy J
Here’s a pin for your Pinterest board 🙂

Materials Needed:

Paintbox Yarns – Simply DK (100% Acrylic; 100g / 3.5oz; Light #3 weight); Color #149 Candyfloss Pink

KnitPicks Straight Knitting needles, size 6 (4.00 mm)

For the sample in the YouTube video, I cast on 23

Directions for Seed Stitch Pane

1 (RS): P1, *k1, p1; rep from * to end

2 (WS): P1, *k1, p1; rep from * to end

3: P1, k1, p1, *k7, p1, k1, p1; rep from * to end

4: P1, k1, p9, *k1, p9; rep from * to last 2 sts, k1, p1

5: As row 3

6: As row 4

7: As row 3

8: As row 4

9: As row 3

10: As row 4

Repeat rows 1-10 until desired length is reached, then bind off as pattern.

Chart of Seed Stitch Pane from Handmade by Stacy J

If you would like a pdf, you can download that below.

Thanks again for visiting! I’m so grateful to have you joining on our yarny adventures. Please remember to tag me @handmadebystacyj – I love to see your makes!

Stacy J

Subscribe on YouTubeJoin me on FacebookFollow on Instagram

Patterns on RavelryInspiration on Pinterest

Double Crochet Square Motif

The Double Crochet Square Motif is a very simple crochet motif pattern; one of the first that I learned when I was little and my mom was teaching me how to crochet. Join me as I show you step by step how to create this beautiful square. Written directions are below, as well as a video.

The crochet hook used is my absolute favorite hook. It’s the Furls Odyssey in Turquoise; however, they now have a bunch of colors that I love! The yarn is also lovely! It’s a super soft, inexpensive and absolutely lovely yarn that I just love, as well (Oh, and it rarely splits!). So much so that I became an affiliate with the Furls company and LoveCrafts. What that means for you is that when you purchase using my link, you allow the company to pay me a small commission without costing you a penny more. This helps me to continue making free tutorials and patterns. Here is the link if you’d like to check them out for yourself:

Furls Crochet Hook

Yarn: Paintbox Simply DK


Image of Furls Crochet hooks

Difficulty level:

Easy


Stitches used:

Ch: Chain

DC: Double Crochet

Sl St: Slip Stitch


Notes:

You can also chose to ch 2 in the corners instead of 4 if you prefer a more closed look.


Double Crochet Motif Pin from Handmade by Stacy J
Here’s a pin for your Pinterest board 🙂

Directions

Ch 4, join to first ch with a sl st.

Round 1: Ch 5 (counts as dc and ch-2), work 3 dc in ring, ch 2, (work 3 dc in ring, ch 2) two times, work 2 dc, join with sl st to 3rd ch of the ch-5.

Round 2: Sl st into chain space, ch 7 (counts as dc and ch-4), work 2 dc in same ch sp, *1 dc in ea of the sts across, (2 dc, ch 4, 2 dc) in next ch-sp; rep from * two more times, work 1 dc in ea of sts across and 1 dc in same space as where the ch-7 is located, join with sl st to 3rd ch of ch-7.

To grow your square, continue to repeat round 2 by following the pattern until you reach your desired size; the double crochets between the corner chain spaces will always be worked as an odd number (for example, row 2 has 3 dc, row 3 has 7 dc, row 4 will have 11 dc, etc…)


I hope you found this tutorial helpful. As always, I’m very grateful to have your support on our yarny adventures. Thank you!

Stacy J

Subscribe on YouTubeJoin me on FacebookFollow on Instagram

Patterns on RavelryInspiration on Pinterest


Merry Mat Mug Rug

The Merry Mat Mug Rug is a quick and easy gift to make for someone, or to gift to yourself. There is an option for making the Merry Mat without fringe, as well. The written pattern can be used with the video tutorial on the “Handmade by Stacy J” YouTube channel.

Disclosure: This post contains affiliate links. By purchasing through that link, you allow the companies that I’m affiliated with to pay me a small commission without costing you a penny more. This allows me to continue making free content. Thank you for your support!

Difficulty level:

Easy

Stitches used:

Written in US Terms

K – Knit

P – Purl

Sl2 – Slip 2 stitches off, one at a time, purl wise  

If you prefer a printable pdf that includes a checklist to help keep track of your rows and printable gift tags for gifting, you can purchase through Ravelry (or add to your favorites or que).

Materials Needed:

Gauge: 

13 rows x 10 sts: 2” in Stockinette Stitch

Measures: 

8″x 6″

Notes: 

• When slipping stitches with RS facing, yarn will be held at the back; when slipping stitches with WS facing, yarn will be held at the front; You can adapt the pattern to be wider by adding stitches in increments of 4 and taller by doing more repeats of the pattern.

If you prefer a printable pdf that includes a checklist to help keep track of your rows and printable gift tags for gifting, you can purchase through Ravelry (or add to your favorites or que).

Directions for the Merry Mat Mug Rug

Set up

Color A: Cast on 36

Color A: Knit one row 

Pattern

1. (RS) Color A:  Knit

2. (WS) Color A: K2, p to last 2 sts, k2

3. Color B: K5, *sl2 wyib, k2; rep * to last 3 sts, k3

4. Color B: K2, P3, *sl2 wyif, p2; rep * to last 3 sts, p1, k2

5. Color A: Knit

6. Color A: K2, p to last 2 sts, k2

7. Color B: K3, *sl2 wyib, k2; rep * to last st, k1

8. Color B: K2, p1 *sl2 wyif, p2; rep to last 5 sts, sl2 wyif, p1, k2


Rep Pattern rows 1-8 three more times

Rep Pattern rows 1-6 once more

Knit 2 rows

Bind off knit wise

MerryMatt_01.jpg

Finishing Options:

Fringe: Cut 18 – 6” pieces of color B & 20 – 6” pieces of color A; Add as fringe using one strand to short edge of mug rug in coordinating rows. Then, trim fringe for consistent length.

Without Fringe: Pick up stitches along short edge (1 st per row) and knit 2 rows;

Bind off knitwise and do the same for the other side.

Block and enjoy with your favorite snack and drink!


I’d love to see your Merry Mat – please take pictures, tag me on social media with #handmadebystacyj and link to the Ravelry project page!


You are welcome to gift and / or sell your finished items. If you are selling them, I simply ask that you credit Handmade by Stacy J as the designer and purchase the ad-free pdf.


Thank you! 

Stacy J

YouTubeFacebookInstagramRavelryPinterest

This pattern is copyright 2020 Handmade by Stacy J. Please do not duplicate or copy any portion of this pattern, as well as photographs. You are encouraged to share images of your final product and are allowed to sell final products; If you sell your final product, I just ask that you please purchase the ad-free pdf and credit Handmade by Stacy J as the designer. Thank you!

Cozy Tablet Tote

The Cozy Tablet Tote is a stylish way to store your tablet. It’s easily modified to fit any of your gizmos that may need a tote. This is designed to be a quick and easy gift to make. Enjoy!


Disclosure: There are links on this post that are for companies that I am an affiliate for. By clicking on and purchasing from these links, you are allowing the company to pay me a small commission, while not costing you a penny more. Thank you for your support.


Here’s a pin for your Pinterest board

Difficulty level:

Easy-ish


Stitches used:

Written in US Terms

Ch (Chain)

Dc (Double Crochet)

FpDc (Front Post Double Crochet)

FpSc (Front Post Single Crochet)

FSc (Foundation Single Crochet)

Standing Sc (Standing Single Crochet)

Sc (Single Crochet)

Sc2tog (Single Crochet 2 Together)

Sc3tog (Single Crochet 3 together)  


Materials Needed:

Red Heart (100% Acrylic; 100g / 7 oz; 333m / 364 yd; Worsted Size 4 yarn) 

Color A – Dusty Grey: 56 yards

B – Scuba: 130 yards

C – White: 37 yards

Crochet Hook size 4.5mm / G+ – My favorite to use is Furls Odyssey; You can get yours here!

2 Lockable stitch markers (Optional)  I use these for indicating where my first and last stitches made are located and this helps for straight edges

Tapestry needle

Scissors

Button (I used a .75” button), sewing needle and sewing thread

To purchase an ad-free pdf of this pattern, please visit my Ravelry Store. 


Gauge:

14 sts x 15 rows = 4” using sc

Measures:

8”x10” without flap, 8” x 14” with flap opened

Notes: 

• To adjust width, you can add or subtract stitches in mulitples of 2; to adjust height, add or omit rows of the “Alpine Section” as desired.

• Ch 1 at the beginning of row does not count as a stitch

• Yarn tails should be left long (approximately 12” – 18”) as you finish each section for ease of sewing the panels together. 

• Using a stitch marker at the first sc made on any sc rows and in the second ch of the ch-2 on dc rows to help keep your edges straight & not lose track of where the ch-2 on some rows are.

• Tote’s second panel is worked by joining in your FSC row, therefore eliminating some seaming; if you prefer to work 2 separate panels, you can do so by working panel 1 two times.


Directions for Cozy Tablet Tote:

Panel 1

1: With MC, make 30 FSc, then turn

2: Ch 1 (does not count as a st), work 1 sc in same st and in each st across, then turn. (30 sc)

3 – 7: Repeat row 2 for 5 more rows with Color A (Grey)

8: Repeat row 2 with Color C (White)


Alpine Section Directions

Notes:

• This panel always starts on the Wrong Side

• While drawing up first loop of FpDc, bring the loop to the height of the current dc to avoid puckering or pulling on this row (it should lay flat)

• As you work a FpDc, be sure NOT to work the st behind it, as you’ve already worked that stitch, only 2 rows below.


Directions:

With Color B (Scuba)

9: WS: Ch 1, work 1 sc in same st in ea st across, then turn. (30 sc)

10: RS: Ch 2 (counts as dc), 1 dc in next st & in ea st across, then turn. (30 dc)

11: WS: Ch 1, work 1 sc in same st in ea st across, (being sure not to miss the top of the ch-2), then turn. (30 sc)

12: RS: Ch 2 (counts as dc), 1 dc in ea of next 3 sts, *FpDc around next dc post 2 rows below, (the 5th post from the edge), 1 dc in next st; rep * until 2 st remains, 1 dc in ea of last 2 sts, turn. (12 FpDc, 18 dc)

13: WS: Rep row 11

14: RS: Ch 2 (counts as dc), 1 dc in ea of next 4 sts *FpDc around next dc post 2 rows below, 1 dc in next st; rep * until 3 sts rem, 1 dc in ea of last 3 sts, turn. (11 FpDc, 19 dc)

15: WS: Rep row 11

16: RS: Rep row 12

17: WS: Rep row 11, switch to Color C (White) and then break color B (Scuba) leaving a longer yarn tail for seaming later.


Single Crochet Transition

18: RS: With Color C, rep row 9, then switch to Color A (Grey) and break Color C.

19: WS: With Color A, rep row 9, then switch to Color C (White) and break Color A.    

20: RS: With Color C, rep row 9, then switch to Color B (Scuba), and break Color C.


Alpine Section 2

Rows 21 – 29: With Color B (Scuba), repeat rows 9-17, then switch to color C (White) and break Color B

Row 30: With Color C, rep row 18, then switch to Color A (Grey) and break Color C.

Rows 31 – 37: With Color A, rep row 2, then fasten off.


Panel 2

This panel will start by joining in the original foundation made at the beg of Panel 1.

With Panel 1 upside down and wrong side facing, join Color A in right corner with standing sc and then work 1 sc in ea st across, turn. (30 sc)


Repeat Panel 1 starting with row 2 and fasten off when completed.


Assembly

With the right sides facing you, fold your panel in half and make sure all the stripes line up correctly.

Then, unfold the panel and fold it in half with the right sides facing each other (the wrong side should be showing on the exterior now.

While sandwiching the piece, use your yarn tails to seam the pouch together on the wrong side; For simplicity, you can loosely tie the yarn tails that meet up together or use stitch markers to hold it all in place.

Use a tapestry needle to sew the panel sides together and then turn the pouch right side out.

Whew – you’ve completed the biggest section; And, now it’ll all be easy peasy from here on out.

Top Border

With Color C (White), join in a seamed corner stitch with a standing sc (Insert stitch marker in top of this stitch for ease of joining), then work 1 sc in each st around top of pouch, joining with sl st to top of standing sc (where the sm is), fasten off and weave in ends. Depending on how you seamed your pouch, you should have approximately 60 sc.

If you prefer to sew in a zipper, this would be a good time to do so. And, if you prefer not to do the closure flap, then your pouch is finished!


Closure Flap

Look at your pouch and then decide which side will be the front and which side will be the back.

With the front side facing you, looking at the WS of the back (Basically, it’s open and your looking inside), place a sm in the top of the middle of the back where the Top Border is.

Then, count 12 sts to the left (including the st that has the sm) and place a sm or a scrap piece of yarn around the post of the st one row below the Top Border.

Count 12 sts to the right (including the st that has the sm) and place another sm or scrap piece of yarn around the post of the st one row below the Top Border.

Remove the middle sm, because your flap will be worked between where the left and right stitch markers are.

Take another look to see if your happy with that placement. If it doesn’t seem centered, you can shift it over a stitch or two if you like as long as you make sure that you shift both stitch markers; there will be 23 sts worked.

Turn pouch wrong side out, because you will be working this section flat.


Closure Flap Stitch Directions:

1: With Color A, join with standing FpSc to post with sm, work 1 FpSc in ea of the next 22 sts, turn and then remove stitch markers. (23 sc)

2 – 4: Ch 1, work 1 sc in ea st across, turn.

5: Ch 1, sc2tog, 1 sc in ea st to the last 2, sc2tog, turn. (21 sc)

Rep row 5 nine times – you will end up with a total of 3 sc left.

Ch 1, sc3tog, fasten off.


For these last rows, you will only be working the two sides of the flap that fold over (not the part that connects to the body of the tote). 

• Color B and RS facing: join with standing sc to top corner where the flap begins at the body of the pouch, then work 1 sc in ea st down the edge, working (1 sc, ch 2, 1 sc) in corner where the sc3tog is located, and continue to work 1 sc in ea st on edge, joining to sc that is located on tote body; Fasten off.

• With Color C: Rep row 16, except in ch-2 sp work (1 dc, *ch5, 1dc), then fasten off. (You may need to add or subtract the ch quantity to adjust for your button size; Make sure that this fits snuggly and isn’t too loose or too tight in order to secure the button.)

• Determine button placement and then sew on button to the pouch.

• Weave in all ends and enjoy! 

I’d love to see yours – please take pictures, tag me on social media with #handmadebystacyj and link to the Ravelry project page!

Stacy J

This pattern is copyright 2020 Handmade by Stacy J. Please do not duplicate or copy any portion of this pattern, as well as photographs. You are encouraged to share images of your final product and are allowed to sell final products; If you sell your final product, I just ask that you please purchase the ad-free pdf and credit Handmade by Stacy J as the designer. Thank you!


Subscribe on YouTubeJoin me on FacebookFollow on Instagram

Patterns on RavelryInspiration on Pinterest

Diagonal Garter Rib

Today’s knitting stitch is for the Diagonal Garter Rib. It’s a very simple, beginner friendly stitch that is worked over 5 stitches and 10 rows using only knits and purls. Below is the written directions with a chart, the video tutorial, and you can use the image to pin to your Pinterest to save for later.


Disclosure: The links above are for companies that I am affiliated with. By purchasing through those links, you allow me to continue making free tutorials by allowing them to pay me a small commission. Thank you for your support!

Difficulty level:

Easy / Beginner

Stitches used:

Knit (k)

Purl (p)

Materials Needed:

Paintbox Yarns – Simply DK (100% Acrylic; 100g / 3.5oz; Light #3 weight); Color #116 Melon Sorbet

KnitPicks Straight Knitting needles, size 6 (4.00 mm)

For the sample in the YouTube video, I cast on 22


Pin of Diagonal Garter Rib from Handmade by Stacy J
Here’s a pin for your Pinterest board 🙂

Directions for the Diagonal Garter Rib:

1 (RS) and every RS row: Knit

2 (WS): *P2, k3; rep from * to last 2 sts, p2

4: K1, *p2, k3; rep from * to last st, p1

6: K2, *p2, k3; rep from * to end.

8: *K3, p2; rep from * to last 2 sts, k2

10: P1, *k3, p2; rep from * to last st, k1

Rep rows 1-10 until desired length is reached, binding off as pattern.

Chart for Diagonal Garter Rib from Handmade by Stacy J

Here’s the video tutorial for you: https://youtu.be/NaakK0kiLDg

You can also download a printable pdf below

Please remember to tag me @handmadebystacyj so that I can see your makes. I hope you enjoy your day and it involves lots and lots of yarn 🙂

Thank you so much!

Stacy J

Subscribe on YouTubeJoin me on FacebookFollow on Instagram

Patterns on RavelryInspiration on Pinterest


Granny Square

Traditional crochet method

The traditional Granny Square is a pattern that many crocheters learn as their first motif. My mom taught me how to create this simple granny square pattern when I was a little girl. It‘s a super simple stitch pattern that only uses a couple of stitches. The written directions are below, as well as a video tutorial above. If you haven’t already, please subscribe to my YouTube channel 🙂

Disclosure: This post may contain links for companies that I am an affliate for. By purchasing through those links you continue to allow me to provide free tutorials by allowing the company to pay me a small commission. As a result, your purchase allows me to continue making free content. Thank you for your support!

Difficulty level:

Easy

Terms and Abbreviations used:

Directions are written. using US terminology

Ch: Chain

Dc: Double Crochet

Rep: Repeat

Sk: Skip

Sl st: Slip Stitch

Sp (s): Space (s)

St (s): Stitch (es)

Pin of traditional granny square from Handmade by Stacy J
Here’s a pin for your Pinterest board 🙂

Materials Needed:

Paintbox Yarns – Simply DK (100% Acrylic; 100g / 3.5oz; Light #3 weight); Color #131 Seafoam Blue & Color #102 Champagne White

Crochet Hook Size G (4 mm) If you love Furls, here’s a link 🙂

Note: If you are using two colors, join with a sl st in any ch-2 corner space on each row.

If you are only using one color, do not fasten off your yarn. Instead, sl st to the corner sp.

Directions for traditional Granny Square

This is worked in the round, do not turn your square when moving on to the next round.

Ch 4, join to first ch with a sl st.

1: Ch 5 (counts as dc and ch-2), work 3 dc in ring, ch 2, (work 3 dc in ring, ch 2) two times, work 2 dc, then join with sl st to 3rd ch of the ch-5.

2: Ch 5 (counts as dc and ch-2), work 3 dc in same ch sp, *ch 1, sk 3 dc, (3 dc, ch 2, 3 dc) in next ch-2 sp; rep from * two more times, ch 1, sk 3 dc, work 2 dc in same sp as where the ch-5 is located, then join with sl st to 3rd ch of ch-5.

3: Ch 5 (counts as dc & ch-2), work 3 dc in same ch sp, *ch 1, sk 3 dc, work 3 dc into next sp, ch 1, sk 3 dc, (3 dc, ch 2, 3 dc) in corner ch-2 sp; rep * two more times; ch 1, sk 3 dc, work 3 dc into next sp, ch 1, sk 3 dc, work 2 dc in same sp where the ch-5 is located, then join with sl st to 3rd ch of ch-5.

4: Ch 5 (counts as dc & ch-2), work 3 dc in same ch sp, *ch 1, sk 3 dc, work 3 dc into next sp, ch 1, sk 3 dc, work 3 dc in next sp, ch 1, work (3 dc, ch 2, 3 dc) in corner ch-2 sp; rep * two more times; ch 1, sk 3 dc, work 3 dc into next sp, ch 1, sk 3 dc, work 3 dc in next sp, ch 1, sk 3 dc, work 2 dc in same sp where the ch-5 is located, then join with sl st to 3rd ch of ch-5. Fasten off.

To grow your granny square

Continue repeating round 4 by following the pattern until you reach your desired size.

If you prefer a printable pdf, there is one below for you to download.

I thank you so much for joining me and supporting me on our yarny adventures. Please remember to tag me @handmadebystacyj with your makes -I love to see them!

Stacy J

YouTubeFacebookInstagramRavelryPinterest


Featured Friend Friday

Meet Courtney with Creations by Courtney!


Welcome to Friday’s Featured Friend! Today I’d like to introduce you to my good friend and amazing designer, Courtney with Creations by Courtney!

About Courtney

Courtney is in Atlanta, Georgia and has been designing crochet pieces since 2017. She was inspired by fashion and wanted to see if she could turn an idea into a finished crochet piece. Her journey as a crochet designer began before she realized that she was a designer, during the time that she was focused on being a maker. “I was occasionally making my own hats and even made a skirt that I was hoping to sell as a custom item, but it never took off. A former business mentor suggested designing, and that’s what I did. I have since learned how to create an easy to read pattern that is tested or tech edited for clarity.”

What inspires you?

When asked, what inspires you to continue designing, Courtney responded, “I’m inspired to continue designing by the endless possibilities of fiber! I am often watching a video or movie, or scrolling Pinterest when an idea may pop into my imagination. I find it exciting to watch a skein of yarn become something else through a series of wrapping and pulling yarn.” Her favorite part of designing is “seeing the completed projects made from my designs. It’s exciting to see another crocheter’s interpretation of one of my designs, and to see them happy with their project.”

So, what is our featured friend, Courtney working on right now? She is currently designing her first sweater! “I have made several garments, but not a traditional sweater. I think it’s going to capture my personality well. I’m excited to get it together and available for the fiber community.”

Biggest tip to a new crafter?

And, her biggest tip to a new crafter? “Learn to read patterns, always make a gauge swatch, practice, and be patient with yourself. I know it’s more than one tip, but I find them all to be equally important.”

To see some of Courtney’s creations, please click on the one of the images. This will take you to her website where there is a plethora of gorgeous crochet designs!

Making Waves Waistcoat from Creations by Courtney
Hooded Poncho designed by Creations by Courtney
Ashley Hooded Cowl link from Creations by Courtney

Personal tidbits

Courtney has been married to her lovely hubby for 10 years. They have 3 kids, and Courtney has a bonus son. “My husband is an entrepreneur, too. He runs an e-commerce store through Amazon. During the summer, he returns to his love of speaking by empowering high school students attending an educational summer camp at a university. My bonus son is 15, and enjoys being a big brother to his younger siblings. My oldest child is our 8 year old son, and he’s in 3rd grade this year. He’s always happy and excited about lots of things, as well as being very caring and helpful. He’s a great big brother to his twin sisters. The twins are 4 years old, and make every day interesting. We never expected to have twins, and they are funny and sassy! One enjoys singing loudly throughout the house, and they both will dance to any music playing anytime. We have four fish that the 8 year old named and talks to daily.”

Typical Saturday?

I asked her what a typical Saturday looks like for her. She responded, “Oh gosh, a typical Saturday morning involves the twins waking up early, climbing in our bed and asking to watch “True” or “My Little Pony” followed shortly by dramatic statements of being so hungry. I make breakfast for the kids and myself, and then make snacks for post-breakfast because they eat most of the day. If it’s a smooth Saturday morning, I might get to sit down and take a breath before noon.”

Best advice ever received?

The best advice she ever received is “be true to yourself, and know that you won’t please everyone. Don’t worry about those that may not like you or what you do because there are plenty of people that will love you and what you have to offer.”

To follow Courtney or learn more about her, please visit her with the links below.


Featured friend logo of Creations by Courtney

WebsiteFacebookFacebook GroupInstagram

RavelryPinterestEtsy

Thank you for taking the time to meet my featured friend! I’ll be taking a break next week, as we all wind down from the Thanksgiving holiday. However, the following Friday you’ll get to meet my friend Sati with Rows and Roses. I hope you have a lovely week and a fantastic holiday!

Stacy J

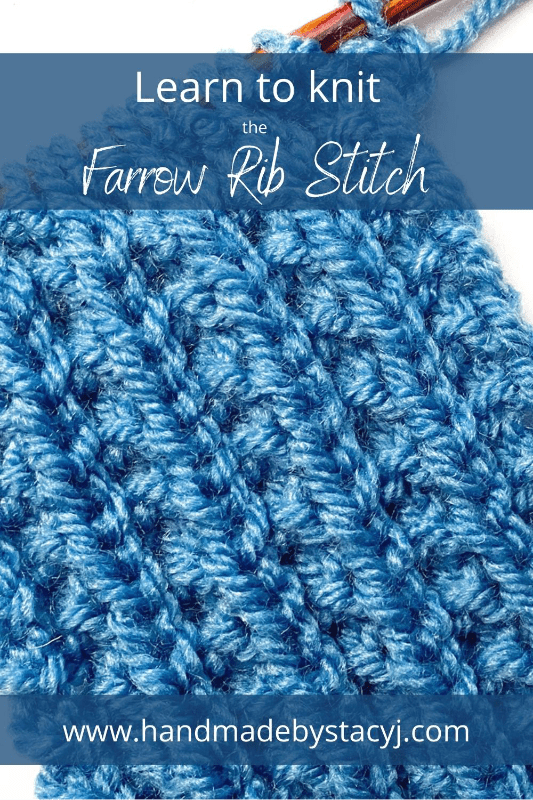
Farrow Rib

The Farrow Rib Stitch tutorial just dropped today and I’m so excited to share it with you! This is such an easy stitch! The Farrow Rib stitch is worked over 3 stitches and 2 rows; super easy to do and super easy to memorize. Join me as I show you step by step how to create this super easy and stretchy rib. Below is the written directions, and above is the video tutorial. If you don’t have time to try this now, there is also a pin for you to save to your Pinterest board.

Disclosure: The links above are for companies that I am an affliate for. By purchasing through those links you continue to allow me to provide free tutorials by allowing the company to pay me a small commission. Thank you for your support!

Difficulty level:

Easy

Stitches used:

Knit (k)

Purl (p)


Pin of the Farrow Rib Stitch from Handmade by Stacy J
Here’s a pin for your Pinterest board 🙂

Materials Needed:

Paintbox Yarns – Simply DK (100% Acrylic; 100g / 3.5oz; Light #3 weight); Color #136 Dolphin Blue

KnitPicks Straight Knitting needles, size 6 (4.00 mm)

Directions

For the sample in the YouTube video, I cast on 16

Row 1 (RS): *K2, p1; rep from * to last st, k1

Row 2 (WS): P1, *k2, p1; rep from * to end

Rep rows 1-2 until desired length is reached, binding off as pattern.

Chart showing how to knit the Farrow RIb Stitch from Handmade by Stacy J

Here’s the video tutorial for you: https://youtu.be/Krs7RS5oWpY

If you’d like a printable pdf, you can download it below.

I’ll be taking next week off to spend the Thanksgiving week with my family – I hope you have a wonderful holiday and I’ll be uploading more tutorials and blog posts the following week. Please remember to tag me on your makes @handmadebystacyj – I love to see them!

Thank you!

Stacy J

Subscribe on YouTubeJoin me on FacebookFollow on Instagram

Patterns on RavelryInspiration on Pinterest


Herringbone Double Crochet

Today I’m sharing with you how to crochet the Herringbone Double Crochet. Not only am I showing you the traditional method, I’m also showing you how to modify the edges so that they’re much straighter. You’ll be amazed at how a simple, little trick makes such a big difference! The written directions are below, as well as the video tutorial.

The crochet hook used is my absolute favorite hook. It’s the Furls Odyssey in Turquoise; however, they now have a bunch of colors that I love! The yarn is also lovely! It’s a super soft, inexpensive and absolutely lovely yarn that I just love, as well (Oh, and it doesn’t split!). So much so that I became an affiliate with the Furls company and LoveCrafts. What that means for you is that when you purchase using my link, you allow the company to pay me a small commission without costing you a penny more. This helps me to continue making free tutorials and patterns. Here is the link if you’d like to check them out for yourself:

Furls Crochet Hooks: https://shrsl.com/3lv3x

Yarn: Paintbox Simply DK – https://www.lovecrafts.com?utm_medium=affiliate&a_aid=eccf469a


Difficulty level: Easy-ish

Terms and Abbreviations used:

Directions are written using US terminology

Ch: Chain

Dc: Double crochet

Ea: Each

Hk: Hook

Rep: Repeat

St (s): Stitch (es)

Yo: Yarn over

Special Stitches used:

Herringbone Double Crochet (HbDc): Yo, insert hook, yo, draw through st and 1st loop on hook, yo, draw through 1 loop, yo, draw through both loops on hook.

Materials Needed:

Paintbox Yarns – Simply DK (100% Acrylic; 100g / 3.5oz; Light #3 weight); (YouTube tutorial uses Color #142 Tea Rose / Image photographed uses Color #131 Seafoam Blue)

Crochet Hook Size G (4 mm)


Pin of Herringbone Double Crochet from Handmade by Stacy J
Here’s a pin for your Pinterest board 🙂

Traditional HbDc:

Any number of sts, +2 for base ch

Row 1: Insert hook in 3rd ch from hk (counts as 1 dc), 1 HbDc into next ch and ea ch across, turn.

Row 2: Ch 3 (counts as 1 dc), work 1 HbDc in next st and ea st across, working last st in top of ch-3, turn.

Rep row 2 until you reach desired length.

Modified HbDc for straight edges:

Any number of sts, +1 for base ch

Row 1: Insert hook in 2nd ch (counts as 1 dc), 1 HbDc into next ch and ea ch across, turn.

Row 2: Ch 2 loosely (counts as 1 dc), work 1 HbDc in next st and ea st across, working last st in top of ch-2, turn.

Rep row 2 until you reach desired length.

If you prefer to download a free pdf with the directions, you can download the pdf below

Thanks for joining me and I’ll be back next Tuesday with another crochet tutorial.

Stacy J

YouTubeFacebookInstagramRavelryPinterest