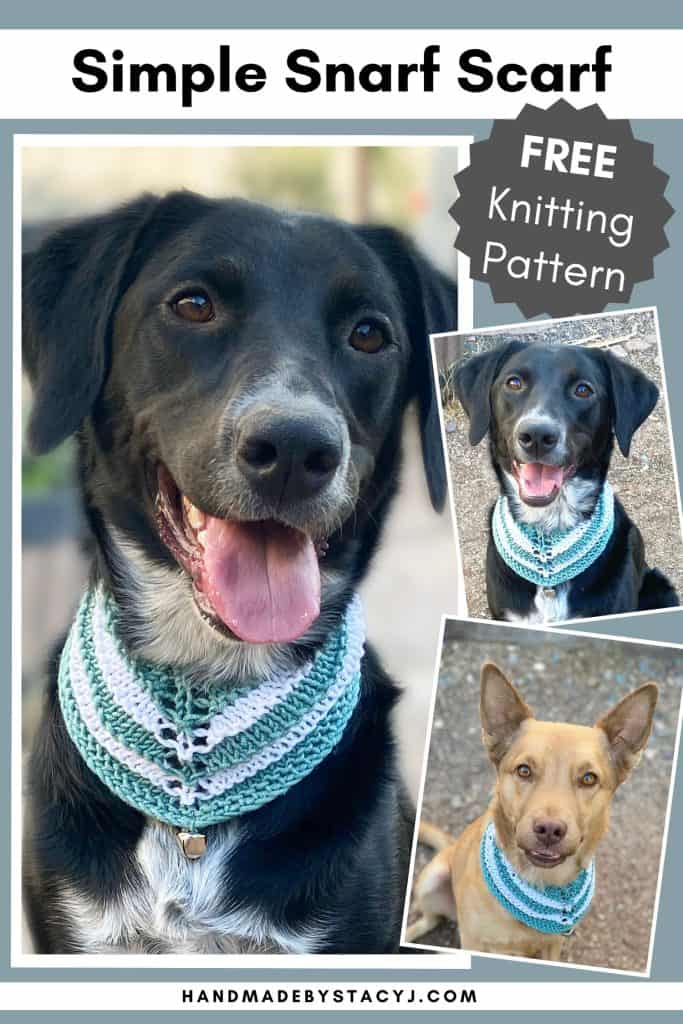
Today I am so excited to share with you the Simple Snarf Scarf – FREE knitting pattern! This pattern is an easier to knit version of the Holiday Snarf Scarf that I designed in 2021.
The Simple Snarf Scarf is a dog scarf that was inspired by our latest addition to our family: Moxxi! We adopted her in 2021 and she makes the funniest sound when she gets a treat. It sounds like a big “SNARF!” Since we hadn’t had a little girl dog for ages, we decided that she needed a little wardrobe – hence, the Snarf Scarf was born!
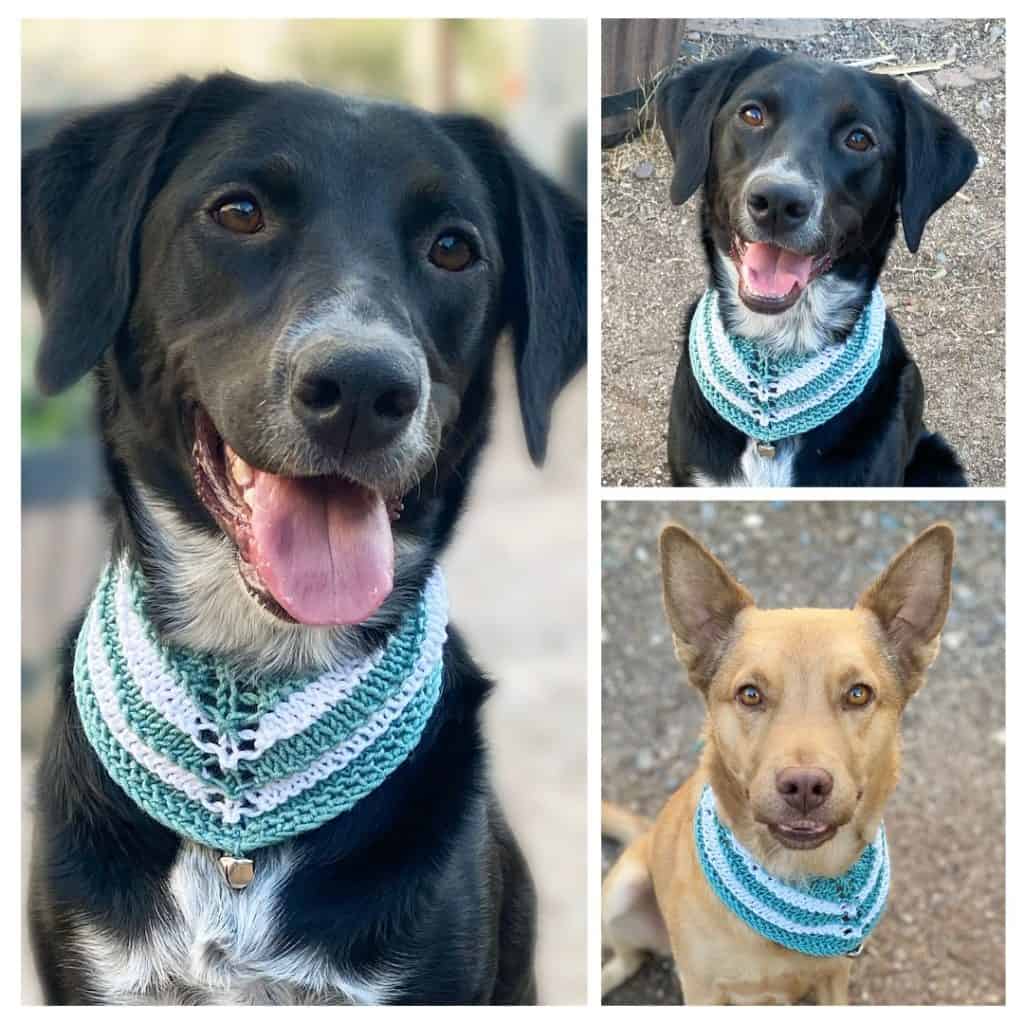
For this photo shoot, she actually chose to cooperate (a little!). Since she’s still a pup, her tendency is to eat the scarf, rather than model it – I was able to bribe her with some treats, making it possible to get a couple pictures of her. And, her big brother Bucket is the model for one of the pictures. 🙂
Here’s a pin for you Pinterest board 🙂
Disclosure: This post contains affiliate links. As an affiliate, when you purchase through my links, you allow the company to pay me a small commission without costing you a penny more, which allows me to continue making free content. The yarn for this pattern was provided to me from King Cole – I am a King Cole Brand Ambassador and this post is part of our ongoing collaboration. Thank you for your support!
About the Simple Snarf Scarf
The Snarf Scarf is triangular in shape and uses very little yarn; therefore it would be a great stash diving project. It uses DK weight yarn with only one color at a time, works up in just a couple hours and is completely customizable to the size of your critter. Bucket and Moxxi are both medium size dogs and the scarf fits them as the pattern is written. However, if you have a very large dog, you just continue repeating until it’s the right size; or, if you have a smaller critter, you can stop the repeats when the size is right.
If you prefer an ad free pdf that includes a larger font and gift tags for gifting, you can click here to purchase off of Ravelryor to add it to your favorites or que – or, if you prefer you purchase through my Etsy store.
About the yarn
The yarn used is from King Cole’s “Cherished Baby Double Knitting” yarn. It’s a dream to work with, is super soft and has approximately 262 yards in each skein. So, you can make lots of snarf scarves with just a couple skeins!
This pattern is an EASY project. Therefore, a beginner could try this out, too. This pattern has been tested – thank you to all my lovely testers!
If you prefer an ad free pdf that includes a larger font and gift tags for gifting, you can click here to purchase off of Ravelryor to add it to your favorites or que – or, if you prefer you can purchase through my Etsy store.
Materials:
King Cole Cherished baby double knitting (100% Low-Pilling Acrylic; 262 yds / 240 m; 100g; #3 / dk weight) yarn in colors: Color A (Laurel): 24 yds / 22 m and Color B (White): 36 yds / 33 m (To find your local store that stocks King Cole yarns, here is the stockist finder link; Or, if you need to shop online, here is LoveCrafts link)
US 7 / 4.5 mm 24” / 60 cm circular knitting needle
1 Stitch marker
1 0.7″ / 18 mm bell (or tassel, if that’s your preference)
Tapestry needle
Scissors
Measuring tape
Measures:
25” x 6” / 63.5 cm x 15.25 cm (To fit critter with 16” – 18” / 40.6 – 45.7 cm neck)
Customizable to fit any critter
Difficulty Level:
Easy
Gauge:
16 sts x 20 rows = 4” / 10 cm in stockinette stitch
Stitches & Abbreviations Used
(Pattern is written in US terms):
C/O: Cast on
K: Knit
K2tog: Knit two stitches together
P: Purl
Pm: Place marker
Rep: Repeat
RS: Right side
Sm: Slip marker
St (s): Stitch (es)
Stretchy bind-off method: K1, k2tog, return those 2 sts back to left needle, repeat until all stitches are bound off
WS: Wrong side
X: Times (example: 2x = 2 times)
Yo: Yarn over
Cable c/o: Cable cast on (Insert right hand needle tip between the two stitches on the left hand needle from front to back, wrap yarn around needle and draw through, leaving the stitch on the right hand needle, draw the yarn out, making a long loop, then place onto the left hand needle and slightly tighten the loop on the needle; repeat these steps for the desired amount of stitches)
Notes:
Do not cut yarn until directed to do so; Instead, carry it up the side of your project
This stitch pattern works up quickly, as there is a 6 stitch increase on the right side of the pattern with every right side row (except for the finishing rows)
Cable cast on method is used for creating the ties of the snarf scarf; But, feel free to use any other cast on method you prefer
To view the tutorial on how to knit the Simple Snarf Scarf, please click on the video link directly above or visit my YouTube channel at: https://youtu.be/PL667cnNhG0
Directions for Simple Snarf Scarf:
To determine the width of the scarf, simply measure your critter’s neck circumference and subtract 2” / 5 cm – that will be the approximate width that you’ll work up to before creating the tie straps
7: (K1, yo) 2x, k to marker, yo, sm, k1, yo, k to last 2 sts, (yo, k1) 2x (21 sts)
8: Knit across (do not cut yarn)
Color B:
9 (RS): As row 7
10 (WS): As row 2
11: As row 7
12: As row 8 (do not cut yarn)
Color A:
13 (RS): As row 7
14 (WS): As row 2
15: As row 7
16: As row 8 (do not cut yarn)
Continue repeating rows 9-16 to desired width of snarf scarf ending with completion of row 11 or 15; cut the yarn that you are no longer working with.
Straps
Using cable cast on method, c/o 20 sts (this creates approximately 4” / 10cm for tying on one side; you may add or subtract in increments of 5 (5 sts = 1” / 2.5 cm) to shorten or lengthen your tie)
Next row (WS): K20 (or however many sts you chose to cast on), k2tog 2x, knit across to last 4 sts removing marker as you come to it, k2tog 2x
Next row (RS): Using cable cast on, c/o 20 sts, knit to the gap that shows where the cast on started, k2tog to close the gap, k across
Bind off on WS using stretchy bind off method
Weave in your ends, secure a bell or tassel to the pointy tip of the scarf.
Give to your critter, take pictures and tag me at #handmadebystacyj and @handmadebystacyj
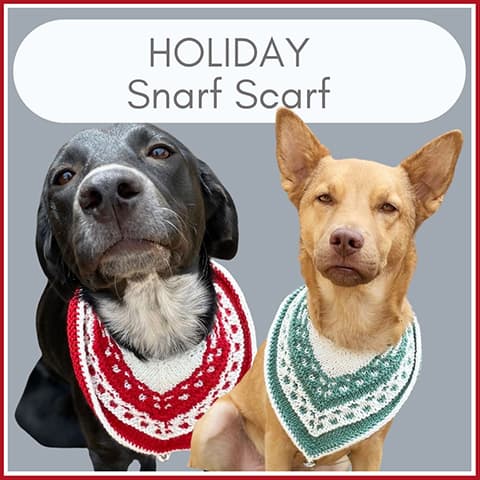
If you’d like another project, check out the original Holiday Snarf Scarf
Wishing you a happy, snarfy kind of day with lots of yarn (and snacks)!
This pattern is copyright 2022 Handmade by Stacy J. Please do not duplicate or copy any portion of this pattern, as well as photographs. You are encouraged to share images of your final product and are allowed to sell final products; If you sell your final product, I just ask that you please purchase the ad-free pdf and credit Handmade by Stacy J as the designer. Thank you!
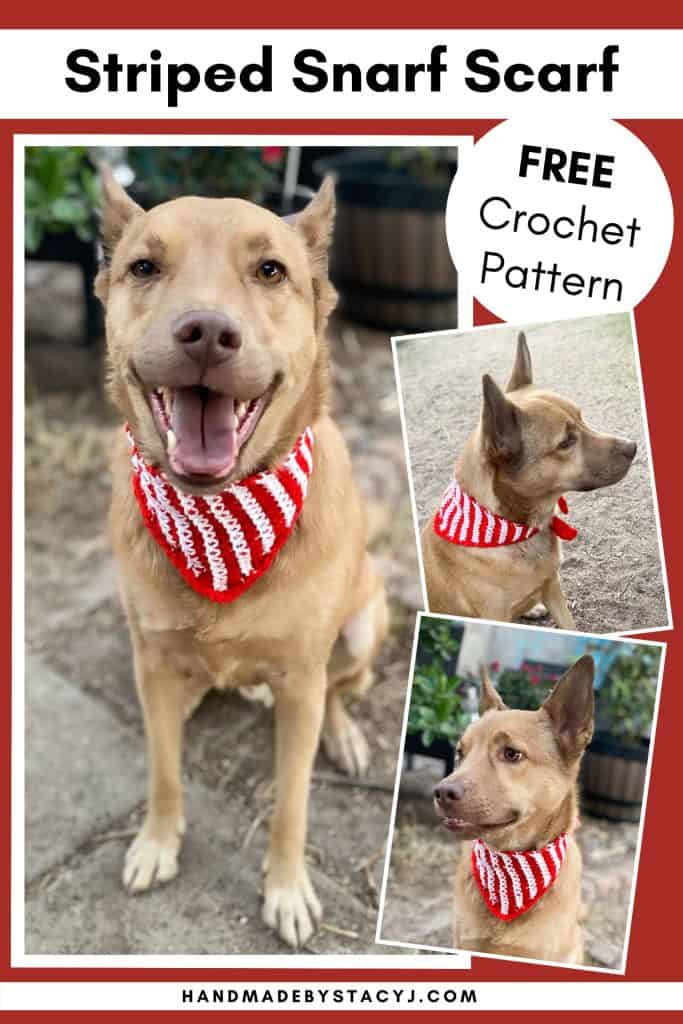
Today I am so excited to share with you the FREE crochet pattern for the Striped Snarf Scarf! This pattern is a crochet version of a knit Snarf Scarf that I designed in 2021.
The Striped Snarf Scarf is a dog scarf that was inspired by our latest addition to our family: Moxxi! We adopted her in 2021 and she makes the funniest sound when she gets a treat. It sounds like a big “SNARF!” Since we hadn’t had a little girl dog for ages, we decided that she needed a little wardrobe – hence, the Snarf Scarf was born!
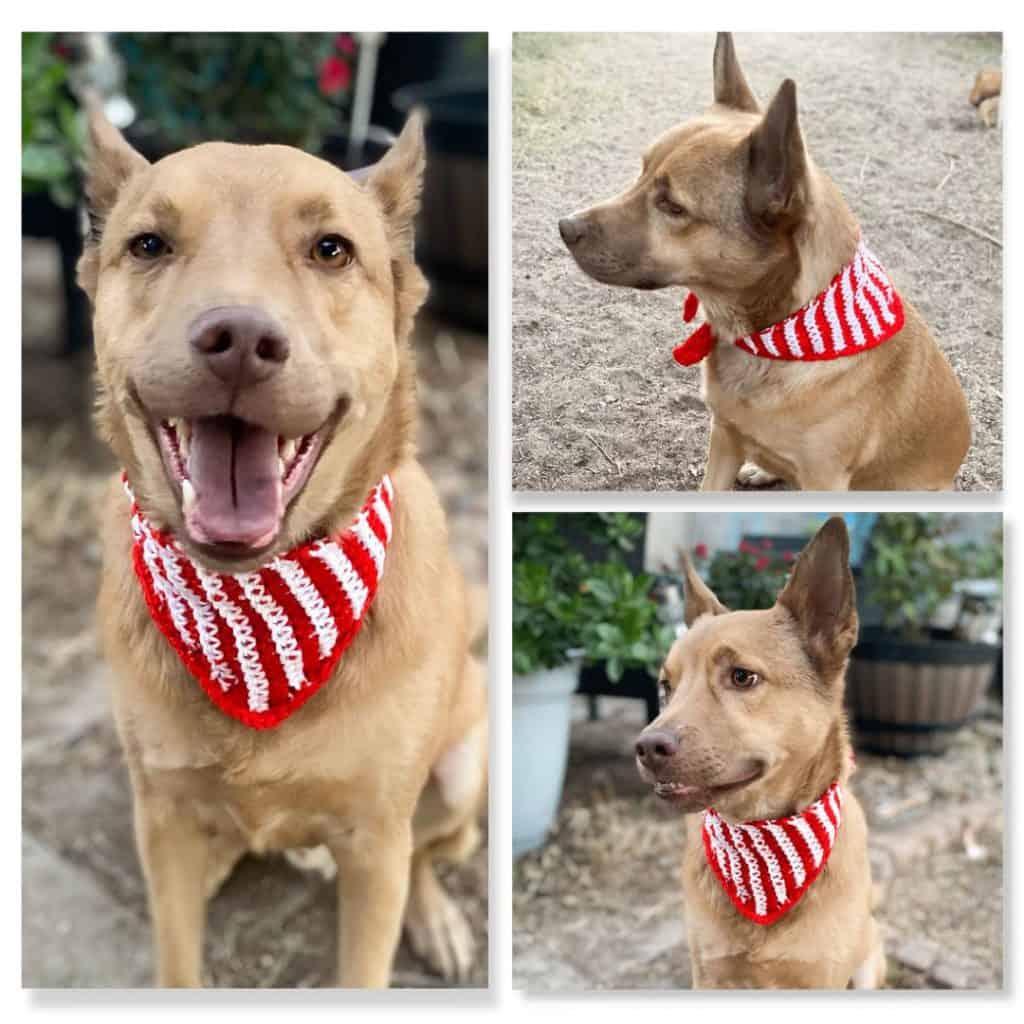
You’ll notice that there aren’t any pictures of her actually wearing the Striped Snarf Scarf, though. Since she’s still a pup, her tendency is to eat the scarf, rather than model it. So, her big brother Bucket is the model for the pictures. 🙂
Disclosure: This post contains affiliate links. As an affiliate, when you purchase through my links, you allow the company to pay me a small commission without costing you a penny more, which allows me to continue making free content. The yarn for this pattern was provided to me from King Cole – I am a King Cole Brand Ambassador and this post is part of our ongoing collaboration. Thank you for your support!
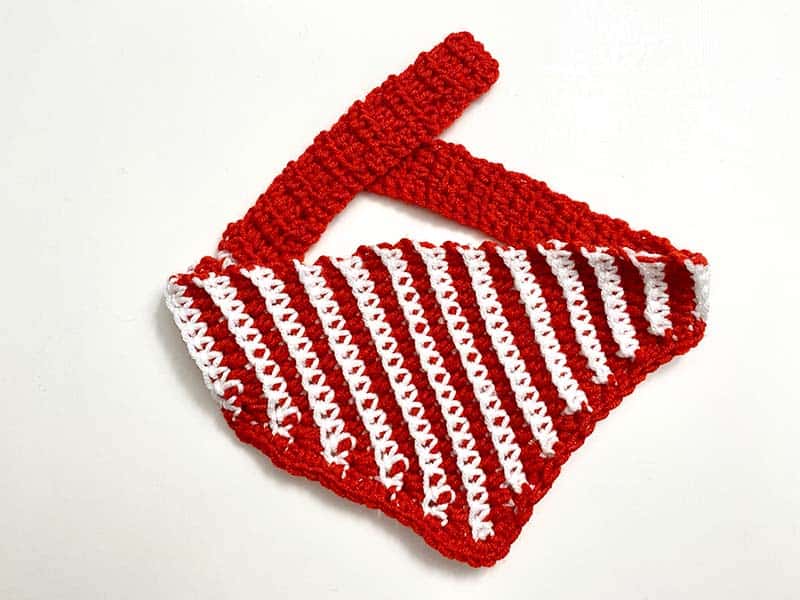
About the Striped Snarf Scarf
The Snarf Scarf is triangular in shape and uses very little yarn; therefore it would be a great stash diving project. It uses DK weight yarn with only one color at a time, works up in just a couple hours and is completely customizable to the size of your critter. Bucket and Moxxi are both medium size dogs and the scarf fits them as the pattern is written. However, if you have a very large dog, you just continue repeating until it’s the right size; or, if you have a smaller critter, you can stop the repeats when the size is right.
If you prefer a printable pdf with a larger font and printable gift tags for gifting, you can grab your ad-free, pdf pattern on Ravelry HEREor at my Etsy shop HERE.
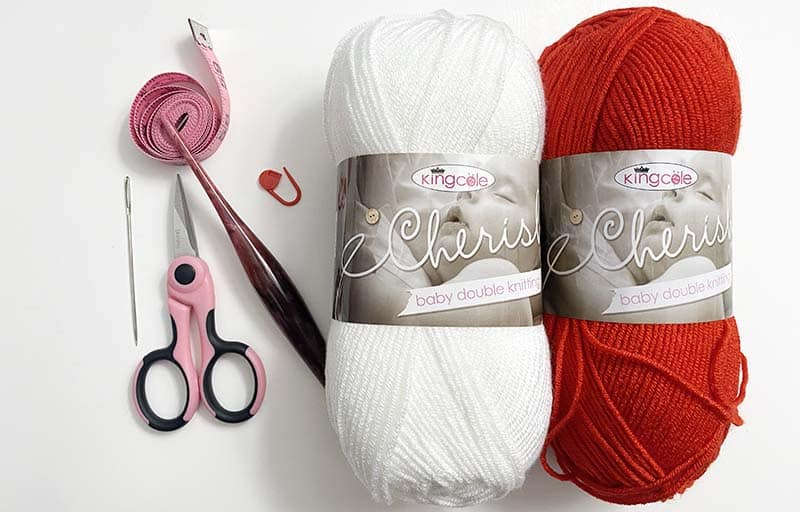
About the yarn
The yarn used is from King Cole’s “Cherished Baby Double Knitting” yarn. It’s a dream to work with, is super soft and has approximately 262 yards in each skein. So, you can make lots of snarf scarves with just a couple skeins!
This pattern is an EASY project. Therefore, a beginner could try this out, too. This pattern has been tested – thank you to all my lovely testers!
You can grab your pattern on Ravelry HEREor at my Etsy shop HERE.
Here’s a pin for you Pinterest board
Materials:
King Cole Cherished baby double knitting (100% Low-Pilling Acrylic; 262 yds / 240 m; 100g; #3 / dk weight) yarn in colors: Main Color (Red): 40 yds / 37 m and Contrast Color (White): 18 yds / 17 m (To find your local store that stocks King Cole yarns, here is the stockist finder link; Or, if you need to shop online, here is LoveCrafts link)
25” x 5” / 64 cm x 13 cm (to fit a critter with a 16” – 18” / 41 cm x 46 cm neck) Directions are written to customize to your own critter
Difficulty Level:
Easy
Gauge:
5 pattern repeats = 4″ or 10 cm (Gauge isn’t critical with this project)
Stitches & Abbreviations Used
(Pattern is written in US terms):
BLO: Back loop only
CC: Contrast color
Ch: Chain
Ea: Each
Hdc: Half double crochet
Hdc2tog: Half double crochet 2 together
MC: Main color
Rep: Repeat
RS: Right side
Sc: Single crochet
Sc2tog: Single crochet 2 together
St (s): Stitch (es)
Tch: Turning chain
WS: Wrong side
Notes:
Ch 1 and ch 2 at the beginning of rows do not count as a stitch
When beginning the body of the scarf, use a lockable stitch marker to mark the right side of your work
Do not cut yarn; instead the yarn will be carried facing the WS with each row worked; when completing a row, give the carried yarn a small tug, but be careful not to pull too tight
When working the body of the scarf, each RS row will have an even number of stitches and each WS row will have an odd number of stitches
The tie straps are written to measure 6” / 15 cm on each side, but feel free to add or subtract length as needed for your critter
To view the tutorial on how to crochet the Striped Snarf Scarf, please click on the video link directly above or visit my YouTube channel at: https://youtu.be/PL667cnNhG0
Directions for Striped Snarf Scarf:
Before beginning the project, measure your critter’s neck and then subtract 3” / 7.6 cm (this will be the size of the body of the scarf). Then divide that number by 2 (that will be the halfway measurement for the body of the scarf).
First tie strap:
With MC, ch 4
Row 1: In third ch from hook, work 1 hdc and in next ch; ch 2, turn
Row 2: 1 hdc in first st, 1 hdc in next st and 1 hdc in top of tch; ch 2, turn (3 hdc)
Row 3: 1 hdc in first st and in ea st across (do not work tch); ch 2, turn (3 hdc)
Rep row 3 until piece measures approximately 6” / 15 cm or your desired length
Body of scarf:
Increase rows (Each row increases by one stitch)
Row 1 (RS) MC: 1 hdc in BLO in ea st across, 2 hdc in BLO of last st
Row 2 (WS) CC: ch 1, turn; 2 sc in first st and 1 sc in ea st across
Row 3 MC: Ch 2, turn; 1 hdc in BLO in ea st across, 2 hdc in BLO of last st
Rep rows 2-3 until the piece measures 6” / 15 cm or to the halfway point of your body of scarf measurement ending with completion of WS row
Decrease rows (Each row decreases by one stitch)
Row 1 (RS) MC: Ch 2, turn; 1 hdc in BLO in first st and in ea st across to last 3 sts, 1 hdc2tog in BLO, 1 hdc in BLO
Row 2 (WS) CC: Ch 1, turn; 1 sc in first st, 1 sc2tog, 1 sc in ea st across
Rep rows 1-2 until 5 sts remain; cut CC
Rep row 1 once more
Next row (WS): Ch 1, turn; 1 sc in first st, 1 sc2tog, 1 sc in next st; ch 2, turn (3 sc)
Second tie strap:
Rep row 3 of First tie strap until piece measures 6” / 15 cm or your desired length ending with completion of RS row, do not turn
Border:
For this section of the pattern you will be working on the RS down the tie strap and the bottom of the scarf
Ch 1, evenly work sc down to the “point” of the triangular bottom of the scarf
At the “point” work 3 sc in the same st
Continue evenly working sc up to the end of the bottom section (where the beginning ch and 3 hdc are located)
Ch 1, work 1 sc in ea of the 3 beginning sts; fasten off and weave in ends.
Give to your critter, take pictures and tag me at #handmadebystacyj and @handmadebystacyj
If you like to knit, check out the original Holiday Snarf Scarf
Wishing you a happy, snarfy kind of day with lots of yarn (and snacks)!
This pattern is copyright 2022 Handmade by Stacy J. Please do not duplicate or copy any portion of this pattern, as well as photographs. You are encouraged to share images of your final product and are allowed to sell final products; If you sell your final product, I just ask that you please purchase the ad-free pdf and credit Handmade by Stacy J as the designer. Thank you!
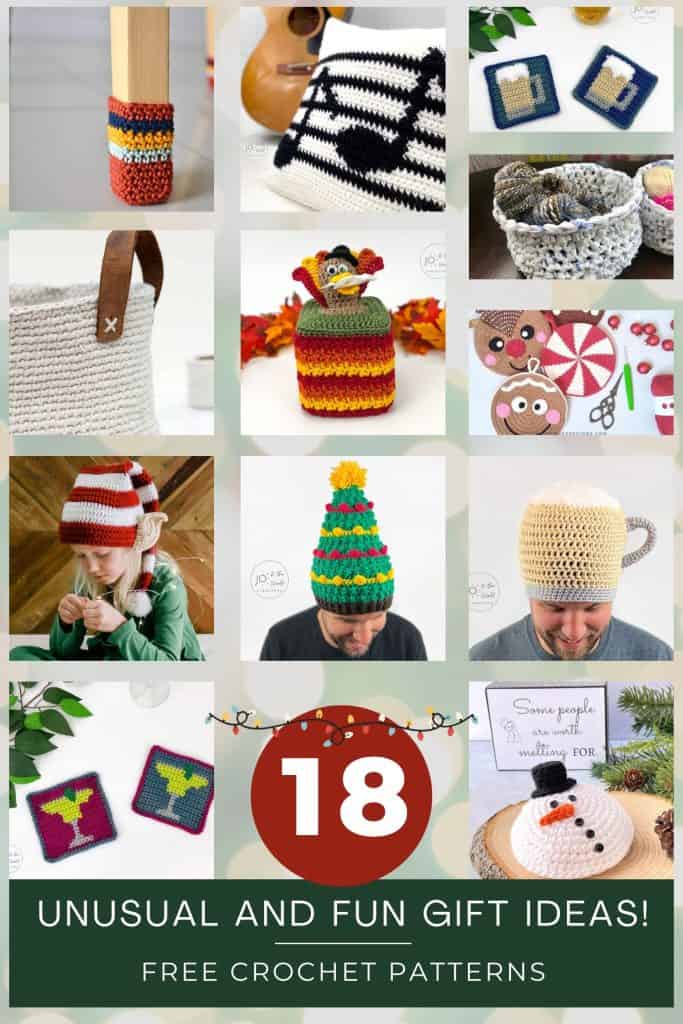
Unusual and fun crochet pattern ideas are what this post is all about. If you’re looking for unique gifts, this is definitely the right place to visit. Instead of the regular gifts, I thought I’d have some fun this year. So, I asked a bunch of my designer friends to show me their favorite unusual and fun crochet patterns. And, wow! Did they ever deliver!!
In this pattern round up you’ll find a bunch of really fun ideas! And, did I mention that they’re FREE crochet patterns?
From hats with elf ears, to a beer hat, to melted snowmen, baskets made with Dollar Store twine, to earbud holders and chair socks (yes, you heard me right…chair socks!) – there’s some really fun patterns to choose from. These will make great gifts and stocking stuffers. Which pattern (or patterns) will you make? There are 18 to pick from and I can think of a recipient for each pattern included – there will be a few on this list that will be for next year’s makes, too!
Here’s a pin for you. Pinterest board 🙂
While you’re on the designer’s web pages, feel free to look around and check out more of their patterns. It’s so much fun to look on their pages and see all of their creative ideas. You may even find more to add to your list of things to make for the upcoming year!
Let’s check out the unusual and fun crochet patterns!
What is cuter than a crochet elf hat pattern? A crochet elf hat pattern with little pointy ears, of course! Make and Do crochet has really knocked it out of the park with this adorable pattern! Wouldn't these just be adorable for your family photos?
If you are searching for a crochet Christmas Tree Hat, this is the perfect pattern from Jo to the World Creations! With easy to follow instructions, you can make this hat for toddlers, kids and adults this holiday season. This crochet pattern includes step by step directions and photos!
The Crochet Chair Socks are from Hortense with Knitting with Chopsticks. This is such a briliant and fun pattern! These chair socks will protect your floors, silence your chairs, and the best part– they’re easy to clean! This fun crochet pattern is super easy and only uses a small amount of yarn, so it’s perfect for using up your existing stash!
This crochet turkey is from Jo to the World Creations. It sits on top of a square tissue box, making it a wonderful Thanksgiving tissue box cover with bright, beautiful fall colors and a lovely textured (and easy) stitch and this cute little guy has a top hat!
If you want to make your kitchen decor ready for the Holidays, then, you’ll really need to check out the free pattern for these Round Christmas Potholders from Raffamusa Designs! These double-thick hot pads are perfect to crochet for yourself or as a fun Christmas present for a family member or a friend.
This free crochet basket pattern from Make and Do Crew is exceptionally easy to make and uses inexpensive twine and leather to create a primitive, yet sophisticated home decor piece. This would be a wonderful piece for organizing all the kiddo's small toys or storing towels (or yarn!).
You can make a crochet basket with plastic bags! This project is as environmentally-friendly as it gets! In this pattern from Banana Moon Studio, April shares with you how to make your own round baskets out of plastic bags!
This cute melted snowman amigurumi from Golden Lucy Crafts would be a fun addition to your Christmas décor. It will look great on a tiered tray, on the coffee table, bookshelf, or fireplace. It can also be used as a pincushion. This crochet Melted Snowman is about 4” in diameter and 2-1/2” tall including the hat.
This amazing pattern is from Jo to the World Creations. Here's what she has to say about it, "Ready to “jazz” up your home decor or make a gift for the music lover in your life? Here’s a “key” crochet pattern that you’ll want to take “note” of! This Music Notes Pillow Cover free crochet pattern makes an awesome crochet gift for men, women, friends, family and definitely a music / piano teacher. The cushion / throw cover goes over a 18” x 18” pillow, is super soft, removable and washable. It’ll be a “major” hit!"
This is a super cute pattern from Raffamusa Designs. It's rainy on one side, sunny on the other side. It's worked in the round and would be a perfect gift for a little one in your life!
This is such a cute pattern from Jennifer at A Crocheted Simplicity. This is designed to be an earbud holder. But, if you don't use earbuds, that's perfectly okay! This small project is perfect for holding many things such as chapstick, scent sachets for the car, chargers, fidget spinners, and more!
This Cabled Ice Cream Cozy – FREE Crochet Drink Mitt pattern is from Jennifer at A Crocheted Simplicity. It's a free pattern that uses crocheted cables!
If you are searching for a great crochet gift idea for Father’s Day or a crochet Christmas gift for a man in your life – or for any beer drinker, crochet them this very unique hat that is sure to bring good cheer(s)! This free pattern from Jo to the World Creations will definitely make a fantastic and unique gift!
This Knit-Look crochet can cozy pattern from Made by Gootie will make the perfect gift for your beer lover friends, for your partner, or for people who love cool beverages! There is even a version for beer bottle cozies!
These crochet beer coasters from Jo to the World Creations are a quick and easy crochet gift idea for men or any beer drinker in your life. It's a great scrap-busting project as you only need a small amount of yarn. The free pattern includes step by step instructions and a chart.
These crochet wine coasters from Jo to the World Creations are a quick and easy crochet gift idea for any wine lovers in your life. It's a great scrap-busting project as you only need a small amount of yarn. These wine coasters make a wine-derful gift for the wine drinker in your life. Or make them for your own home for when it's wine o'clock!
These Margarita crochet coasters from Jo to the World Creations would be great for the Margarita lover in your life! The free crochet coaster pattern includes written instructions and a chart so you can make these coasters easily and quickly!
Here's a free crochet pattern for Martini coasters from Jo to the World Creations that is quick, easy and fun to make - whether you like them shaken or stirred. If you are looking for a great square crochet coaster pattern or a unique gift idea for a Martini drinker, these would be a great gift!
I hope you enjoyed this round up to find your favorite unusual and fun crochet pattern! These are such amazing, fun and unique gift ideas. I’d love to know which one (or ones!) you choose to make. I’ll definitely be making at least 2 of the included designs, but probably more like 4 or 5!
The Tiny Gems Baby Blanket is a free knitting pattern that was inspired by a dishcloth that I designed in 2020. It uses the Seersucker or Padded Diamonds stitch that adds a beautiful texture. It’s framed on the inside with a stockinette panel and the outside is worked with garter stitch. It’s all worked in one piece, so the borders are worked at the same time as the body of the blanket.
If you’d like to check out the free knitting pattern for the dishcloth that inspired this blanket, here’s the link.
About the yarn
As I was picking out the colors, the King Cole “Little Treasures Double Knitting” yarn in the color “Jem” really called out to me. It has hints of greens, yellows, cream and a touch of pinks / purples. It’s a fairly neutral color for babies and is oh-so-soft. It works up like a dream and there were very few knots. I used just under 4 skeins for this project.
The blanket uses size US 8 / 5 mm knitting needles and works over an 8 row repeat.
Disclosure: The Tiny Gems Blanket post contains affiliate links. As an affiliate, when you purchase through my links, you allow the company to pay me a small commission without costing you a penny more, which allows me to continue making free content. The yarn for this pattern was provided to me from King Cole – I am a King Cole Brand Ambassador and this post is part of our ongoing collaboration. Thank you for your support!
About the blanket
The Tiny Gems Baby Blanket works over an 8 row repeat and the stitches are worked in increments of 4. Therefore, you can adjust the size as you like. One of my testers even turned the blanket into a doll blanket for one of her granddaughters! The framing is worked as you work the blanket, so there’s no picking up stitches or adding to the blanket once the body is completed.
The blanket is sized for a 42″ x 42″ and the terms are written using US terminology. I’ve created a video to help with your blanket
If you prefer and ad free pdf that includes a chart, checklist, larger font and gift tags for gifting your blanket, you can click here to purchase off of Ravelry (or add it to your favorites or que), or you can purchase through my Etsy store.
Here’s a pin to add to your Pinterest board 🙂
Materials needed:
King Cole Little Treasures Double Knitting (60% Anti-Pilling Acrylic, 40% Polyamide; 3.5 oz / 100g; 349 yd / 320 m) – 1200 yds / 1097 m in color #4780 / Jem (To find your local King Cole stockist click HERE or visit LoveCrafts to purchase online)
Gauge: 16 sts x 24 rows = 4” x 4” / 10 cm x 10 cm in stockinette stitch
Pattern Difficulty level: Easy
If you prefer and ad free pdf that includes a chart, checklist, larger font and gift tags for gifting your blanket, you can click here to purchase off of Ravelry (or add it to your favorites or que), or you can purchase through my Etsy store.
Stitches & Terms Used
(Pattern is written in US terms):
Bind off
Garter Stitch: Knit each row
K: Knit
Long Tail cast on
P: Purl
Pm: Place marker
Rep: Repeat
Rm: Remove marker
Rs: Right side
Sm: Stitch marker
St (s): Stitch (es)
WS: Wrong side
Notes:
To make blanket larger or smaller, add or subtract in increments of 4
Some of my testers needed to do 3 more repeats of the body to meet the measurement
Work garter st for 26 rows and remove markers as you come to them.
Bind off loosely, knit wise
Weave in any ends, then block and enjoy.
When you’re all done, please take pictures and tag me on social media @handmadebystacyj or #handmadebystacyj so that I can see your beautiful blanket 🙂
This free knitting pattern is copyright 2022 Handmade by Stacy J. Please do not duplicate or copy any portion of this pattern, as well as photographs. You are encouraged to share images of your final product and are allowed to sell final products; I just ask that if you sell your final product, please purchase the ad-free pdf, provide your own photographs and that you please credit Handmade by Stacy J as the designer. Thank you for your support!
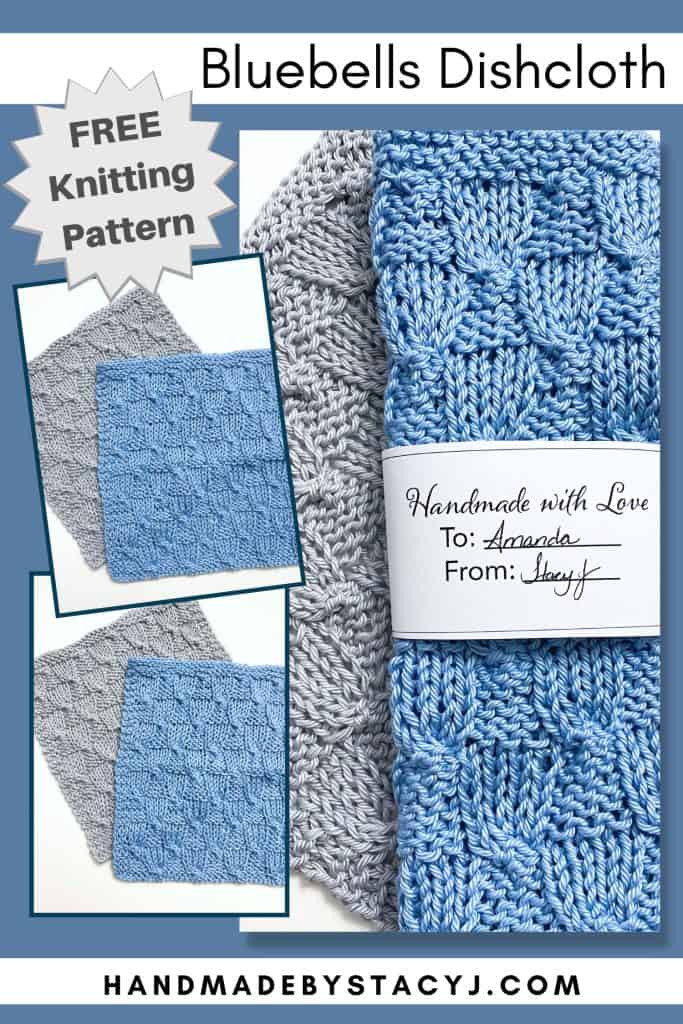
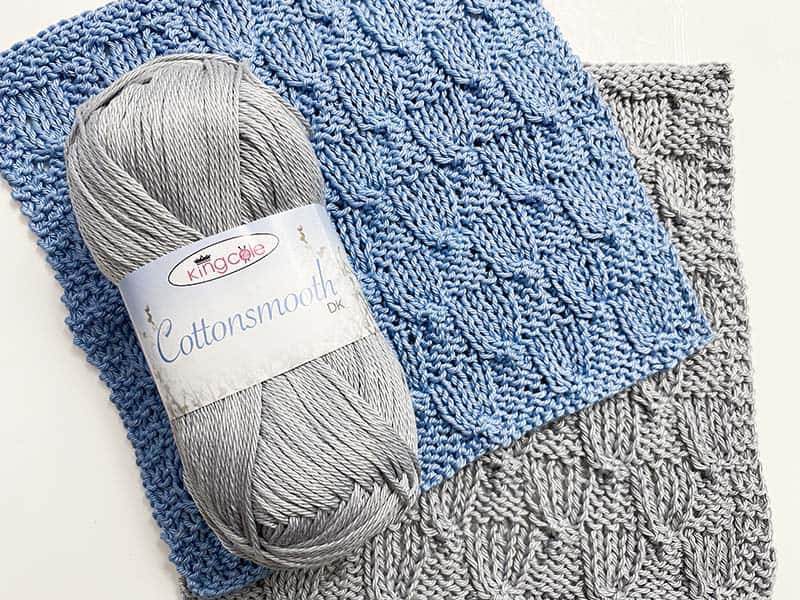
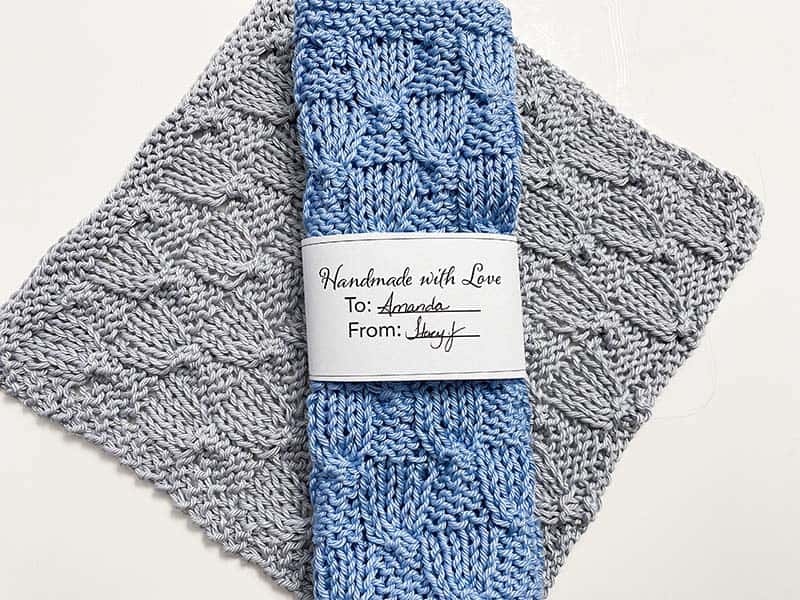
The Bluebells Dishcloth is a very quick and easy knit that has a wonderful stitch detail. If you haven’t knit cables before, this is a great way to get introduced to them. It uses only one cable stitch and the rest of the stitches are simple knit and purl. The yarn used in this project is the King Cole Cottonsmooth DK. It’s 100% Mercerized Cotton and is oh-so-amazing to work with! It’s a dk weight, so it doesn’t make a bulky dishcloth, making it easy to get into those delicate dishes.
Disclosure: This post contains affiliate links. That means that I may receive compensation when you purchase through my links at no additional cost to you. I am a King Cole Brand Ambassador and this post is part of our ongoing collaboration.
I named this pattern the Bluebells Dishcloth because the stitch reminds me of Bluebell flowers. The stitch pattern was found in a Japanese knitting book and it didn’t have a name to it, so that’s what I came up with. I do hope you enjoy working on this dishcloth as much as I enjoyed designing it.
Here’s a pin for your Pinterest board 🙂
Measures:
8.5” x 8.5” / 21.6 cm x 21.6 cm
Gauge:
12 rows of pattern = 2” / 5 cm
Materials needed:
King Cole Cottonsmooth DK (100% mercerised cotton; 218 yds / 200 m; 100g; dk / #3 weight) yarn in color “Pale Blue” or “Silver” – 65 yds / 59.5 m (To find your local stockist, click HERE; or you can purchase online through this affiliate link)
US size 3 / 3.25 mm knitting needles
Cable needle
Tapestry needle
Scissors
Lockable stitch marker (optional)
Stitches and abbreviations used:
Pattern is written in US terms
Bind off
Cast on
C4F: Cable 4 front – Slip 2 stitches purlwise from left needle to cable needle, hold at front of work, knit next 2 stitches on left needle, then knit 2 stitches from cable needle
K: Knit
P: Purl
Rep: Repeat
RS: Right side
St (s): Stitch (es)
WS: Wrong side
Directions for Bluebells Dishcloth
Using long tail cast on method or preferred method, cast on 46
Rows 1 – 4: Knit
Row 5 (RS): K3, *c4f, p4; rep * to last 3 sts, k3
Row 6: K3, *k4, p4; rep * to last 3 sts, k3
Rows 7 – 10: As row 6
Row 11: K3, *p4, c4f; rep * to last 3 sts, k3
Row 12: K3, *p4, k4; rep * to last 3 sts, k3
Rows 13 – 16: As row 12
Repeat rows 5-16 three more times (or to desired length)
Repeat row 5 once more
Knit 3 rows
Bind off knitwise
If you enjoyed this dishcloth, here a few more that are available for free to view on the website 🙂
This pattern is copyright 2023 Handmade by Stacy J. Please do not duplicate or copy any portion of this pattern, as well as photographs. You are encouraged to share images of your final product and are allowed to sell final products; I just ask that if you sell your final product, please purchase the ad-free pdf, provide your own photographs and that you please credit Handmade by Stacy J as the designer. Thank you for your support!
Please enjoy these printable dishcloth wrappers that I’ve designed for you. These are perfect if you’re gifting a dishcloth or selling them at craft fairs to add that nice, finishing touch.
The wrappers work wonderfully for any of the washcloth patterns that I’ve designed or you can turn any of my “Square Block” patterns into a dishcloth by using your choice of cotton yarn. A list of available patterns is below:
Feel free to print out the pdf below and then use them for your makes. To use these wrappers, simply download the link below, print the pdf, then cut out the one you like, wrap it around a dishcloth and use tape to secure the back.
These wrapper designs are copyright 2022 Handmade by Stacy J. Please do not duplicate or copy any portion of this design, as well as photographs. You are encouraged to share images of your final product and are allowed to sell final products. Thank you!
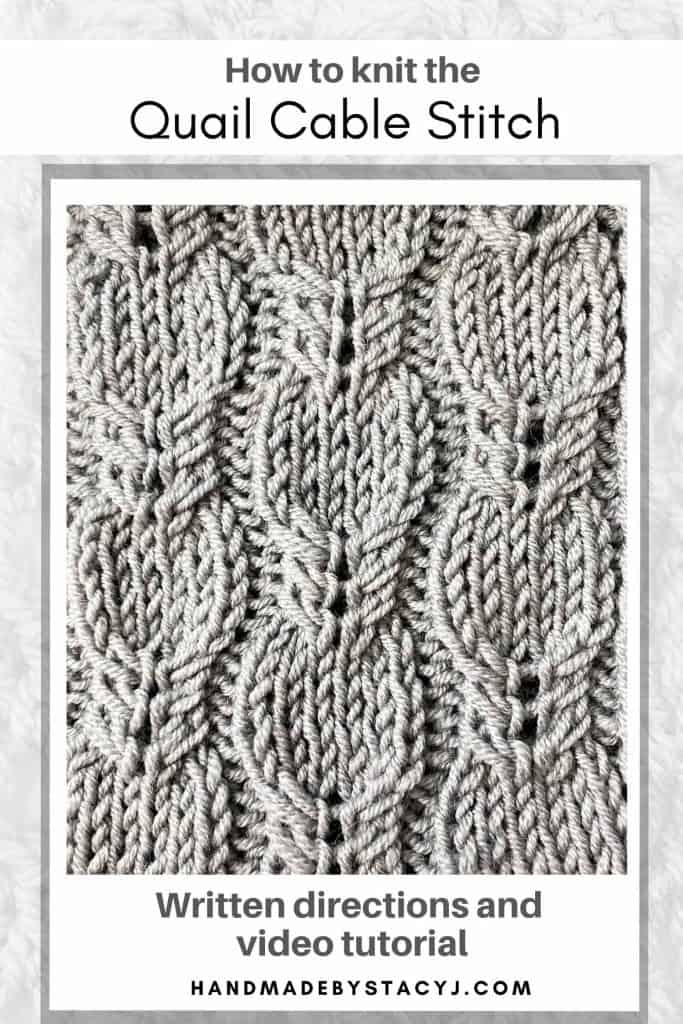
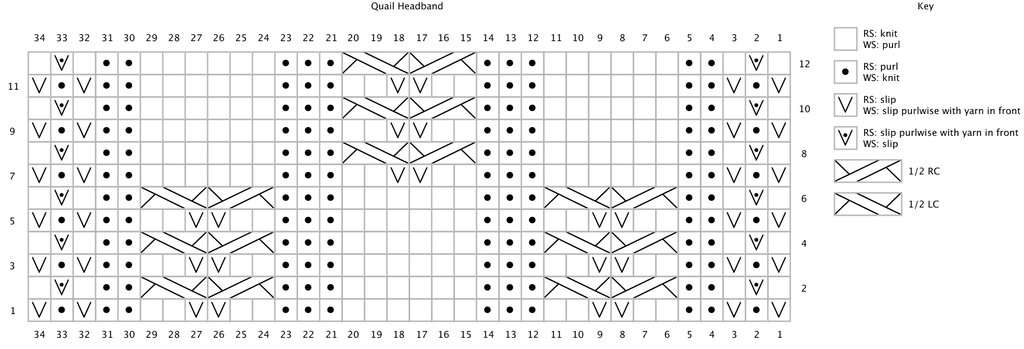
The Quail Cable Stitch is an interesting cable fabric. It can be used for all-over pattern knitting, or as a fun detail to add to a project. It works in multiples of 18+3 over a 12 row repeat. Below are the written directions, a chart and a video for your reference. The video walks you through how to use the Quail Cable stitch while making a head band / ear warmer. To see the free pattern for that project, click HERE.
Below there is a video that shows how to make the ear warmer, but it also shows to make the cable stitch. There are time stamps, as well, to help you along.
Disclosure: This post contains affiliate links. That means that I may receive compensation when you purchase through my links at no additional cost to you. I am a King Cole Brand Ambassador and this post is part of our ongoing collaboration.
Stitches and abbreviations used:
K: Knit. P: Purl. Sl wyif: Slip 1 stitch purlwise with yarn in front. 1/2 LC : Slip next stitch to cable needle purlwise and place at front of work, k2, then k1 from cable needle. 1/2 RC : Slip next 2 stitches to cable needle purlwise and place at back of work, k1, then k2 from cable needle.
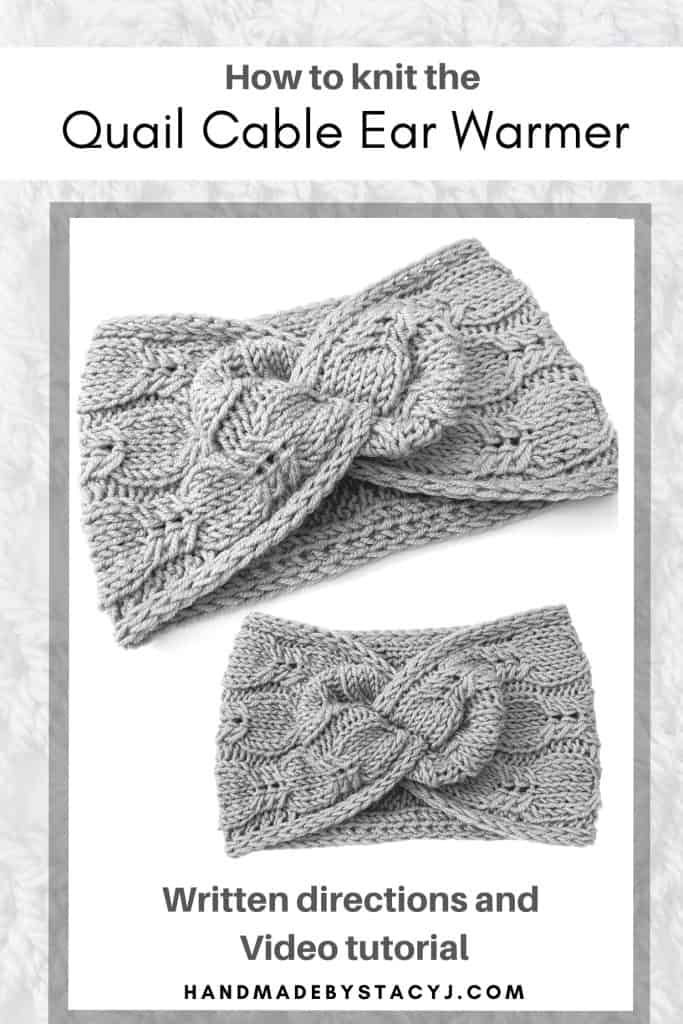
The Quail Cable Ear Warmer / Headband is a beautiful accessory to add to your cooler weather wardrobe. It’s large enough to cover your ears comfortably, but also has a wonderful stitch detail. The yarn used in this example is the King Cole Luxury Merino DK. It’s 100% Merino Superwash wool and is oh-so-amazing! It’s so soft, warm and lovely to work with.
The name “Quail” came from a knitting stitch book that I picked up. I’ve seen the stitch name referred to also as the “Folded Cable”, however that one was a little different of a stitch than this one is. But, I just love this stitch so much that it really called out to me to be an amazingly cozy ear warmer.
Disclosure: This post contains affiliate links. That means that I may receive compensation when you purchase through my links at no additional cost to you. I am a King Cole Brand Ambassador and this post is part of our ongoing collaboration.
Here’s a pin for your Pinterest board 🙂
Measures:
5.5″ / 14 cm tall x 20″ / 51 cm circumference
Gauge:
2 pattern repeats = 4″ / 10 cm
Materials needed:
King Cole Luxury Merino dk (100% Merino Superwash; 153 yds / 140 m; 50g, dk / #3 weight yarn) – 100 yds / 92 m in color Pewter
US size 6 / 4 mm knitting needles
Cable needle
Sharp tapestry needle
Scissors
Stitches and abbreviations used:
K: Knit. P: Purl. Sl wyif: Slip 1 stitch purlwise with yarn in front. 1/2 LC : Slip next stitch to cable needle purlwise and place at front of work, k2, then k1 from cable needle. 1/2 RC : Slip next 2 stitches to cable needle purlwise and place at back of work, k1, then k2 from cable needle.
Directions for Quail Cable Ear Warmer / Headband
Before beginning the ear warmer / headband, measure the circumference of the head that it’s intended for and subtract 2″ / 5 cm – that will allow the headband to fit snug. This pattern is written to fit an Adult Medium size.
Repeat rows 1-12 until piece measures 20″ / 50 cm or to desired length
Bind off in pattern leaving a 36″ / 1 m tail for sewing
I highly recommend blocking your piece prior to sewing so that the cable pattern will really show up. Be sure not to block it to be longer than the length that you want your ear warmer to be.
Today I’m coming to you with a yarn review for King Cole Safari Chunky yarn. I’ve recently worked with this yarn to create the“Southwest Sunset” knit blanket and I’ve absolutely fallen in love with yarn. So, I’d like to share the details and my experience with you.
If you prefer to watch the video of the Safari Chunky yarn review, please click HERE
Disclosure: I am a King Cole Brand Ambassador and this post is part of our ongoing collaboration.
Here are the details for the King Cole Safari Chunky Yarn
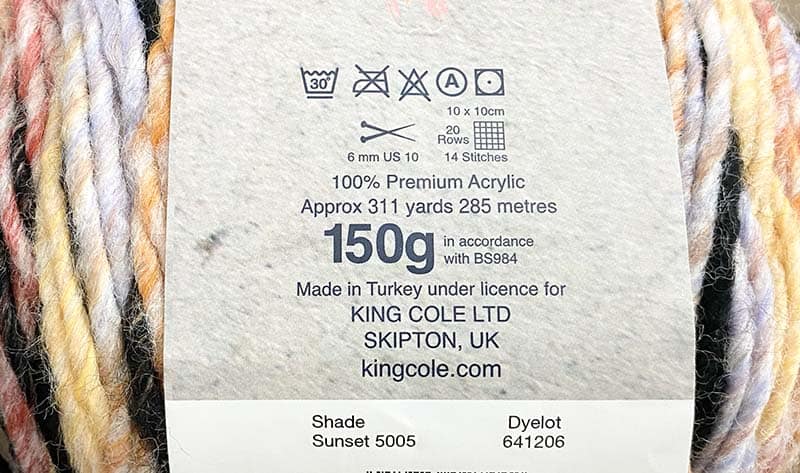
100% Premium Acrylic
Approximately 311 yds / 285 metres
150g
8 color shades are available (as of this writing in October 2022)
Machine washable on the gentle cycle at 86 degrees Fahrenheit / 30 degrees Celcius
Tumble dry on low heat
Dry clean with any solvent
Do not iron or use bleach
I designed the“Southwest Sunset” knit blanket using the Safari Chunky yarn in September of this year and this yarn was a dream to knit with. One of the great things about this yarn is that I never came across any knots…not a single one… in 5 balls of yarn!
The yarn didn’t split and the color changes make a longer term project more fun. Although I typically don’t knit using the color Black, the black sections in the yarn are small enough that they’re actually fun to work with! They’re a beautiful, rich, deep black color and they add such a fun design element.
This yarn is perfect for a project that is simple and when you want the yarn to really shine. That’s why it called out to me for the “Southwest Sunset” blanket. It’s an interesting and beautiful yarn that just calls out to be the star of the show.
While working with the Safari Chunky, I was thrilled with how soft it is. But, then I washed it. And, oh-my-goodness! Washing it brought out a whole new level of softness! It’s so squishy, warm and cuddly! It made my throw one of the softest blankets I’ve ever made. Typically I gift any blankets that I make. But, because of this yarn, I’m keeping this one!
Would I recommend?
YES! Absolutely YES! Not only is it a joy to work with, it’s easy to care for and there’s so much yardage in a ball. That’s a huge win-win!
If you’d like to get your hands on some King Cole “Safari Chunky” yarn for yourself, here’s the link to find your local stockist.
I know you’ll enjoy working with this yarn and I can’t wait to see what you create with it! Will it be a blanket? A hat? A scarf? Please tag me so I can see your makes.
The 4 Day Throw was inspired by a knit stitch that I modified for a collaboration project with another designer. She directed her followers to my YouTube channel and had them pick out a stitch for her upcoming design. Well, they all picked a knit stitch. My fellow designer is not a knitter, so I adapted the stitch to slightly resemble the stitch chosen. Hence, the Leafy Lace Stitch was born!
As I created the stitch, it really called out to me to be a blanket. So, I gathered some yarn and gave it a shot. Although I loved the first version, it needed some adjustments. So, I made it again and had it tested. The testers did an amazing job and also gave me feedback that required going back to the drawing board. I reworked and rewrote the pattern, had it tested once more and here we have it!
I named it the “4 Day Throw” because I was able to make each version In just under 4 days. However, I did work on each blanket for about 8-10 hours each day. Your timing may vary depending on your skill level and the time that you have to dedicate to your project.
My testers rated the 4 Day Throw for an Intermediate to Advanced level crocheter. They did warn that this is not a project with which you can lose yourself in a television program or podcast. This project does require some concentration. However, the end result is worth it!
It’s sized for a 48″ x 58″ throw and the terms are written in US terminology. There’s a full length video tutorial (with time stamps) to help throughout the entire throw.
Also, THANK YOU to all of my wonderful testers! I couldn’t have done this pattern without you! And a big THANK YOU to Mary Maxim for providing the yarn for this gorgeous blanket!
If you prefer and ad free pdf that includes a chart, checklist, larger font and gift tags for gifting you blanket, you click here to purchase off of Ravelry (or add it to your favorites or que), or you can purchase from my Etsy store.
Materials:
This pattern contains affiliate links. That means that I may receive compensation when you purchase through my links at no additional cost to you.
Stitches & Terms Used (Pattern is written in US terms):
BPTR: Back Post Treble Crochet – Yo 2 times, insert hook back to front around indicated stitch, draw up a loop (4 loops on hook), [yo, draw through 2] three times
BPTR3tog: Back Post Treble 3 Together – Yo 2 times, insert hook back to front around first stitch, draw up a loop, [yo, draw through 2] two times (2 loops on hook), yo 2 times, insert hook back to front around next stitch, draw up a loop, [yo, draw through 2] two times (3 loops on hook), yo 2 times, insert hook back to front around next stitch, draw up a loop [yo, draw through 2] two times (4 loops on hook), yo, draw through remaining 4 loops
Ch: Chain
Dc: Double Crochet
Dc2tog: Double Crochet 2 Together – Yo, insert hook into next st, yo and draw up a loop, yo and draw through 2 (leaving 2 loops on hook), yo, insert hook into next stitch, yo and draw up a loop, yo and draw through 2 (3 loops remaining on hook), yo and then draw through all 3 loops on hook
Ea: Each
Fdc: Foundation Double Crochet – Ch 3; Yo, insert hook in 3rd chain from hook, yarn over and pull up loop (3 loops on hook); Yo and draw through 1 loop (1 chain made); [Yo and draw through 2 loops] 2x (1 Fdc with ch at bottom); *Yo, insert hook under the 2 loops of the chain at the bottom of the stitch just made, yo and pull up loop (3 loops on hook), yo and draw through 1 loop (1 chain made), (yo and draw through 2 loops) 2 times; rep *
FPTR3tog: Front Post Treble 3 Together – Yo 2 times, insert hook front to back around first stitch, draw up a loop, [yo, draw through 2] two times (2 loops on hook), yo 2 times, insert hook front to back around next stitch, draw up a loop, [yo, draw through 2] two times (3 loops on hook), yo 2 times, insert hook front to back around next stitch, draw up a loop [yo, draw through 2] two times (4 loops on hook), yo, draw through remaining 4 loops
FPTR: Front Post Treble Crochet – Yo 2 times, insert hook front to back around indicated stitch, draw up a loop (4 loops on hook), [yo, draw through 2] three times
modBPTR: Modified Back Post Treble Crochet – Yo 2 times, insert hook back to front around post that faces RS of indicated stitch, draw up a loop (4 loops on hook), [yo, draw through 2] twice (2 loops on hook), yo, insert hook in stitch behind post just worked, draw up a loop (4 loops on hook), yo, draw through 2, yo, draw through remaining 3 loops
modFPTR: Modified Front Post Treble Crochet – Yo 2 times, insert hook front to back around post that faces RS of indicated stitch, draw up a loop (4 loops on hook), [yo, draw through 2] twice (2 loops on hook), yo, insert hook in stitch behind post just worked, draw up a loop (4 loops on hook), yo, draw through 2, yo, draw through remaining 3 loops
Rep: Repeat
RS: Right Side
Sk: Skip
Sp: Space
St(s): Stitch (es)
Tch: Turning Chain
WS: Wrong Side
X: Times (Example: 5x = 5 times)
Yo: Yarn over
Gauge Swatch
The gauge swatch pattern is used to confirm that you are working with the same tension as I do. This helps in determining the amount of yarn needed. If your gauge swatch turns out larger, go down a hook size. If your swatch measures smaller, then go up a hook size.
The gauge swatch pattern has a slightly different border than the blanket does. However, it’s a great way for you to gain understanding of how the leaves are formed. You’ll get comfortable with the placement of your stitches, as well as understand the modified front and back post treble crochet stitches.
To see a video tutorial that walks you through the gauge swatch, please click the image below or click HERE; you can also visit the crochet stitchespage, if you prefer.
Gauge Swatch Pattern
Measures: 6” x 5” / 15.24 cm x 12.7 cm
Note (For Gauge Swatch only): Ch-3 at beg of row counts as first dc
Using J / 6 mm crochet hook, work 19 Foundation dc and skip to step 2 (only work step one is if the beginning ch method is your preferred method)
Row 1: Ch 22; Work 1 dc in fourth ch from hook (skipped chs count as first dc) and then in ea ch across
2: Ch 3, turn; (RS): 1 dc in next st, 1 modFPTR in next st, 1 dc in ea of the next 3 sts, ch 2, sk 3, 3 dc in next st, ch 2, sk 3, 1 dc in ea of next 3 sts, 1 modFPTR in next st, 1 dc in next st and 1 dc in top of tch
3: Ch 3, turn; (WS): 1 dc in next st, 1 modBPTR in next st, 1 dc in ea of next 2 sts, ch 2, sk 1 dc and ch-2 sp, 1 BPTR around first post of 3-dc cluster, [1 BPTR, 1 dc, 1 BPTR] in second st, 1 BPTR around third post of 3-dc cluster, ch 2, sk ch-2 sp and dc, 1 dc in ea of next 2 sts, 1 modBPTR in next st, 1 dc in next st and 1 dc in top of tch
4: Ch 3, turn; 1 dc in next st, 1 modFPTR in next st, 1 dc in next st, ch 2, sk 1 dc and ch-2 sp, 1 FPTR around ea of the next 2 posts, [1 FPTR, 1 dc, 1 FPTR] in next st, 1 FPTR around post of ea of the next 2 sts, ch 2, sk ch-2 sp and 1 dc, 1 dc in next st, 1 modFPTR in next st, 1 dc in next st and 1 dc in top of tch
5: Ch 3, turn; 1 dc in next st, 1 modBPTR in next st, 1 dc in next st and 1 dc in ch-2 sp, ch 2, 1 BPTR around ea of the next 2 posts, 1 BPTR3tog around next 3 posts, 1 BPTR around ea of next 2 posts, ch 2, 1 dc in ch-2 sp and 1 dc in next st, 1 modBPTR in next st, 1 dc in next stand 1 dc in top of tch
6: Ch 3, turn; 1 dc in next st, 1 modFPTR in next st, 1 dc in ea of next 2 sts and ch-2 sp, ch 2, 1 FPTR in next st, 1 FPTR3tog around next 3 posts, 1 FPTR in next st, ch 2, 1 dc in ch-2 sp and in ea of next 2 dcs, 1 modFPTR in next st, 1 dc in next st and 1 dc in top of tch
7: Ch 3, turn; 1 dc in next st, 1 modBPTR in next st, 1 dc in next 3 sts and 1 dc in ch-2 sp, ch 2, BPTR3tog around next 3 posts, ch 2, 1 dc in ch-2 sp and in ea of the next 3 sts, 1 modBPTR in next st, 1 dc in next st and 1 dc in top of tch
Take a look at your gauge swatch and it should look like the example below. It should measure 6” / 15.2 cm across and 5” / 12.7 cm tall. Now, let’s move on to the blanket.
If you prefer and ad free pdf that includes a chart, checklist, larger font and gift tags for gifting you blanket, you click here to purchase off of Ravelry (or add it to your favorites or que), or you can purchase from my Etsy store.
Pattern for the 4 Day Throw
Notes:
Ch-2 at beg of row does not count as st
First dc will be made in first st where tch is located
Each leaf is worked in a panel; Panels 1, 3, 5 & 7 begin and end with a full leaf, panels 2, 4, & 6 begin and end with a half leaf
There is a chart at the end of the written pattern for reference, as well as a check list
Optional: Using a lockable stitch marker, mark the right side of your work
Full length video tutorial (with time stamps), please click below
Directions:
Work 127 Fdc and skip to Bottom Border section (only the work step below is if the beginning ch is your preferred method)
Chain 129: Work 1 dc in third ch from hook (skipped chs do not count as first dc) and in ea ch across (127 dc)
Bottom Border:
Row 1: Ch 2, turn; (RS): 1 dc in first st, 1 dc in next st, *1 modFPTR, 1 dc; rep * across until 1 st remains; 1 dc in top of tch (62 modFPTR, 65 dc)
2. Ch 2, turn; (WS): 1 dc in first st, 1 dc in next st, *1 modBPTR around FPTR from previous row, 1 dc in next st; rep * until 1 st remains, 1 dc2tog in last st and top of tch (62 modBPTR, 64 dc, 1 dc2tog)
3. Ch 2, turn; (RS): 1 dc in first st, 1 dc in next st, *1 modFPTR, 1 dc; rep * across until 1 st remains; 1 dc2tog in last st and top of tch (62 modFPTR, 64 dc, 1 dc2tog)
Repeat rows 2-3 once more
Repeat row 2 once more
Body of Blanket
Row 1:
Ch 2, turn; (RS): 1 dc in first st, [1 dc in next st, 1 modFPTR in next st] 7x
Panel 1:
1 dc in ea of the next 3 sts, ch 2, sk 3, 3 dc in next st, ch 2, sk 3, 1 dc in ea of next 3 sts, 1 Fptr in next st
Panel 2:
dc in ea of the next 2 sts, ch 2, sk 2, 1 Fptr around ea of next 2 sts, 1 FpTr3tog around post just worked and ea of the next 2 posts, 1 Fptr around post just worked, 1 Fptr around next st, ch 2, sk 2, 1 dc in ea of next 2 sts, 1 Fptr in next st
Rep Panel 1 – Panel 2 twice more
Rep Panel 1 once more making last Fptr a ModFPTR, then end with [1 dc, 1 modFPTR] 6x, 1 dc in next st, 1 dc2tog in last dc and in top of tch (14 modFPTR, 51 dc, 14 ch-2, 4 3-dc clusters, 18 FPTR, 3 FPTR3tog, 1 dc2tog)
Row 2:
Ch 2, turn; (WS): 1 dc in first st, [1 dc in next st, 1 modBPTR in next st] 7x
Panel 1:
1 dc in ea of next 2 sts, ch 2, sk 1 dc and ch-2 sp, 1 BPTR around first post of 3-dc cluster, [1 BPTR, 1 dc, 1 BPTR] in second st, 1 BPTR around third post of 3-dc cluster, ch 2, sk ch-2 sp and dc, 1 dc in ea of next 2 sts, 1 Bptr in next st
Panel 2:
1 dc in ea of next 2 sts, 1 dc in ch-sp, ch 2, 1 BPTR, 1 BPTR3tog, 1 BPTR, ch 2, 1 dc in ch-sp, 1 dc in ea of next 2 sts, 1 Bptr in next st
Rep Panels 1-2 twice more
Rep Panel 1 once more making last Bptr a ModBptr and then end with [1 dc, 1 modBPTR] 6x, 1 dc in next st, 1 dc2tog in last dc and in top of tch (14 modBPTR, 49 dc, 14 ch-2, 20 BPTR, 4 [BPTR, 1 dc, BPTR] Cluster, 3 BPTR3tog, 1 dc2tog)
Row 3:
Ch 2, turn; 1 dc in first st, [1 dc in next st, 1 modFPTR in next st] 7x
Panel 1:
1 dc in next st, ch 2, sk 1 dc and ch-2 sp, 1 FPTR around ea of the next 2 posts, [1 FPTR, 1 dc, 1 FPTR] in middle st of 3-dc cluster, 1 FPTR around post of ea of the next 2 sts, ch 2, sk ch-2 sp and 1 dc, 1 dc in next st, 1 Fptr in next st
Panel 2:
1 dc in ea of next 3 sts, 1 dc in ch-sp, ch 2, FPTR3tog, ch 2, 1 dc in ch-sp, 1 dc in ea of next 3 sts, 1 Fptr in next st
Rep panels 1-2 twice more
Rep panel 1 once more making last Fptr a ModFPTR, then end with [1 dc, 1 modFPTR] 6x, 1 dc in next st, 1 dc2tog in last dc and in top of tch (14 modFPTR, 47 dc, 14 ch-2, 4 [FPTR, 1 dc, FPTR] clusters, 22 FPTR, 3 FPTR3tog, 1 dc2tog)
Row 4:
Ch 2, turn; 1 dc in first st, [1 dc in next st, 1 modBPTR in next st] 7x
Panel 1:
1 dc in next st, 1 dc in ch-2 sp, ch 2, 1 BPTR around ea of the next 2 posts, 1 BPTR3tog around next 3 posts, 1 BPTR around ea of next 2 posts, ch 2, 1 dc in ch-2 sp and 1 dc in next st, 1 Bptr in next st
Panel 2:
1 dc in each of next 3 sts, ch 2, sk 1 dc and ch-sp, 3 dc in top of FPTR3tog from previous row, ch 2, sk ch-sp and 1 dc, 1 dc in ea of the next 3 sts, 1 Bptr in next st
Rep panels 1 – 2 twice more
Rep panel 1 once more making last Bptr a ModBPTR, then end with [1 dc, 1 modBPTR] 6x, 1 dc in next st, 1 dc2tog in last dc and in top of tch (14 modBPTR, 49 dc, 14 ch-2, 22 BPTR, 3 3-dc clusters, 4 BPTR3tog, 1 dc2tog)
Row 5:
Ch 2, turn; 1 dc in first st, [1 dc in next st, 1 modFPTR in next st] 7x
Panel 1:
1 dc in ea of next 2 sts, 1 dc in ch-sp, ch 2, 1 FPTR in next st, 1 FPTR3tog around next 3 posts, 1 FPTR in next st, ch 2, 1 dc in ch-2 sp and in ea of next 2 dcs, 1 Fptr in next st
Panel 2:
1 dc in ea of next 2 sts, ch 2, sk 1 dc and ch-sp, 1 FPTR in next st, [1 FPTR, 1 dc, 1 FPTR] in middle st of 3-dc cluster, 1 FPTR in next st, ch 2, sk ch-sp and 1 dc, 1 dc in ea of next 2 sts, 1 Fptr in next st
Rep panels 1 – 2 twice more
Rep panel 1 once more making last Fptr a ModFPTR, then end with [1 dc, 1 modFPTR] 6x, 1 dc in next st, 1 dc2tog in last dc and in top of tch (14 modFPTR, 51 dc, 14 ch-2, 3 [FPTR, 1 dc, FPTR] clusters, 20 FPTR, 4 FPTR3tog, 1 dc2tog)
Row 6:
Ch 2, turn; 1 dc in first st, [1 dc in next st, 1 modBPTR in next st] 7x
Panel 1:
1 dc in next 3 sts and 1 dc in ch-2 sp, ch 2, BPTR3tog around next 3 posts, ch 2, 1 dc in ch-2 sp and in ea of the next 3 sts, 1 Bptr in next st
Panel 2:
1 dc in next st, ch 2, sk 1 dc and ch-sp, 1 BPTR in ea of next 2 sts, [1 BPTR, 1 dc, 1 BPTR] in middle st of 3-dc cluster, 1 BPTR in ea of next 2 sts, ch 2, sk ch-sp and 1 dc, 1 dc in next st, 1 Bptr in next st
Rep panels 1 – 2 twice more
Rep panel 1 once more making last Bptr a ModBPTR, then end with [1 dc, 1 modBPTR] 6x, 1 dc in next st, 1 dc2tog in last dc and in top of tch (14 modBPTR, 53 dc, 14 ch-2, 18 BPTR, 3 [BPTR, dc, BPTR] clusters, 4 BPTR3tog, 1 dc2tog)
Row 7:
Ch 2, turn; 1 dc in first st, [1 dc in next st, 1 modFPTR in next st] 7x
Panel 1:
1 dc in ea of next 3 sts, ch 2, sk 1 dc and ch-sp, 3 dc in top of BPTR3tog from previous row, ch 2, sk ch-sp and 1 dc, 1 dc in ea of next 3 sts, 1 Fptr in next st
Panel 2:
1 dc in next st, 1 dc in ch-sp, ch 2, 1 FPTR in ea of next 2 sts, 1 FPTR3tog, 1 FPTR in ea of next 2 sts, ch 2, 1 dc in ch-sp, 1 dc in next st, 1 Fptr in next st
Rep panels 1 – 2 twice more
Rep panel 1 once more but make last Fptr a ModFPTR, then end with [1 dc, 1 modFPTR] 6x, 1 dc in next st, 1 dc2tog in last dc and in top of tch (14 modFPTR, 51 dc, 14 ch-2, 4 3-dc clusters, 18 FPTR, 3 FPTR3tog, 1 dc2tog)
Repeat rows 2-7 eleven more times ending with last repeat with completion of row 6
(12 full leaves on panels 1, 3, 5, 7; 11 full leaves with 2 half leaves on panels 2, 4, 6)
Top Border
Row 1:
Ch 2, turn; 1 dc in first st, [1 dc in next st, 1 modFPTR in next st] 7x
Panel 1: [1 dc in next st, 1 modFPTR in next st] 2x, 2 dc in ch-sp, 1 dc next st (top of bptr3tog from previous row), 2 dc in ch-sp, [1 modFPTR in next st, 1 dc in next st] 2x, 1 modFPTR in next st
Panel 2: 1 dc in next st, 1 dc in ch-sp, 1 dc in next st, 1 modFPTR in next st, 1 dc in next st, 1 dc in between the next st and st just previously worked, 1 dc in next st (middle st of 7 sts worked in previous row), 1 dc in between the next st and st just previously worked, 1 dc in next st, 1 modFPTR in next st, 1 dc in next st, 1 dc in ch-sp, 1 dc in next st, 1 modFPTR in next st
Rep panels 1 – 2 twice more
Rep panel 1 once more ending with [1 dc, 1 modFPTR] 6x, 1 dc in next st, 1 dc2tog in last dc and in top of tch (84 dc, 42 modFPTR, 1 dc2tog)
Row 2:
Ch 2, turn; (WS): 1 dc in first st, [1 dc in next st, 1 modBPTR in next st] across to last 2 sts and tch, 1 dc in next st, 1 dc2tog in last st and tch (64 dc, 62 modBPTR, 1 dc2tog)
Row 3:
Ch 2, turn; 1 dc in first st, [1 dc in next st, 1 modFPTR in next st] across to last 2 sts and tch, 1 dc in next st, 1 dc2tog in last st and tch (64 dc, 62 modFPTR, 1 dc2tog)
Repeat rows 2-3 twice more
Fasten off and weave in ends
I hope you enjoy making this blanket as much as I did! Please tag me on social media @handmadebystacyj or #handmadebystacyj so that I can see your makes. Thank you so much for your support!
This pattern is copyright 2023 Handmade by Stacy J. Please do not duplicate or copy any portion of this pattern, as well as photographs. You are encouraged to share images of your final product and are allowed to sell final products; I just ask that if you sell your final product, please purchase the ad-free pdf, provide your own photographs and that you please credit Handmade by Stacy J as the designer. Thank you for your support!